Inspired by our Handprint Carrots and Fork Spring Flowers blog posts – today’s Plastic Fork Carrots tutorial is the perfect DIY kids craft idea to celebrate the change in season and/or upcoming Easter break!
At Glued To My Crafts, we LOVE thinking outside the box! Today we going to show YOU how easy it is to take some ordinary inexpensive plastic forks {possibly from your party stash} and turn them into adorable, decorative carrot pieces, that any “bunny” will love!
This carrot themed art project includes easy to find craft materials. All you need is paper, paint, glue and plastic forks. That’s it! Not to mention – the steps are even EASIER to follow since all you need to do is paint, cut and glue.
To recreate this carrot craft idea, you can find our full step-by-step tutorial below. Then set up shop on your kitchen table and watch your child’s imagination go WILD as they make some one-of-a-kind carrot pieces with you!! Even adults will want to join in on the fun!
On that note, I’ll let you get to it! Happy crafting my friends! Don’t forget to share pictures of your finished plastic fork and paper carrots with us, by tagging our account on Instagram to see them! #gluedtomycrafts

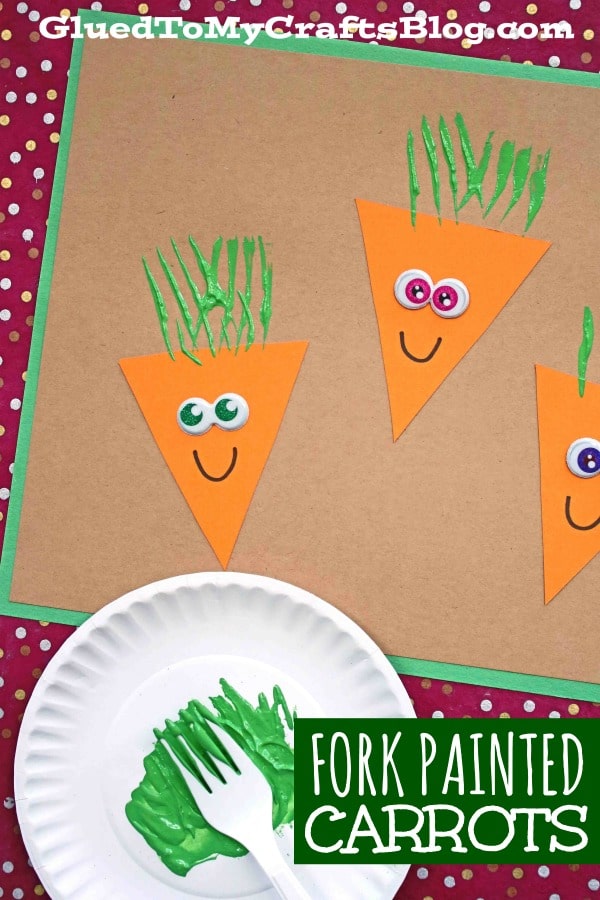
Learn how to make this adorable paper & fork painted carrot garden craft with your kids! It’s a perfect Easter craft idea.
Craft Supplies:
- Orange Cardstock Paper
- Brown Cardstock Paper
- Paper Scissors
- School Glue
- Plastic Fork
- Green Craft Paint
- Small Paper Plate
- Large Wiggle Eyes
- Black Sharpie Marker
Directions:
- First things first – grab your cardstock paper, school glue and scissors.
- Decide how many carrots you want in the “garden.” Cut out that many triangles from the orange cardstock.
- Now glue those pieces in the “dirt” on the brown cardstock.
- You now have the start of your carrots.
- Grab your green craft paint, fork and paper plate.
- Squirt some green paint on the paper plate. You don’t need a lot. The size of a quarter is a good starting point.
- Have children take their fork – which is their “paint brush” and have them make the greenery on each carrot cutout.
- Finally – the last step of this fork painted carrot craft. Glue the wiggle eyes in place on each carrot piece and draw on a smile to give them some character.
- Set aside to let it dry completely before displaying proudly!
RELATED —> Fork Painted Penguin


If you are looking for even MORE easy spring themed kids craft ideas from Glued To My Crafts, be sure to check out these fun posts listed below.
- Carrot Garden Sensory Bin
- Tissue Paper Carrot
- Handprint Carrot Garden
- Paper Plate Honey Bee
- Cupcake Liner Bunnies
- Popsicle Stick Flowers
- Paper Plate Bird Nest
- Plastic Fork Spring Flowers
- Popsicle Stick Bunny Gnome
- Craft Foam Egg Bunny House
