
Plant some creativity! We’ve got the perfect activity for your little ones to explore their artistic side!
Check out our paper plate gardening art for preschoolers!

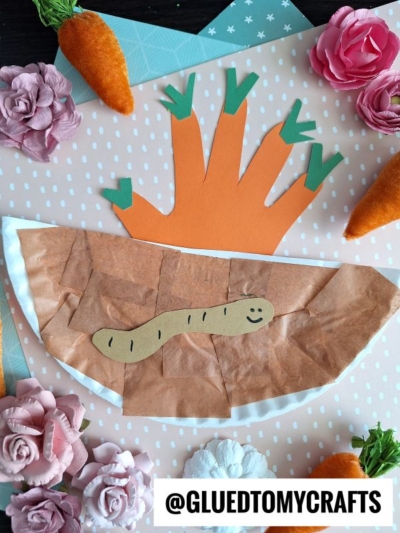
Paper Plate Carrot Garden
Today’s latest tutorial from Glued To My Crafts is a fun and super simple kid craft idea that’s absolutely perfect for spring! I really hope you like it and see my vision on this one!
This Handprint Carrots In The Garden craft idea incorporates an inexpensive paper plate and cardstock paper elements to make a one-of-a-kind spring themed piece! My favorite part is the sweet paper handprint cutout that we turned into “carrots” growing from the dirt. Do you see my vision?
So what are you waiting for? Let’s GROW our own paper carrot garden creations with our littles today by finding the full tutorial below! Then pair it with an Easter or spring theme to make the fun go even longer! I just know you are going to have a blast!
Happy crafting, my friends!! Don’t forget to share pictures of your child’s paper plate carrot garden with us by tagging our account on Instagram. I can’t wait to see how your child makes their handprint carrot stand out from the crowd! #gluedtomycrafts
RELATED —> Handprint Carrot


Spring is in the air and that means Easter is coming! Get crafty with your kids this year and make a paper plate handprint carrot garden.
Craft Supplies:
- Large Paper Plate
- Brown Tissue Paper
- Orange Cardstock Paper
- Green Cardstock Paper
- Light Brown Cardstock Paper
- School Glue
- Paper Craft Scissors
- Hand-Held Office Stapler
- Pencil or Pen
Directions:
- First cut your paper plate in half. Straight up the center to make TWO equal halves.
- Save one half of the paper plate for today’s craft and the other for a rainy day!
- Next up – grab your brown tissue paper and have children cut/tear a small amount into small pieces to represent the dirt.
- Have them glue those pieces to the paper plate half.
- Once they are done with that step, set aside the paper plate piece to allow it to dry a bit.
- Now grab the orange cardstock paper, your pencil and scissors.
- Trace one of your child’s hands on it {any hand they want!}.
- Use the scissors to trim around/out the traced handprint design from the paper.
- Now grab the green cardstock.
- Cut out small greenery for EACH fingertip of the handprint. This will give the look of carrots!
- Go ahead and staple or glue those on, on each fingertip of the handprint cutout.
- To finish off the paper handprint carrots in the garden idea, staple the decorated orange handprint to the paper plate.
- If desired – cut out a simple worm from light brown cardstock paper to add to the paper plate piece.
- Then display proudly to all to see!!!
RELATED —> Popsicle Stick Carrots
Love this Paper Plate & Handprint Carrot Garden tutorial from us?
Then you might also enjoy our SUPER UNIQUE Popsicle Stick Carrots or Carrot Garden Sensory Bin craft posts, as well!

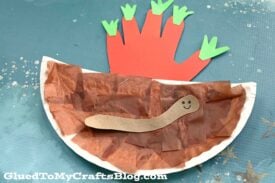
Paper Plate Handprint Carrot Garden Craft
Here’s your checklist of supplies to bring this craft to life:
- School Glue
- Pencil or Pen
Prepare your creative haven by laying down a protective cover before the crafting magic begins!
Directions:
- First cut your paper plate in half. Straight up the center to make TWO equal halves.1 Large Paper Plate
- Save one half of the paper plate for today's craft and the other for a rainy day!
- Next up - grab your brown tissue paper and have children cut/tear a small amount into small pieces to represent the dirt.Tissue Paper
- Have them glue those pieces to the paper plate half.
- Once they are done with that step, set aside the paper plate piece to allow it to dry a bit.
- Now grab the orange cardstock paper, your pencil and scissors.Cardstock Paper
- Trace one of your child's hands on it {any hand they want!}.
- Use the scissors to trim around/out the traced handprint design from the paper.
- Now grab the green cardstock paper.
- Cut out small greenery for EACH fingertip of the handprint. This will give the look of carrots!
- Go ahead and staple or glue those on, on each fingertip of the handprint cutout.
- To finish off the paper handprint carrots in the garden idea, staple the decorated orange handprint to the paper plate.
- If desired - cut out a simple worm from light brown cardstock paper to add to the paper plate piece.
- Then display proudly to all to see!!!

CLICK HERE TO PRINT THE DIRECTIONS FOR THIS CRAFT