Create a stunning "Love You to the Moon and Back" card with this easy torn paper craft tutorial. Perfect for kids to make for Valentine's or Mother's Day!
This sweet and simple craft project is the perfect way to spend a cozy afternoon with your little ones. If you are looking for a heartfelt, handmade gift that kids can make for Valentine’s Day, Mother’s Day, or just because, this “Love You to the Moon and Back” card is a winner.
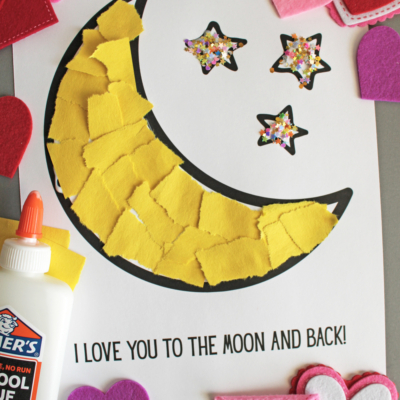
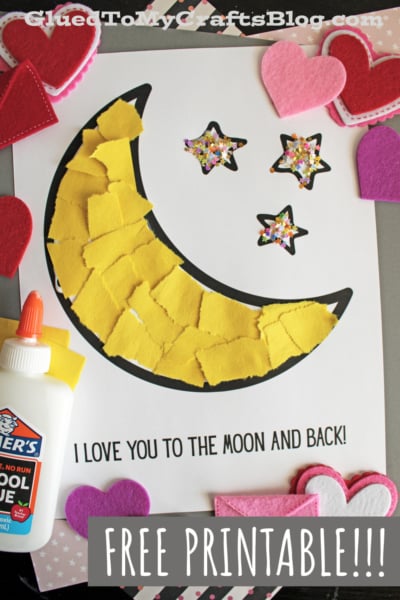
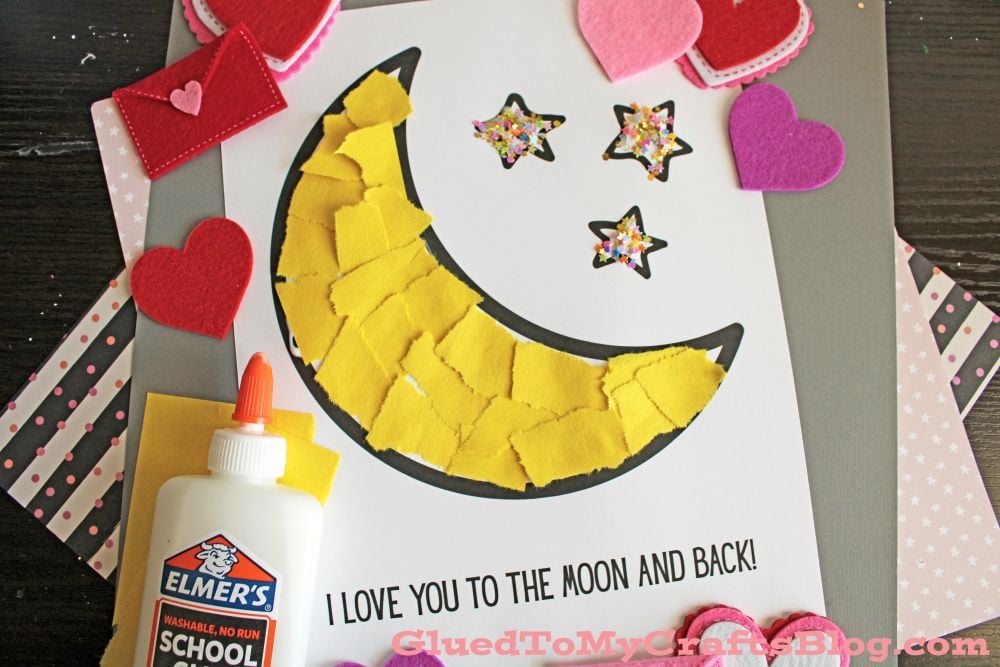
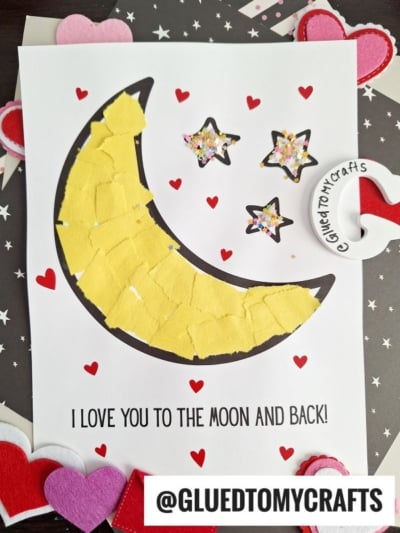
It uses the technique of torn paper art, which is fantastic for developing fine motor skills in younger children. Plus, there is no need for perfect scissor cuts, making it a stress-free activity for everyone involved. The texture of the torn paper gives the moon a wonderful, crater-like appearance that looks surprisingly artistic!
Let’s dive into this easy, budget-friendly project that turns simple construction paper into a keepsake you will cherish.
Craft Supplies:
One of the great things about this ripped paper moon craft is that it requires only simple and affordable materials. You might already have most of them at home or in the classroom.
- Yellow Construction Paper
- White Cardstock Paper
- To The Moon and Back Printable – on our landing page
- School Glue
- Crayons, Markers or Coloring Pencils
- Embellishments
Directions:
Follow these easy steps to create your beautiful “love you to the moon and back” card:
- First, prepare a clean and organized workspace. Lay out all your materials so the kids can easily access everything. This makes the torn paper activity more manageable, especially if you’re working with a group.
- Start by downloading or creating your “to the moon and back” printable. Print it onto a single sheet of white cardstock. This will serve as the base for your craft.
- If desired, kids can color in the stars in the coloring page before moving onto the next step.
- Next up – help your child tear their sheet of yellow construction paper into small pieces. The pieces don’t need to be perfect. This step is great for building fine motor skills.
- Using school glue, have your child carefully glue the ripped yellow paper pieces inside the “moon” outline on the printable. Encourage them to fill the space and enjoy the process. Remind them that the goal isn’t perfection – it’s about having fun and creating something unique!
- Optional step – make it personal: add a photo of the child’s face peeking over the moon.
- When done decorating, allow the glue to dry completely before handling the craft. This ensures everything stays in place and looks its best.
RELATED —> Paper Plate Paint Splat Moon Craft
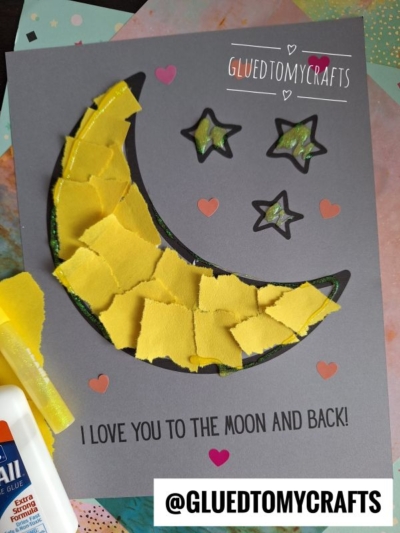
And there you have it! A beautiful, textured moon card that is simple enough for toddlers but engaging enough for older kids. The “Love You to the Moon and Back” sentiment makes it a timeless keepsake for grandparents, parents, or friends.
Crafting doesn’t have to be complicated to be beautiful. We hope you have a wonderful time tearing, pasting, and creating memories together. If you try this torn paper moon craft, let us know how it turned out! Happy crafting, my friends!

Torn Paper Love You To The Moon and Back Craft Idea for Kids
Create a stunning "Love You to the Moon and Back" card with this easy torn paper craft tutorial. Perfect for kids to make for Valentine's or Mother's Day!
Here’s your checklist of supplies to bring this craft to life:
- School Glue
Prepare your creative haven by laying down a protective cover before the crafting magic begins!
Directions:
- First, prepare a clean and organized workspace. Lay out all your materials so the kids can easily access everything. This makes the torn paper activity more manageable, especially if you’re working with a group.
- Start by downloading or creating your "to the moon and back" printable. Print it onto a single sheet of white cardstock. This will serve as the base for your craft.
- If desired, kids can color in the stars in the coloring page before moving onto the next step.
- Next up - help your child tear their sheet of yellow construction paper into small pieces. The pieces don’t need to be perfect. This step is great for building fine motor skills.
- Using school glue, have your child carefully glue the ripped yellow paper pieces inside the "moon" outline on the printable. Encourage them to fill the space and enjoy the process. Remind them that the goal isn’t perfection - it’s about having fun and creating something unique!
- Optional step - make it personal: add a photo of the child's face peeking over the moon.
- When done decorating, allow the glue to dry completely before handling the craft. This ensures everything stays in place and looks its best.

NEED MORE HELP DOWNLOADING OUR FREE PRINTABLES? PLEASE REFER TO OUR FAQ PAGE
If you've enjoyed our content or have any thoughts to share, we'd love to hear from you! Mention @gluedtomycrafts or tag #gluedtomycrafts on Instagram!