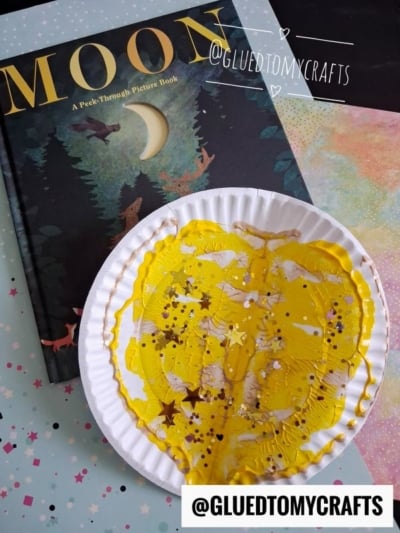
Get creative with your kids this weekend! This fun and easy Paper Plate Paint Splat Moon Craft is the perfect activity to bring out their inner artist.

Are you ready to take your crafting adventures to the next level? Inspired by the beauty of outer space, this Paint Splat Moon craft is the perfect way to spark creativity and have some hands-on fun with your little ones! With just a few simple supplies – like puffy paint, glitter, and a paper plate – you can create a stunning marbled moon that’s truly out of this world.

Looking for a fun and creative activity to do with your kids? Inspired by some adorable space-themed stickers, I came up with this Paint Splat Moon craft that’s perfect for little artists!
With just a few simple supplies like puffy paint, glitter, and a paper plate, you can create a marbled moon masterpiece that’s out of this world.
Whether it’s a rainy day or a classroom art project, this craft is sure to spark creativity and bring smiles. Let’s dive in and get crafting!

Whether it’s a rainy day activity, a classroom art project, or just a fun way to spend time together, this craft is sure to bring smiles and a touch of cosmic magic. So, grab your supplies, roll up your sleeves, and let’s make some moon magic happen!
Craft Supplies:
- White Paper Plates – 1 per craft
- Silver Tulip Puffy Paint
- Black Tulip Puffy Paint
- Gold Tulip Puffy Paint
- Space Themed Stickers
- Baby Wipe
- optional materials – loose craft glitter
Directions:
- Please make sure you have a good working area that can get dirty because paint will squeeze out of the sides of this craft!!!
- First fold your paper plate in half {one per moon craft you want to make.}
- Unfold and squirt some black/silver/gold paint on one side of the paper plate {I like the Tulip Puffy Paint for this particular step since it’s in a nice controlled squirt bottle} Be sure to keep the paint inside the paper plate and not place too much down.
- Once the paint is down, go ahead and fold/squish your paper plate together again. Be sure to rub your hand all over the folded piece, so the paint will cover your the inside nicely {paint WILL more than likely squeeze out the sides, so be sure to pay attention to that and clean up with baby wipes!}
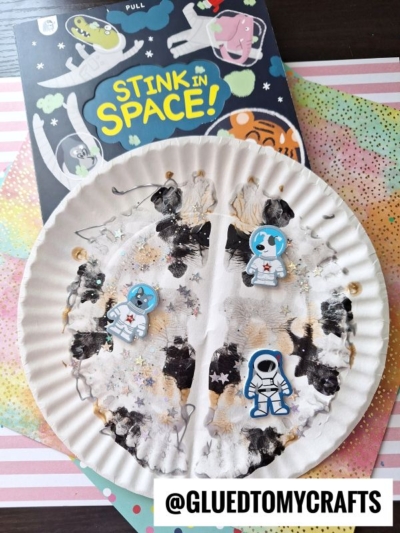
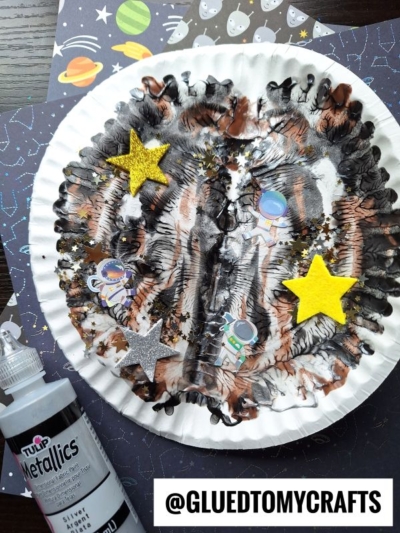
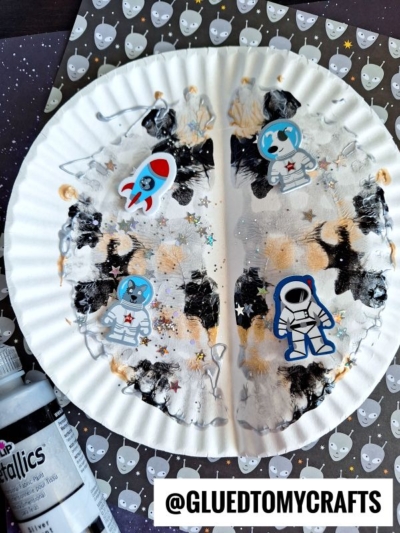
- Now carefully unfold your piece to reveal your “marbled moon” design inside. Sprinkle some glitter/rhinestones on top of the wet paint if desired to create more texture.
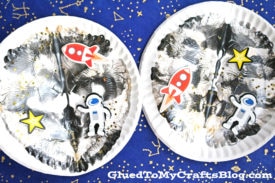
- To finish the Paint Splatter Moon craft – add your space themed stickers on top.
- Then set aside to let it dry completely before displaying proudly.
PAIR YOUR PAPER PLATE MOON WITH OUR MOON DOUGH SLIME TUTORIAL!
Thank you for joining me on this creative journey to make a Paint Splat Moon! I hope this craft brings joy, laughter, and a little bit of messy fun to your day. Whether you’re crafting with your kids, students, or just for yourself, the possibilities are as endless as the stars in the sky.
If you loved this project, I’d be thrilled to see your creations! Share your masterpieces on Instagram and tag @gluedtomycrafts or use #gluedtomycrafts so we can celebrate your creativity together. Don’t forget to explore more fun and easy craft ideas on the blog to keep the inspiration flowing.
Until next time, happy crafting, my friends! Keep reaching for the stars – one craft at a time. 🌙✨

Paper Plate Paint Splat Moon Craft
Get creative with your kids this weekend! This fun and easy Paper Plate Paint Splat Moon Craft is the perfect activity to bring out their inner artist.
Here’s your checklist of supplies to bring this craft to life:
- 1 Large Paper Plate
- Tulip Puffy Paint silver, black and gray
- Embellishments
- Loose Craft Glitter
Prepare your creative haven by laying down a protective cover before the crafting magic begins!
Directions:
- Please make sure you have a good working area that can get dirty because paint will squeeze out of the sides of this craft!!!
- First fold your paper plate in half {one per moon craft you want to make.}
- Unfold and squirt some black/silver/gold paint on one side of the paper plate. Be sure to keep the paint inside the paper plate and not place too much down.
- Once the paint is down, go ahead and fold/squish your paper plate together again. Be sure to rub your hand all over the folded piece, so the paint will cover your the inside nicely {paint WILL more than likely squeeze out the sides, so be sure to pay attention to that and clean up with baby wipes!}
- Now carefully unfold your piece to reveal your "marbled moon" design inside.
- Sprinkle some glitter/rhinestones on top of the wet paint if desired to create more texture.
- To finish the Paper Plate Moons - add your space themed stickers on top.
- Set aside to let it dry completely before displaying proudly.

CLICK HERE TO PRINT THE DIRECTIONS FOR THIS CRAFT
If you've enjoyed our content or have any thoughts to share, we'd love to hear from you! Mention @gluedtomycrafts or tag #gluedtomycrafts on Instagram!