Get creative with your little ones this Halloween by making an adorable paper plate melted witch craft! Make it as spooky or as silly as you like – the possibilities are endless!

Paper Plate & Tissue Paper Melted Witch Craft
In honor of the wicked witch in the classic movie “The Wizard of Oz” today’s kid craft is full of WICKED WHIMSY!
With just recycled materials, a little cardstock paper and glue, you too can re-create this one-of-a-kind Paper Plate Melted Green Witch with your child in no time!
This Halloween themed activity is not scary, simply adorable and completely customizable too. Plus if you are on a budget – no problem there! We are talking only a few cents for this awesome green witch craft!
So this Halloween season let your child’s creativity shine by kicking it off with this awesome craft!
Happy crafting my friends! Don’t forget to share pictures of your melted witch creations on our Facebook page! #gluedtomycrafts
RELATED —> Handprint Witch

Who says Halloween crafts can’t be fun and easy? With just a couple of paper plates and some magic, you’ll have a spooktacular melted witch decoration!
Craft Supplies:
- Large Paper Plate
- School Glue
- Scissors
- Green Tissue Paper
- Black Cardstock Paper
- Brown Cardstock Paper
- Scrapbook Paper
- Stapler
Directions:
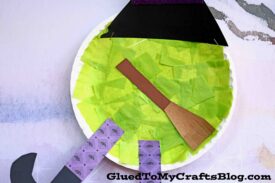
- First have your child cut their green tissue paper into small squares.
- Now have your child paint a thick layer of glue all over their paper plate, really making sure you get every inch covered.
- Next have them place the tissue paper squares on top of the glue, until the paper plate is completely covered.
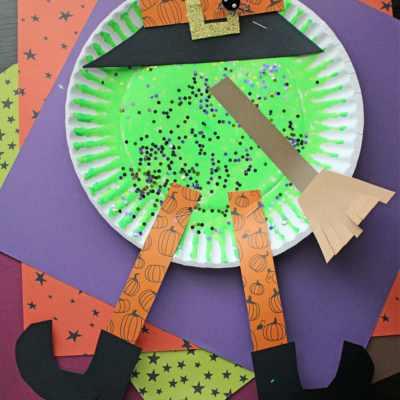
- To finish off the Paper Plate Melted Witch craft – cut a witch hat and boots from the black cardstock, as well as some legs from the scrapbook paper and a broom from the brown cardstock.
- Staple/glue those pieces to the front of the decorated paper plate, along with any other embellishments you might see fit.
- Then display proudly for ALL to see!
Book Suggestions:
Here are some recommended books that beautifully complement our craft idea. You can conveniently purchase them through our affiliate links on Amazon.
- Room on the Broom by Julia Donaldson
- The Little Witch Who Lost Her Broom! by Elaine Bickell
- The Witch’s Cat and The Broomstick Blunder by Kirstie Watson
- Ten Flying Brooms by Ilanit Oliver
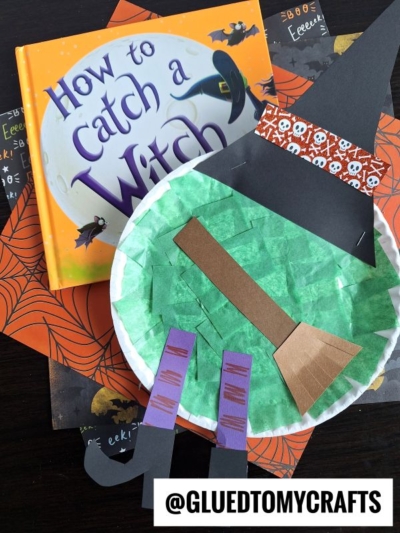
- How to Catch a Witch by Alice Walstead
- There’s a Witch in Your Book by Tom Fletcher
- It’s Raining Bats & Frogs by Rebecca Colby
RELATED —> Popsicle Stick Broom
BTW – you can skip the green tissue paper and opt for craft paint instead – hint hint!
On that note, are you looking for even more fun Halloween kid crafts from Glued To My Crafts? Check out these past posts, listed below, for some spooky and extra crafty inspiration!
They are just as fun and easy as today’s Paper Melted Green Witch tutorial and sure to bring so much creativity into your home this October!
Paper Plate Witch
Eyeball Frame
Paper Plate Frankenstein
Paper Plate Skull
Popsicle Stick Witch Hats
Paper Plate Wolf
Popsicle Stick Witch Fingers
Popsicle Stick Witch

Paper Plate Melted Witch Craft
Here’s your checklist of supplies to bring this craft to life:
Prepare your creative haven by laying down a protective cover before the crafting magic begins!
Directions:
- First have your child cut their green tissue paper into small squares.Tissue Paper
- Now have your child paint a thick layer of glue all over their paper plate, really making sure you get every inch covered.1 Large Paper Plate
- Next have them place the tissue paper squares on top of the glue, until the paper plate is completely covered.
- To finish off the Paper Plate Melted Witch craft – cut a witch hat and boots from the black cardstock, as well as some legs from the scrapbook paper and a broom from the brown cardstock.Cardstock Paper, Scrapbook Paper
- Staple/glue those pieces to the front of the decorated paper plate, along with any other embellishments you might see fit.
- Then display proudly for ALL to see!

CLICK HERE TO PRINT THE DIRECTIONS FOR THIS CRAFT