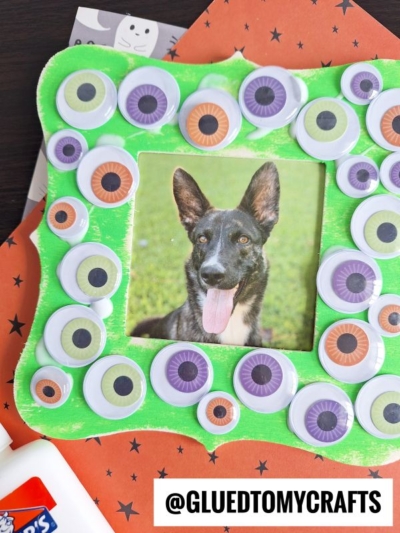
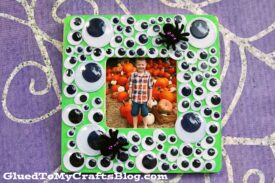
Using some green paint, school glue & tons of wiggle eyes - my son was able to make a "one of a kind" Halloween Eyeball Frame within minutes

Get creative this Halloween and make your own fun wiggle eye covered picture frame craft with just a few simple supplies! Let your scary imaginations go wild!

Halloween is a magical time filled with spooky decorations, playful costumes, and delightful crafts that spark creativity. One of the most exciting parts of this season for kids is the opportunity to create their own unique decorations.
This year, why not try something a bit eerie yet utterly charming—a DIY Eyeball Covered Picture Frame? It’s a fun, easy project perfect for children and adds a spooky touch to your Halloween decor.
In this blog post, we’ll walk you through the steps of making an eyeball-covered picture frame. We’ll tell you all the materials you need, tips for keeping things mess-free, and ideas for customizing your frame.
This craft is suitable for children of all ages and offers a fantastic way for youngsters to develop their fine motor skills and express their artistic flair. Let’s get started!

Get spooky with this fun and simple Halloween eyeball frame craft! With just a few supplies you can have a one-of-a-kind decoration that’s sure to wow any Halloween enthusiast.
CRAFT SUPPLIES:
- Unfinished Wood Craft Frame
- White School Glue
- Green Craft Paint
- Foam Paint Brush
- Small Paper Plate
- Small and Large Wiggle Eyes
- Embellishments
DIRECTIONS:
- First paint your wood frame completely green. Simply squirt some craft paint on one corner and work from there.
- When done painting, set it aside to allow it to dry completely.
- Next up – gut a good layer of school glue all over your frame.
- Help your child place wiggle eyes all over the glue/frame, until completely covered.
- Again, set aside to let it dry completely.
- If desired, add other embellishments like ribbon, wood cutouts etc to the front of the frame.
- Fill with your favorite pictures and display your decorative eyeball Halloween frame proudly for ALL to see!
RELATED —> Paint Splat Cauldron
Don’t let the fun stop here with our Halloween Eyeball Frame tutorial!
Below are a few more fun Halloween kids craft ideas, from us at Glued To My Crafts, that we hope inspire you today:
Paper Plate Jack O’ Lantern
Egg Carton Spiders
Terra Cotta Pot Pumpkin
Paint Splat Witch Face
Paper Bag Monster Puppet
Popsicle Stick Spiders
Stamped Eyeball Jar
Paper Plate Eyeball
Popsicle Stick Eyeballs
Spooky Halloween Eyeball Tree

Eyeball Covered Picture Frame Craft Idea
Using some green paint, school glue & tons of wiggle eyes - my son was able to make a "one of a kind" Halloween Eyeball Frame within minutes
Here’s your checklist of supplies to bring this craft to life:
- 1 Unfinished Wooden Craft Frame
- Craft Paint
- Googly Eyes large and small
- Embellishments
Prepare your creative haven by laying down a protective cover before the crafting magic begins!
Directions:
- First paint your wood frame completely green. Simply squirt some craft paint on one corner and work from there.1 Unfinished Wooden Craft Frame, Craft Paint
- When done painting, set it aside to allow it to dry completely.
- Next up - gut a good layer of school glue all over your frame.
- Help your child place wiggle eyes all over the glue/frame, until completely covered.Googly Eyes
- Again, set aside to let it dry completely.
- If desired, add other embellishments like ribbon, wood cutouts etc to the front of the frame.Embellishments
- Fill with your favorite pictures and display your decorative eyeball Halloween frame proudly for ALL to see!

CLICK HERE TO PRINT THE DIRECTIONS FOR THIS CRAFT
If you've enjoyed our content or have any thoughts to share, we'd love to hear from you! Mention @gluedtomycrafts or tag #gluedtomycrafts on Instagram!