
Get your little ones crafting this holiday season with this easy and fun paper snowman snowflake ornament craft! Let them show off their creativity, while making a special ornament that is sure to be treasured for years to come.

Paper Snowflake Snowman Craft
Our latest {and greatest!} super fun paper snowflake snowman star ornament craft is going to be really easy and inexpensive to recreate.
All you need is dark colored cardstock paper, a mini white cupcake liner, puffy paint and our free snowflake star printable listed below. That’s it!
And since the supplies are really simple, I could see this DIY being done in a large crowd setting such as a children’s holiday party, at a sleepover and even in the classroom for a winter lesson plan. Even adults can participate {and love} this one! Plus since this idea can be hung on the Christmas tree afterwards, it’s going to be a great keepsake as well!
So what are we waiting for?! All the details and the free snowman snowflake shape printable can be found below.
On that note, don’t let this crafty idea slip away. Bookmark it now and later this week, so you make some colorful “one-of-a-kind” snowman paper snowflake ornaments with the kids.
Happy crafting, my dear friends! I can’t wait to see your paper snowflake snowman star creations! I’m sure they are going to be MAGICAL!
RELATED: Clay Melted Snowmen Magnets and Chalk Art Snowy Day


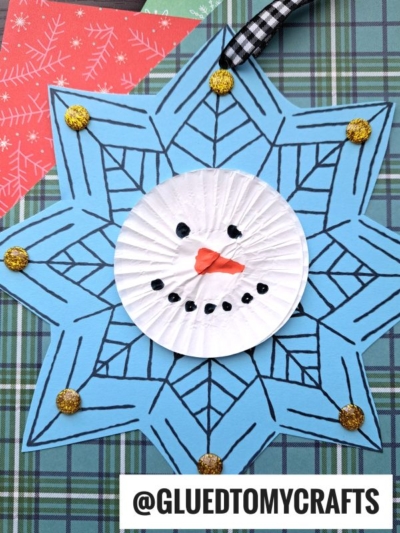
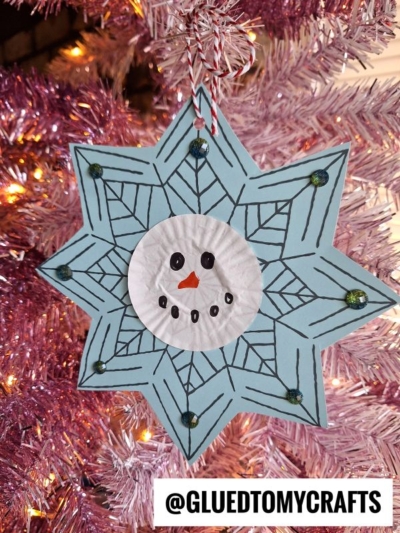
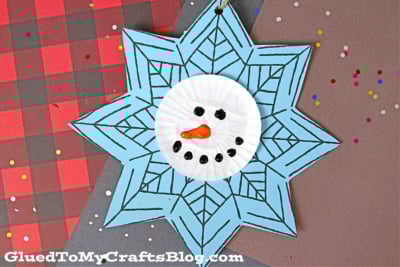
Looking for a fun paper snowflake ornament craft idea for kids? Look no further! This easy tutorial uses cardstock paper, a mini white cupcake liner, and puffy paint.
Craft Supplies:
- Snowflake Printable – on our landing page
- Blue Cardstock Paper
- Craft Scissors
- Mini White Cupcake Liners
- Take Runner or Glue Stick
- Black Puffy Paint
- Orange Puffy Paint
- Single Hole Punch
- Twine or Ribbon
Directions:
- First things first – grab our free blank snowflake shape printable, listed above in the supply list.
- Next, go ahead and find it on your computer, right click and print the file on a single sheet of BLUE cardstock paper. You will need one print per snowman craft.
- Now grab your scissors and cut out the snowflake star design from your printed piece.
- Discard excess paper.
- Next up – grab ONE mini white cupcake liner and your choice of adhesive.
- Flatten out the cupcake liner with your hands and glue it to the center of the snowflake design you just cut out.
- Now before you add the puffy paint, go ahead and hole punch a hole to the top of the snowflake design & add your string through it for easy hanging.
- To finish off the paper snowflake ornament craft, simple draw on the snowman’s face with the two bottles of puffy paint.
- Then when done, set it aside to let it dry completely before you hang it on the tree. And that’s it! Admire your hard work because I bet it turned out awesome!
RELATED —> Handprint Snowman Poem
At Glued To My Crafts, we have a “knack” for stepping outside the traditional. It’s kind-of what we strive to do with our website!
So before you leave our paper and cupcake liner snowflake snowman star tutorial, please check out our popular Chalk Art Santa, Toilet Roll Snowflake Stamp and Snowflake Ornament craft posts.
All three are super unique to our website and sure to impress the crafty fingers that recreate them today!

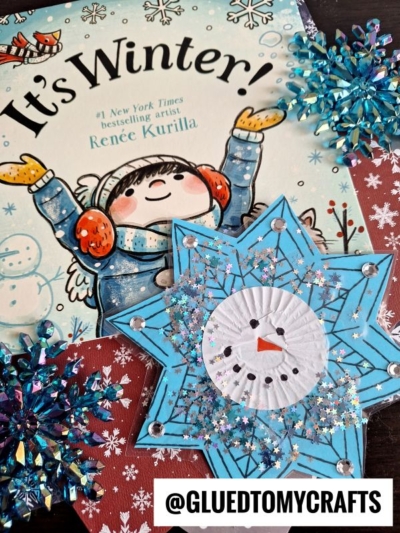
Paper Snowman Snowflake Ornament Craft Idea
Here’s your checklist of supplies to bring this craft to life:
Prepare your creative haven by laying down a protective cover before the crafting magic begins!
Directions:
- First print out our provided printable, in color, on a single sheet of light blue cardstock paper. You only need one print per craft.
- Now grab your scissors and cut out the snowflake star design from your printed piece.
- Discard excess paper.
- Next up - grab ONE mini white cupcake liner and your choice of adhesive.
- Flatten out the cupcake liner with your hands and glue it to the center of the snowflake design you just cut out.
- Now before you add the puffy paint, go ahead and hole punch a hole to the top of the snowflake design & add your string through it for easy hanging.
- To finish off the paper snowflake ornament craft, simple draw on the snowman's face with the two bottles of puffy paint.
- Then when done, set it aside to let it dry completely before you hang it on the tree. And that's it! Admire your hard work because I bet it turned out awesome!


NEED MORE HELP DOWNLOADING OUR FREE PRINTABLES? PLEASE REFER TO OUR FAQ PAGE