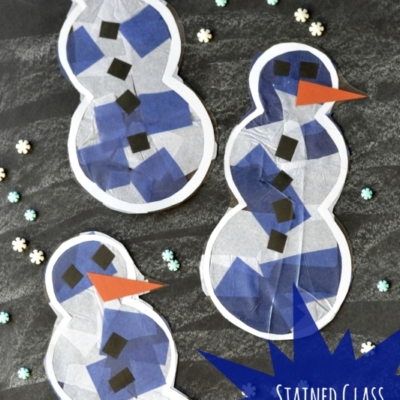
Create your own winter wonderland with this festive stained glass snowman craft! Get creative and spread the holiday cheer by displaying these unique works of art in your home.

Tissue Paper Snowmen Suncatcher Craft Idea For Kids
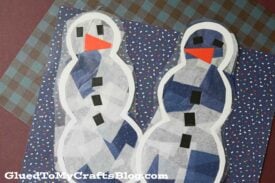
What’s a child to do on a snow day? Build a frosty friend of course! On that note, I’m so glad you landed on our latest snowman stained glass craft tutorial!
With our easy step-by-step tutorial and free printable template – you too can pull together these Stained Glass Snowmen with your child in no time!
Keep your fingertips warm and the coats in the closet, while you create one-of-a-kind pieces to hang on your windows. My motto for this kid craft is “the more the merrier” and just like us – these snowmen come in all shapes, sizes and styles. No real rules – customize your snowman stained glass paper pieces however you wish today!
Keep scrolling for more details and as well as the free printable, so you can recreate it today. Then, when you are done, come share some pictures of the end result on our Facebook page to admire! I just know you are going to make some beautiful tissue paper and contact paper snowman pieces! #gluedtomycrafts
RELATED: Broccoli Stamped Winter Tree and Christmas Tree Wagon

This paper snowman suncatcher craft is easy & fun to make! Follow our simple instructions and you can have a set of handmade ornaments to add to the windows in no time at all.
Craft Supplies:
- Snowman Outline Printable – from our landing page
- Clear Contact Paper
- White Cardstock Paper
- Scissors
- White Tissue Paper
- Dark Blue Tissue Paper
- Light Blue Tissue Paper
- Orange Cardstock Paper
- Black Cardstock Paper
RELATED —> Stained Glass Hearts
Directions:
- First grab and print the FREE printable on a single sheet of white cardstock.
- Using your scissors, trim out the snowman design in the printable, as well as the center of it.
- Now grab your contact paper and cut two pieces the same length. Take off the protective paper off one and lay it on a flat surface.
- Lay your snowman cutout on the contact paper.
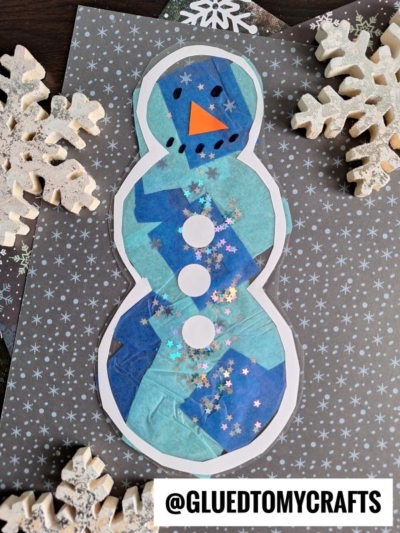
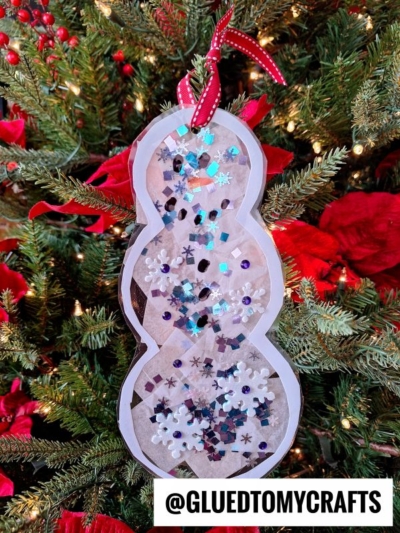
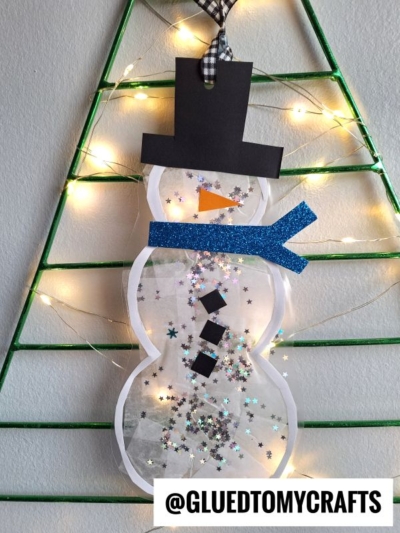
- Now cut a “carrot” and some “buttons” out of orange/black cardstock and place them on the contact paper.
- Grab your tissue paper and cut it into small squares. Now have your child place it on the contact paper, to make a beautiful design.
- Once done, grab the other piece of contact paper and remove it’s protective sheet. Then lay it on top of the other piece and press firmly. Make sure every corner is stuck together.
- To finish off the craft, use your scissors to trim out the snowman.
- Then display your finished Stained Glass Snowman proudly on a window, for everyone to see.
RELATED —> Paper Plate Snowman House
Create a holiday worth remembering with our easy step-by-step kid craft tutorials! Be sure to check out these fun posts, listed below, for even MORE crafty & festive inspiration. All of which would pair nicely with today’s Stained Glass Snowman tutorial!
And as always – if our mosaic designed snowman craft post inspires you, be sure to share it on our Facebook page or in our group.
We love seeing our inspiration come to life and can’t wait to see your mosaic snowmen pieces in action!
- Paper Plate Ornament
- Cork Reindeer Ornaments
- Stained Glass Ornaments
- Paper Plate Reindeer
- Reindeer Frame
- Marbled Paper Trees
- Cotton Ball Snowman

Stained Glass Snowmen Craft
Here’s your checklist of supplies to bring this craft to life:
- 1 Scissors
Prepare your creative haven by laying down a protective cover before the crafting magic begins!
Directions:
- First grab and print the FREE snowman printable on a single sheet of white cardstock paper.
- Using your scissors, trim out the snowman design in the printable, as well as the center of it.
- Now grab your contact paper and cut two pieces the same length. Take off the protective paper off one and lay it on a flat surface.
- Lay your snowman cutout on the contact paper.
- Now cut a "carrot" and some "buttons" out of orange/black cardstock and place them on the contact paper.
- Grab your tissue paper and cut it into small squares. Now have your child place it on the contact paper, to make a beautiful design.
- Once done, grab the other piece of contact paper and remove it’s protective sheet. Then lay it on top of the other piece and press firmly. Make sure every corner is stuck together.
- To finish off the craft, use your scissors to trim out the snowman.
- Then display your finished Stained Glass Snowman proudly on a window, for everyone to see.


NEED MORE HELP DOWNLOADING OUR FREE PRINTABLES? PLEASE REFER TO OUR FAQ PAGE