
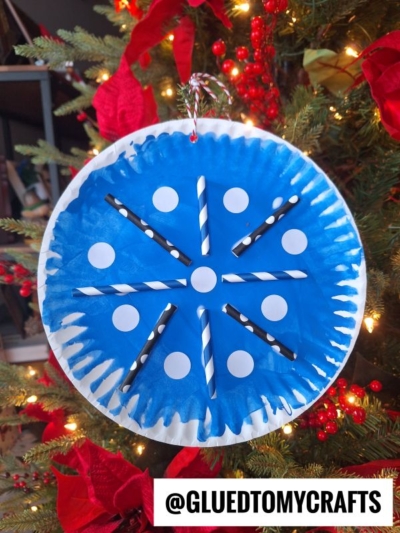
Better bundle up those mittens! It’s time to get crafty and create your own winter wonderland with this adorable paper plate snowflake craft!

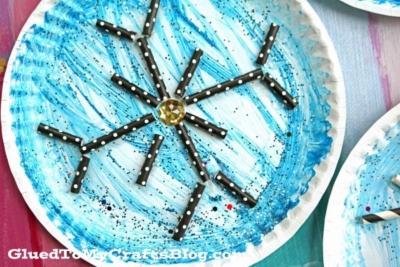
Let it snow with our Mixed Media Snowflake craft idea!
Are you looking for a fun and creative way to keep your children occupied during the winter season? If so, why not let them get crafty with this simple yet delightful paper plate snowflake craft!
This easy DIY project is budget-friendly, requiring only some basic supplies that can be found around the house. It’s also suitable for both preschoolers and older kids alike, as it requires minimal supervision but encourages imaginative play.
Best of all, your little ones can proudly display their finished creations in their bedroom or elsewhere in the home! Read on for instructions on how to make these cute snowflakes out of paper plates and paper straws!
Don’t forget to share pictures of your snowflakes made from paper plates and paper straws, on our Facebook page to admire this winter season!
RELATED —> Chalk Art Snowy Day

Get creative with a simple craft to bring the winter cheer! Make beautiful snowflakes with paper plates and let your creativity soar.
Craft Supplies:
- Large Paper Plate
- Blue Craft Paint
- Foam Paint Brush
- Paper Straws {5-10 per craft}
- Craft Scissors
- School Glue
- Large Rhinestones
- Loose Craft Glitter
Directions:
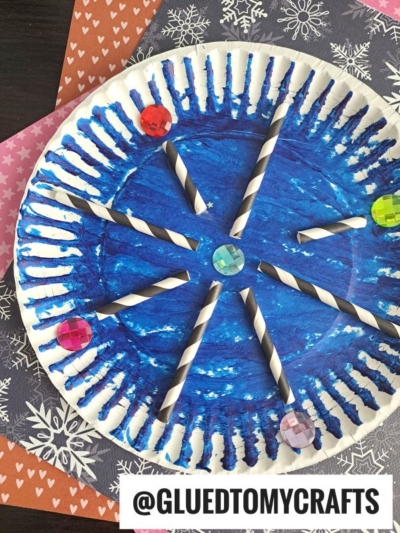
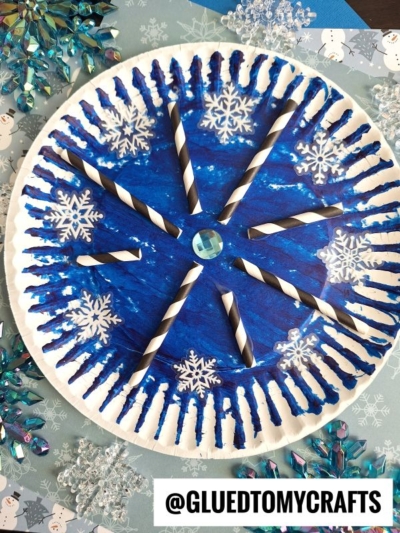
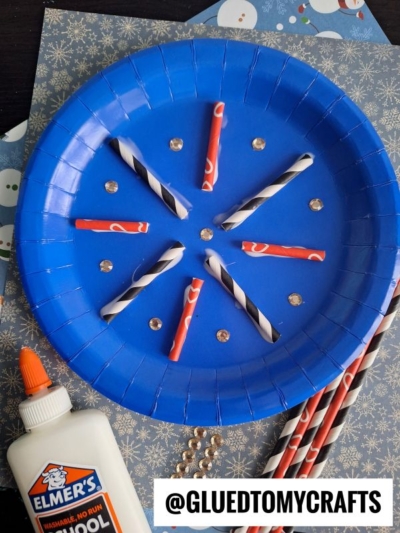
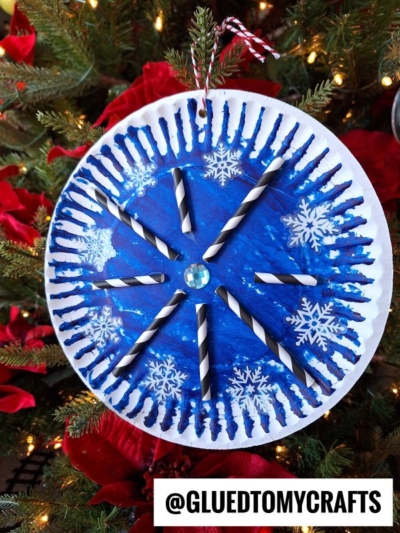
- First have children paint their paper plate however they like. A nice shade of dark blue is nice but any color will do. Just remember to make it a shade darker than your paper straws.
- Sprinkle some loose craft glitter on top of the wet paint, before setting it aside to let it dry.
- Now grab your paper straws and scissors. Trim them down for your snowflake design.
- Start laying/planning out the design you will be making for your snowflake.
- Next is finally putting the snowflake design together! Glue down a single rhinestone to the center of your paper plate. This will be your guide and center of the snowflake.
- Now one by one – start gluing your paper straws in place on the paper plate.
- Once done, set aside to let it dry completely before displaying proudly for ALL to see!
RELATED —> Toilet Roll Snowflake Stamp
But wait – there’s more to see on Glued To My Crafts!
Be sure to check out our Snowman Snowflakes and Snowflake Gnome tutorials for more crafty art projects to make with the kids this winter season!
They can also easily be turned into winter décor you hang on the windows! #gluedtomycrafts

Paper Plate Snowflake Craft Idea
Here’s your checklist of supplies to bring this craft to life:
Prepare your creative haven by laying down a protective cover before the crafting magic begins!
Directions:
- First have children paint their paper plate however they like. A nice shade of dark blue is nice but any color will do. Just remember to make it a shade darker than your paper straws.
- Sprinkle some loose craft glitter on top of the wet paint, before setting it aside to let it dry.
- Now grab your paper straws and scissors.
- Trim them down for your snowflake design.
- Start laying/planning out the design you will be making for your snowflake.
- Next is finally putting the snowflake design together! Glue down a single rhinestone to the center of your paper plate. This will be your guide and center of the snowflake.
- Now one by one - start gluing your paper straws in place on the paper plate.
- Once done, set aside to let it dry completely before displaying proudly for ALL to see!

Grab our favorite books via our Amazon affiliate link! In our Amazon storefront you will find books, toys and craft supplies we absolutely love using for our Glued To My Crafts tutorials!