
Bring the beach to your home with this easy and fun tissue paper and paper plate beach ball craft idea for kids!

Beach Ball Craft Idea For Kids
Hi friends! Are you enjoying your summer so far?
If you need a last minute summer craft idea to keep the kids busy when your days aren’t so jammed packed – look no further because today I’m rolling out this paper plate beach ball tutorial and it’s ANOTHER fun simple summer themed kid craft on Glued To My Crafts, that is sure to be a hit in your home {especially with the older kids!}
When I think of summer, I often think of a large, colorful beach ball.
Why you might ask? Well – since I’m not much of a water person {neither is my son} we prefer to spend our lazy summer days on land, usually kicking {or throwing} a ball around.
So if you haven’t guessed – that’s exactly what inspired today’s Paper Plate Beach Ball kid craft tutorial. Using just a simple paper plate, colorful tissue paper and glue, we were able to make our own one-of-a-kind beach ball craft within minutes and you can TOO by following our simple step-by-step tutorial below.
Happy crafting and enjoying your summer, my friends! I can’t wait to see pictures of your paper plate and tissue paper beach ball crafts! #gluedtomycrafts
RELATED: Pool Lounging Friends and Popsicle Stick Mermaids

Just a simple paper plate, colorful tissue paper & school glue bring this beach ball to life. It’s simply perfect for a summer or camp theme!
Craft Supplies:
- Large Paper Plate
- Tissue Paper
- Cardstock or Construction Paper
- Black Sharpie Marker
- School Glue
- Craft Scissors
Directions:
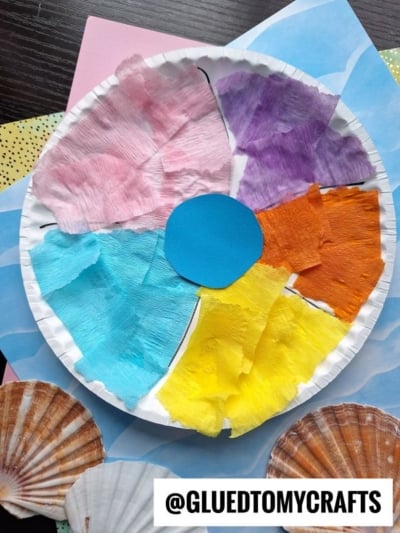
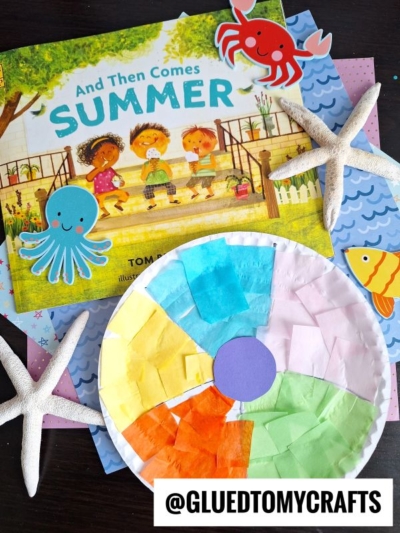
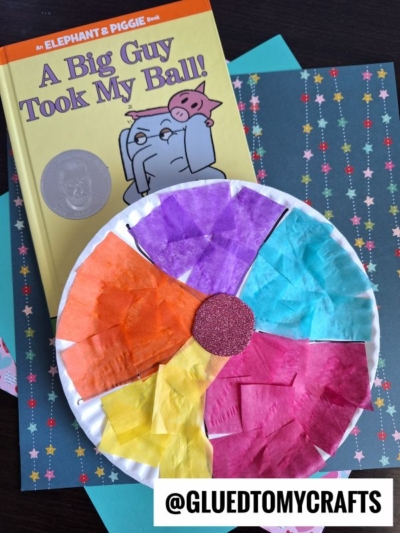
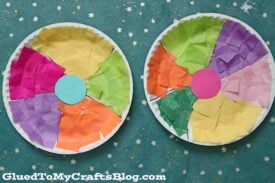
- First envision your beach ball and take your marker to outline the different sections for it. I found the easiest way to do this, was to draw a circle in the center of the paper plate and draw curved lines from there.
- Next is the tissue paper. For each section, cut a small amount of tissue paper into small squares and keep in separate piles.
- Now place a good amount of glue in each section of the divided paper plate.
- Have children place their tissue paper on top of the glue, until each section is completely covered and really starts to look like a beach ball {remember to make each section a different color!}
- To finish the Paper Plate Beach Ball craft, I cut a medium sized circle out of cardstock and glued it to the center of the paper plate {mainly to cover the initial circle I drew for the craft}
- Then add other embellishments and display your paper beach ball proudly for all to see!
RELATED —> Popsicle Stick Mermaid Tails
If you are looking for even MORE easy summer themed craft ideas, from Glued To My Crafts, be sure to check out these fun posts listed below.
BTW – “if” you decide to make our Paper Plate and Tissue Paper Beach Ball tutorial, please share a picture with us, by tagging our page on Instagram. We love seeing our inspiration come to life and it seriously makes my day to hear from you!
- Paper Plate Surf Board
- Paper Plate Ice Cream
- Paint Splat Beach Day
- Paper Plate Beach Camper
- Paper Plate Hermit Crab
- Foam Ball Ice Cream Cones
- Paper Plate Mermaid Tail
- Wooden Spoon Mermaid

Tissue Paper & Paper Plate Beach Ball Craft
Here’s your checklist of supplies to bring this craft to life:
Prepare your creative haven by laying down a protective cover before the crafting magic begins!
Directions:
- First envision your beach ball and take your marker to outline the different sections for it. I found the easiest way to do this, was to draw a circle in the center of the paper plate and draw curved lines from there.
- Next is the tissue paper. For each section, cut a small amount of tissue paper into small squares and keep in separate piles.
- Now place a good amount of glue in each section of the divided paper plate.
- Have children place their tissue paper on top of the glue, until each section is completely covered and really starts to look like a beach ball {remember to make each section a different color!}
- To finish the Paper Plate Beach Ball craft, I cut a medium sized circle out of cardstock and glued it to the center of the paper plate {mainly to cover the initial circle I drew for the craft}
- Then add other embellishments and display your paper beach ball proudly for all to see!

CLICK HERE TO PRINT THE DIRECTIONS FOR THIS CRAFT