
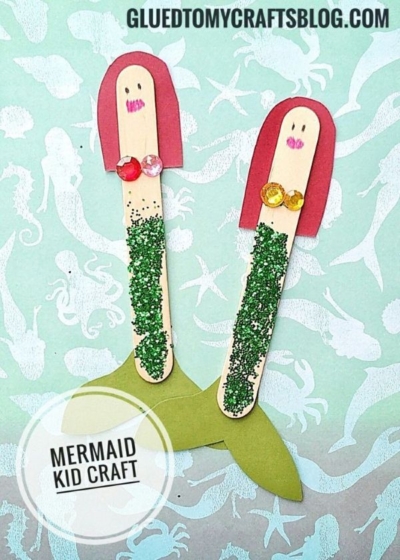
If you’re looking for a creative craft idea for your kids, look no further! This wavy popsicle stick mermaid puppet is perfect for summer

Mermaid Puppets Made From Wavy Craft Sticks
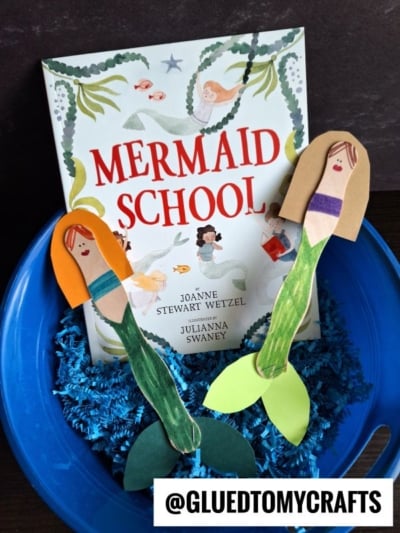
Hi friends! Are you looking for a fun beach themed craft for your kids to make this summer? Well – YOU are in the right place because today I’m sharing this simple but adorable Popsicle Stick Mermaid Puppet tutorial, THAT is super easy to pull together in minutes AND it’s budget friendly too!
Popsicle sticks are fairly easy to find, inexpensive and even come in fun colors & different shapes/sizes these days. No need to eat a ton of frozen popsicles either!
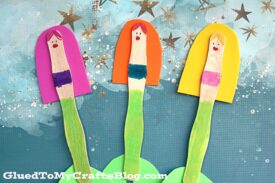
After playing around with my own popsicle stick stash, I instantly pictured these beautiful mermaids made out of some wavy paddle fan sticks {the curves were perfect for a mermaid silhouette} Next thing you know, wham bam this blog post was born! Best part? All ages of children {and even adults} can customize them however they like, with craft supplies you probably already have on hand {score!}
So without further ado – inspire young creative minds and encourage some fun family time with our small-scale mermaid project today! You can find ALL the details you need to know {as well links to the supplies we used} in the full tutorial below! Happy crafting, my friends!!!
RELATED —> Clothespin Mermaids

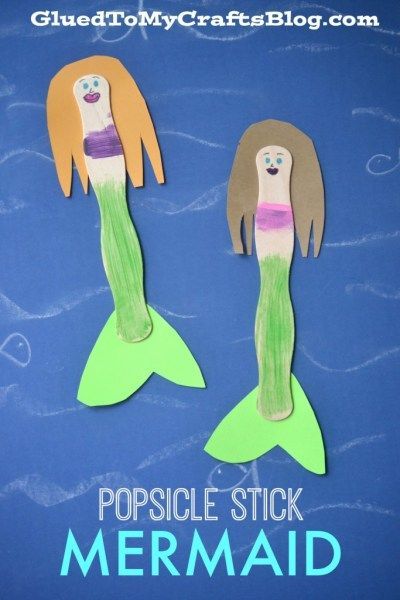
Learn how to make a mermaid puppet within minutes, with this easy popsicle stick craft tutorial for kids!
Craft Supplies:
- Wavy Paddle Fan Sticks – 1 per craft
- School Glue
- Small Paint Brushes
- Green Craft Paint
- Choice of Color Craft Paint
- Small Paper Plate
- Craft Foam or Cardstock Paper
- Sharpie Markers
Directions:
- First things first – plan out your color choices for your mermaid.
- Squirt those colors on the paper plate.
- Using the small paint brushes, have children paint one half of their wavy popsicle stick green. This is the mermaid’s tail.
- Next have them paint the mermaid’s top cover {bra} on the other half of the stick. We just did a simple line for ours.
- When done set aside to let it dry completely.
- While that is drying, have children cut out some long mermaid hair and some fins from some green cardstock paper and/or craft foam.
- To finish off the Popsicle Stick Mermaid – have children glue the hair/fins on the back of the popsicle stick and draw on a face/hair with some Sharpie markers.
- Then add other embellishments you see fit and play with/display proudly for all to see!
- Don’t forget to share pictures with us! #gluedtomycrafts
RELATED —> Paper Bag Mermaid
If you are looking for even MORE easy kids craft ideas that use popsicle sticks, be sure to check out these fun posts listed below!
- Popsicle Stick Pirate Flags
- Popsicle Stick Sheep
- Popsicle Stick Ghosts
- Yarn Mermaid Hair
- Popsicle Stick Baker
- Popsicle Stick Owls
- Popsicle Stick Fish
- Craft Stick Scarecrow House
Wavy Popsicle Stick Mermaid Craft Idea
Here’s your checklist of supplies to bring this craft to life:
- School Glue
- 1 Scissors
Prepare your creative haven by laying down a protective cover before the crafting magic begins!
Directions:
- First things first - plan out your color choices for your mermaid. Squirt those colors on the paper plate.
- Using the small paint brushes, have children paint one half of their wavy popsicle stick green. This is the mermaid's tail.
- Next have them paint the mermaid's top cover {bra} on the other half of the stick. We just did a simple line for ours.
- When done set aside to let it dry completely.
- While that is drying, have children cut out some long mermaid hair and some fins from their cardstock and/or craft foam.
- To finish off the Popsicle Stick Mermaid - have children glue the hair/fins on the back of the popsicle stick and draw on a face/hair with some Sharpie markers.
- Then add other embellishments you see fit and play with/display proudly for all to see!

Grab our favorite books via our Amazon affiliate link! In our Amazon storefront you will find books, toys and craft supplies we absolutely love using for our Glued To My Crafts tutorials!
