
Looking for a fun and easy craft idea for kids? This paper plate ice cream cone tutorial is perfect! Not only will it keep the little ones entertained on hot summer days, but it’s also helpful in teaching them how to use their creative imagination.

Ice Cream Cone Craft For Kids
As summer is in full swing, you may be looking for fun activities to keep your kids entertained and help them get creative. If so, look no further than the paper plate ice cream craft!
This super simple activity will keep little ones busy and leave everyone with a happy feeling at the end. Not only would this craft be great to do on a hot summer day, but it’s perfect for teachers too as they can also use it in classrooms to encourage creativity in kids of all ages.
With just a few supplies you have everything you need – such as tissue paper, cardstock paper and paper plates – this fun project can easily lead into more colorful crafts.
So get ready for some brightly colored ice cream scoop inspired treats that are sure to put smiles on everyone’s faces! Find ALL the details you need to know, in the full tutorial below! Happy crafting, my friends!!!
RELATED —> Cupcake Liner Ice Cream

Love ice cream? So do we! Here’s a fun and easy paper plate ice cream craft for kids that will keep them entertained this afternoon!
Craft Supplies:
- Large Paper Plates
- Craft Scissors
- Pink Tissue Paper
- School Glue
- Red Cardstock Paper
- Brown Cardstock Paper
- Paper Heart Punch
- Stapler
Directions:
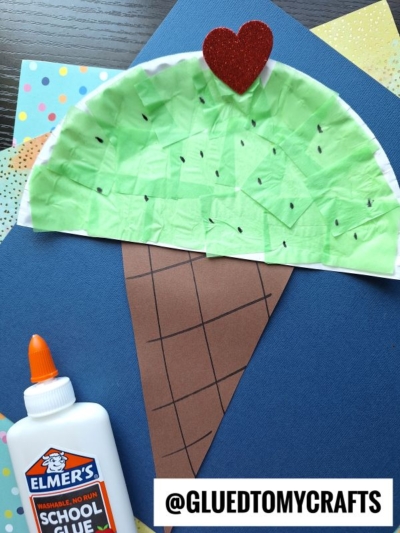
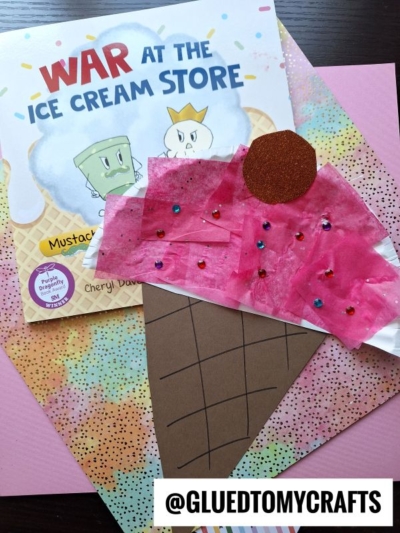
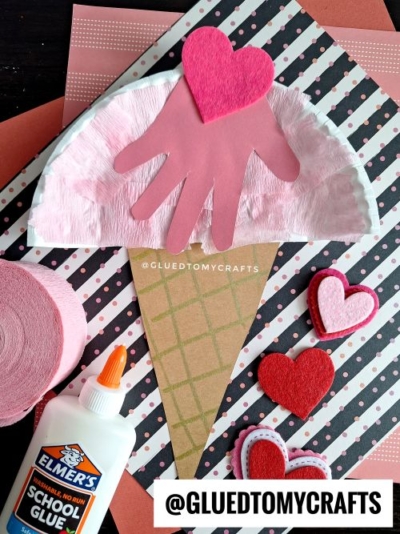
- First cut your paper plate in half. Straight up the center to create TWO equal halves.
- Save one for your ice cream craft and the other half for another craft {maybe for our jellyfish tutorial!}
- Take your brown cardstock and cut a “cone” out of it.
- With your red cardstock – punch out a heart shape. This is the cherry on top.
- Cut your tissue paper into small squares.
- Put a good layer of glue all over the paper plate half.
- Have your child place the tissue paper on the plate, until completely covered.
- Now staple the cone and cherry on to the plate, to complete the Paper Plate Ice Cream Cone kid craft idea.
- If desired, use the black Sharpie marker to give your cone some dimension. You can also glue on some loose craft glitter on top of your ice cream craft, for added flair as well!
- Finally, when everything is completely dry, display it proudly for ALL to see!
RELATED —> Paint Splat Ice Cream
If you enjoyed this paper plate ice cream tutorial post – you might enjoy these kid friendly craft ideas on Glued To My Crafts right now:
- Paper Plate Fox
- Tissue Paper Cupcake
- Paper Plate Shark
- Tissue Paper Apple
- Popsicle Stick Alien
- Paper Cup Ice Cream Cone
- Popsicle Stick Unicorn Ice Cream
- Valentine Heart Ice Cream Cone

Paper Plate Ice Cream Craft For Kids
Here’s your checklist of supplies to bring this craft to life:
- 1 Large Paper Plate
- Tissue Paper
- Cardstock Paper red and brown
Prepare your creative haven by laying down a protective cover before the crafting magic begins!
Directions:
- First cut your paper plate in half. Straight up the center to create TWO equal halves.1 Large Paper Plate
- Save one half for your ice cream craft and the other half for another craft.
- Take your brown cardstock paper and cut a "cone" out of it.
- With your red cardstock paper - punch out a heart shape. This is the cherry on top.Cardstock Paper
- Cut your tissue paper into small squares.Tissue Paper
- Put a good layer of glue all over the paper plate half.
- Have your child place the tissue paper on the plate, until completely covered.
- Now staple the cone and cherry on to the plate, to complete the Paper Plate Ice Cream Cone kid craft idea.
- If desired, use the black Sharpie marker to give your cone some dimension. You can also glue on some loose craft glitter on top of your ice cream craft, for added flair as well!
- Finally, when everything is completely dry, display it proudly for ALL to see!


CLICK HERE TO PRINT THE DIRECTIONS FOR THIS CRAFT