
Cupcake Craft Idea For Kids
Hi friends! Welcome to another awesome tutorial on Glued To My Crafts! Today we are going to be sharing this beautiful cupcake kid craft idea that lacks the sticky mess and extra calories of the real deal. But on that note, it’s still super sweet and perfect for an afternoon full of crafty fun with your little crafter!
Our latest and greatest Tissue Paper Cupcake tutorial is not only super easy but you can also pull it together for your child on the fly, with really inexpensive supplies. I promise you – it doesn’t require anything fancy or an artistic “baker’s” touch. Just simple fun you can do within an hour with a basic white paper plate and tissue paper squares!
So enough chit chat from me…. below are all the details for what you need to make your own tissue paper and paper plate cupcake with your child today. Then, when you both recreate it, come share pictures on our Facebook page for us to admire! #gluedtomycrafts
RELATED —> Handprint Cupcake Keepsake
This tissue paper cupcake is a fun and easy kids craft that you can make with just a few simple supplies. All you need is a few simple supplies to “bake” it up with your kiddo today!
Craft Supplies:
- Small or Large Paper Plate
- Pink Tissue Paper
- Red Construction Paper
- White School Glue
- Craft Scissors
- Stapler
- Paint Brush
- Black Sharpie Marker
Directions:
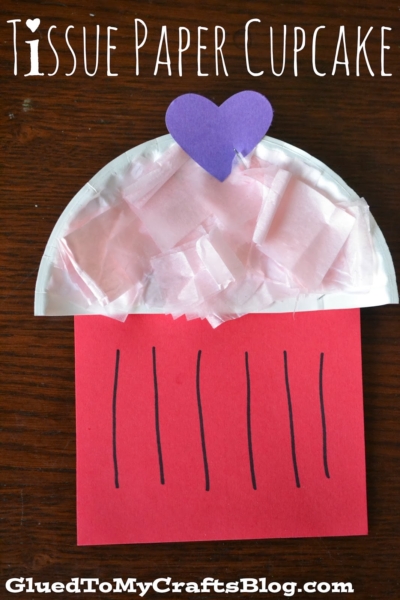
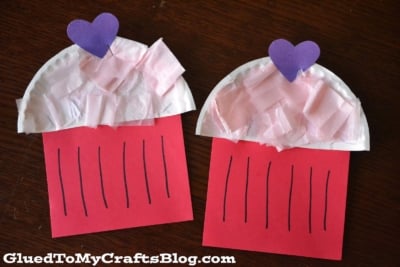
- First cut your paper plate in half. Straight up the center to make TWO halves. This will be the tops of your two cupcakes.
- Next – tear or cut up your tissue paper into small squares.
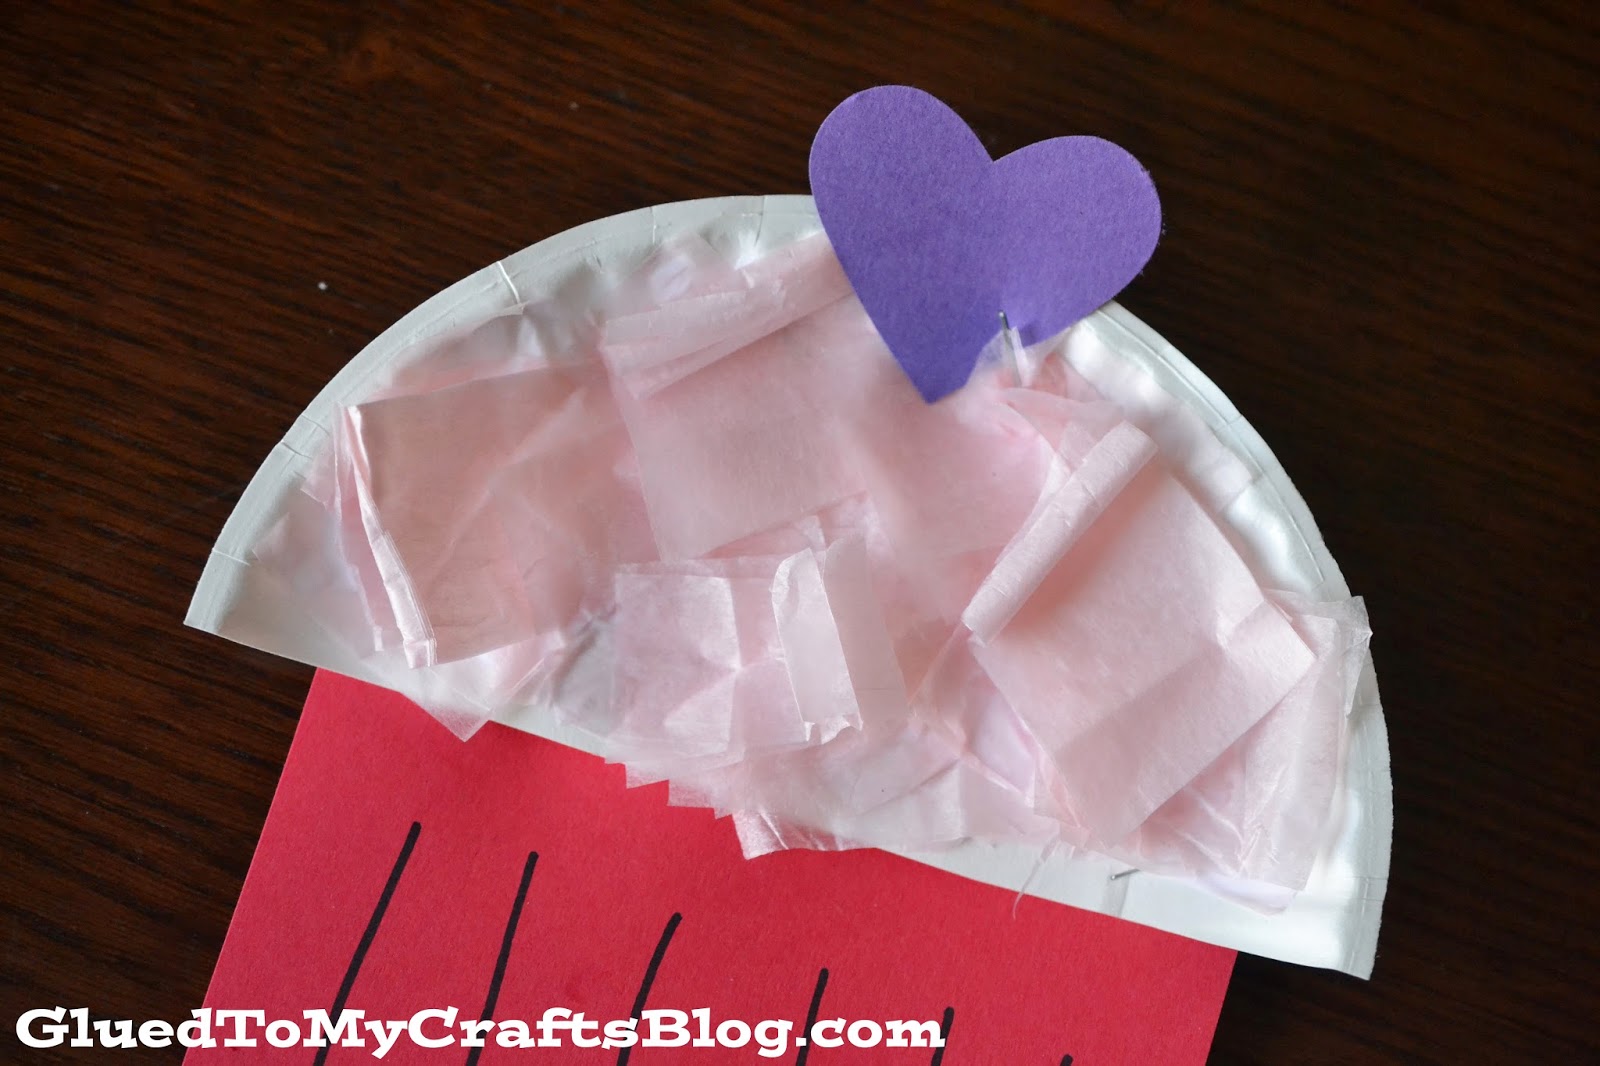
- Take your cardstock and cut two squares out. This will be the base of the cupcake. You can draw lines on it to make it look like a cupcake liner. Then staple the square piece to the bottom of one of your paper plate halves. Your cupcake should start to look like a cupcake.
- Now is the fun part. Adding the “frosting” to the cupcake. Using a paint brush – slather some glue on the paper plate half. Have your child place tissue paper on the glue, completely covering the paper plate half. Once covered, set aside to let dry.
- To finish off – have them add some flair to their cupcake. We added a punch out of a heart to the top of ours. You can also had things like glitter, ribbon or sequins for sprinkles, to really dress it up!
RELATED —> Paper Plate Apple
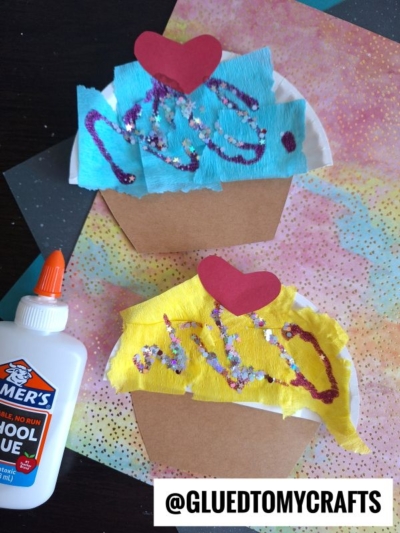

You can of course add your own spin by changing up the colors of the tissue paper and/or cardstock paper. Don’t forget to also add some festive flair with a little glitter glue, adhesive rhinestones etc. to really make it stand out from the crowd! Just raid your craft stash to make it happen!
Now don’t you think these Tissue Paper Cupcakes are PERFECT for a Valentine’s Day craft, as well as decorations for a sweet party!? We do and we hope it inspired you! today! Before you leave, be sure to also check out our popsicle stick version of a cupcake baker!
RELATED —> Valentine Fairy House

Tissue Paper and Paper Plate Cupcake Craft
Here’s your checklist of supplies to bring this craft to life:
Prepare your creative haven by laying down a protective cover before the crafting magic begins!
Directions:
- First cut your paper plate in half. Straight up the center to make TWO halves. This will be the tops of your two cupcakes.
- Next - tear or cut up your tissue paper into small squares.
- Take your cardstock and cut two squares out. This will be the base of the cupcake. You can draw lines on it to make it look like a cupcake liner.
- Staple the square piece to the bottom of one of your paper plate halves. Your cupcake should start to look like a cupcake.
- Now is the fun part. Adding the "frosting" to the cupcake. Using a paint brush - slather some glue on the paper plate half. Have your child place tissue paper on the glue, completely covering the paper plate half. Once covered, set aside to let dry.
- To finish off - have them add some flair to their cupcake. We added a punch out of a heart to the top of ours. You can also had things like glitter, ribbon or sequins to really dress it up!

Grab our favorite books via our Amazon affiliate link! In our Amazon storefront you will find books, toys and craft supplies we absolutely love using for our Glued To My Crafts tutorials!