Learn how to make this adorable cupcake liner unicorn card with our easy tutorial. It's perfect for any occasion!
This simple white unicorn craft idea using baking liners provides the perfect way to bring a bit of whimsy into your home AND has something enchanting to give to someone else!
Whether you’re looking for something special that kids can do as an art project in school or at a birthday party, an afternoon activity to keep little ones busy and entertained on a rainy day, or even a thoughtful handmade gift for friends or family members, this fun Cupcake Liner Unicorn Card craft idea is sure to delight everyone!
From mythical creatures to vibrant colors, this crafting session is a delightful way to engage with your child, demonstrating how the simplest of supplies can be turned into something fantastical.
Ready to reignite some creativity and spread a little rainbow-colored love? Grab your materials and let’s flutter into the majestic universe of cupcake liner unicorns!
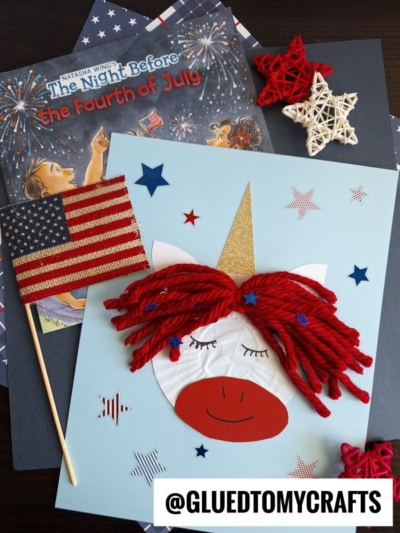
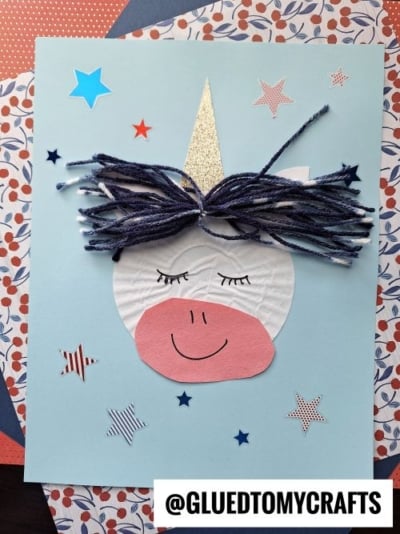
It’s a cute and easy craft for kids! Using inexpensive cupcake liners, you can create your own unicorn card within minutes!
Card Supplies:
- White Cupcake Liners
- Cardstock Paper
- Glue Stick
- Scissors
- Craft Yarn
- Markers
- Embellishments
Directions:
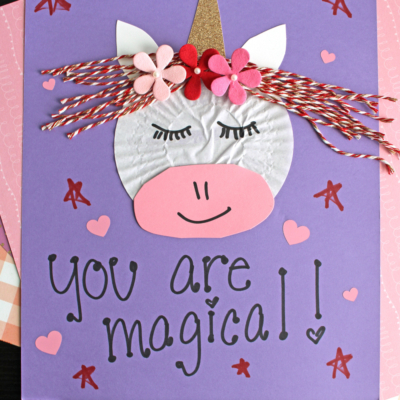
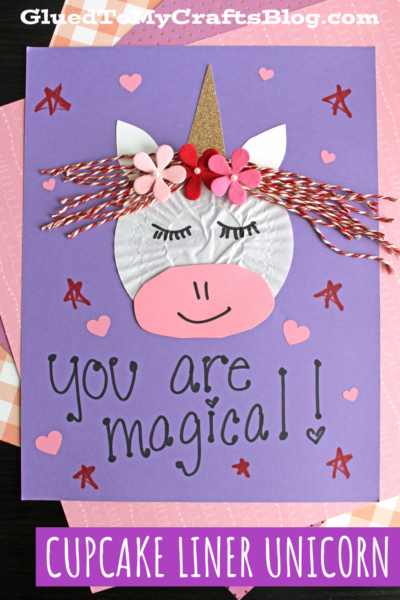
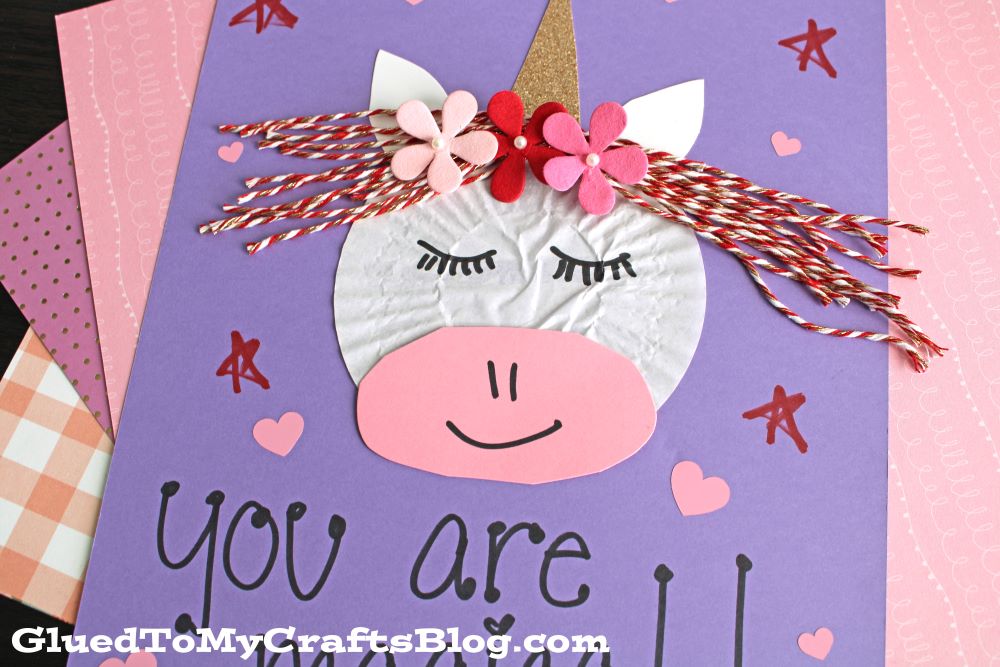
- First have children flatten their white cupcake liner and glue it to the center of a single piece of cardstock paper.
- Once the cupcake liner is down, grab your remaining sheets of cardstock paper and cut out a horn, ears and her snout.
- Now grab your craft yarn and cut off several long strands.
- Use one of those pieces to secure/tie them all together in the center. This is the unicorn’s hair.
- To finish the Cupcake Liner Unicorn Card, have children glue on the cardstock pieces in their designated spots, as well as the yarn hair.
- Use a marker to draw on eyelashes and mouth.
- Then help them write “you are magical” around their finished design.
- When done decorating your card, gift away to the lucky receiver!
RELATED —> Popsicle Stick Unicorns
AFFILIATE LINK – PAIR OUR CRAFT IDEA WITH THIS BOOK RECOMMENDATION
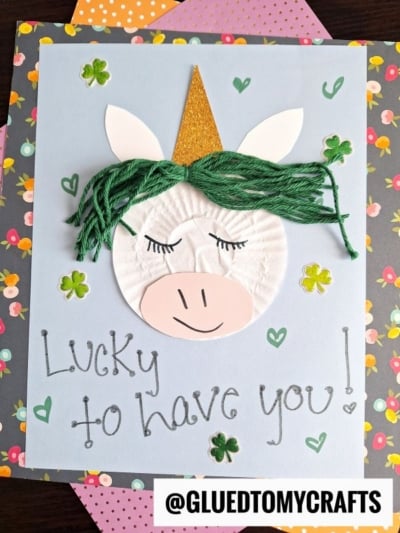
Before you click away for good, I want YOU to go ahead & also check out our unique Moose, Pumpkin Pie and Gingerbread Man cupcake liner card craft posts!

Cupcake Liner Unicorn Card Craft
Learn how to make this adorable cupcake liner unicorn card with our easy tutorial. It's perfect for any occasion!
Here’s your checklist of supplies to bring this craft to life:
- Cupcake Liners white
- Cardstock Paper
- Craft Yarn
- Embellishments
Prepare your creative haven by laying down a protective cover before the crafting magic begins!
Directions:
- First have children flatten their white cupcake liner and glue it to the center of a single piece of cardstock paper.
- Once the cupcake liner is down, grab your remaining sheets of cardstock paper and cut out a horn, ears and her snout.
- Now grab your craft yarn and cut off several long strands.
- Use one of those pieces to secure/tie them all together in the center. This is the unicorn's hair.
- To finish the Cupcake Liner Unicorn Card, have children glue on the cardstock pieces in their designated spots, as well as the yarn hair.
- Use a marker to draw on eyelashes and mouth.
- Then help them write "you are magical" around their finished design.
- When done decorating your card, gift away to the lucky receiver!


CLICK HERE TO PRINT THE DIRECTIONS FOR THIS CRAFT
If you've enjoyed our content or have any thoughts to share, we'd love to hear from you! Mention @gluedtomycrafts or tag #gluedtomycrafts on Instagram!