This easy craft for kids is a fun way to teach them about sharks and ocean life.

Are you looking for a super fun arts and crafts project to tackle with your kids? Then get ready to create, because today I’m going to show you how to make an awesome paper plate shark craft – just in time for Shark Week!

Get ready to dive into a sea of creativity with this Paper Plate & Tissue Paper Shark craft! Perfect for Shark Week or any ocean-themed adventure, this fun and simple project is a great way to spark your child’s imagination while teaching them about marine life.
With just a few basic supplies like paper plates, tissue paper, and cardstock, kids can create their very own friendly shark that’s as fun to make as it is to display.
Whether you’re crafting at home or in a classroom, this activity is sure to make a splash. Let’s grab our supplies and get started on this jaw-some craft!
Grab some paper plates, cardstock paper and tissue paper and let’s dive into this delightful project that is perfect for Shark Week!
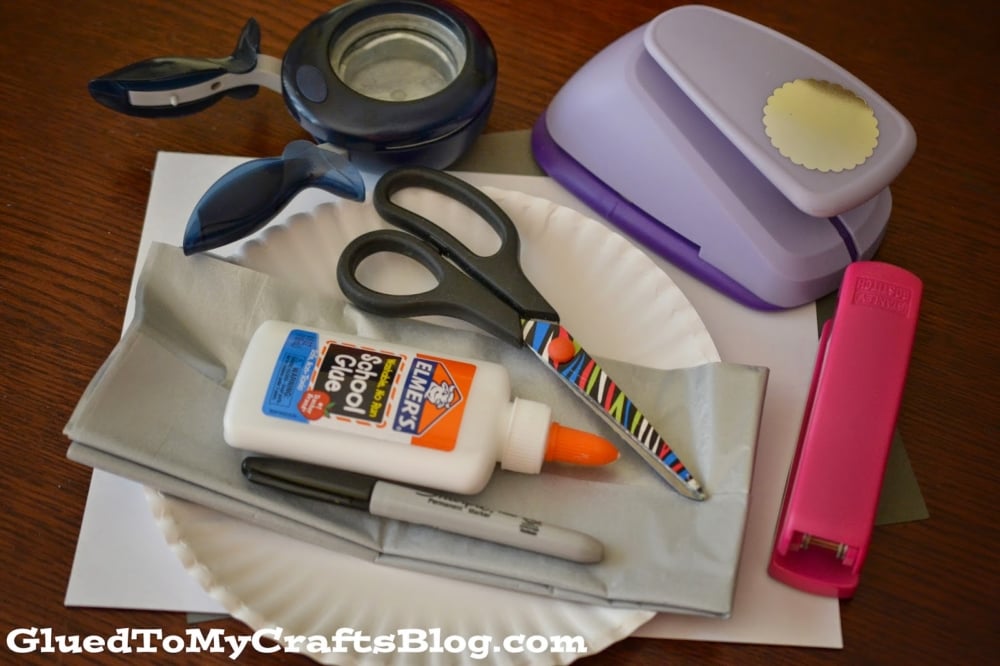
Craft Supplies:
- Large Paper Plate
- Gray/Silver Tissue Paper
- Gray Cardstock Paper
- White Cardstock Paper
- Basic Craft Scissors
- School Glue
- Stapler
- Black Sharpie Marker
- Various Paper Punches
Directions:
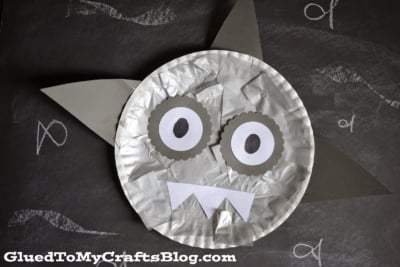
- First cut your tissue paper into small squares.
- Slather a good amount of glue all over the paper plate.
- Ask your child to completely cover their paper plate in tissue paper.
- While they work on that – cut out the other embellishments to give the shark life. {think eyes, arms, mouth, etc}
- Now glue/staple on those embellishments to the paper plate.
- Let it dry completely before displaying your Paper Plate Gray Shark proudly.
RELATED —> Cupcake Liner & Paper Plate Fish

Happy Shark Week folks! May it be extra crafty!
If you enjoyed this kid friendly shark paper plate craft – you may also enjoy these blog posts from us:
- Paper Plate Fish Bowl
- Paper Plate Raccoon
- Popsicle Stick Fish
- Paper Bowl Grill
- Watercolor Donut Friends
- Paper Plate Shark Car
- Shark Mouth Picture Frame

Paper Plate Shark Craft Idea For Kids
This easy craft for kids is a fun way to teach them about sharks and ocean life.
Here’s your checklist of supplies to bring this craft to life:
- 1 Large Paper Plate
- Tissue Paper silver
- Cardstock Paper gray and white
- School Glue
Prepare your creative haven by laying down a protective cover before the crafting magic begins!
Directions:
- First cut your tissue paper into small squares.Tissue Paper
- Slather a good amount of glue all over the paper plate.1 Large Paper Plate
- Ask your child to completely cover their paper plate in tissue paper.
- While they work on that - cut out the other embellishments to give the shark life. {think eyes, arms, mouth, etc}Cardstock Paper
- Now glue/staple on those embellishments to the paper plate.
- Let it dry completely before displaying your Paper Plate Shark proudly.

CLICK HERE TO PRINT THE DIRECTIONS FOR THIS CRAFT
If you've enjoyed our content or have any thoughts to share, we'd love to hear from you! Mention @gluedtomycrafts or tag #gluedtomycrafts on Instagram!