
Summer is the perfect time to spark creativity with your kids and keep them joyfully entertained. If you’re looking for a fun craft idea that’s easy to make and full of imaginative possibilities, this paper bowl pretend play grill is exactly what you need.
Not only will your kids have a blast making their own mini grill, but they’ll also enjoy hours of pretend barbecuing fun. Think about all the burgers, hotdogs, and imaginary kebabs they’ll whip up!
This simple yet engaging craft uses items you probably have at home and takes your kid’s love for pretend play to the next level. Get ready to roll up your sleeves and bring this adorable project to life.

Get creative this summer with our DIY paper bowl pretend play grill! A fun, easy craft for kids to make and enjoy. Perfect for imaginative play.
Craft Supplies:
Before we jump into the step-by-step process, let’s go over the materials needed. Most of these items are likely already sitting somewhere in your home. Here’s what you’ll need to craft your pretend grill:
- Small Paper Bowl – 1 per craft
- Black Craft Paint
- Paint Brush
- Black Tissue Paper
- Red Tissue Paper
- Yellow Tissue Paper
- School Glue
- Scissors
- Hot Glue Gun
- Hot Glue Gun Sticks
- Paper Straws
- Popsicle Stick
- Cotton Balls
Directions:
Now that your materials are ready, it’s time to transform these simple items into a delightful pretend play grill. Follow these steps with your kids and watch their creativity shine!
- First things first – paint the outside of your paper bowls completely black.
- Set them aside to let the dry completely.
- Once dry – it’s time for the tissue paper “fire” element inside the grill. In the inside of one paper bowl, lay/glue some black tissue paper to give the look of the inside of the grill.
- Now tear/cut some yellow/red tissue paper squares and bunch/twist them to look like flames.
- Glue those inside the “grill.”
- Next get the glue gun hot and ready.
- Cut your paper straws in half. Make sure they are all the same length.
- Turn the paper bowl that you just put tissue paper “flames” inside, upside down.
- Glue the paper straw “legs” to the bottom of the paper bowl. Make sure they are secure in place. This may take 5-10 minutes for it to dry completely.
- While those are drying in place, go ahead and hot glue your “marshmallow” aka a cotton ball to the popsicle stick for a smores element. Set that aside.
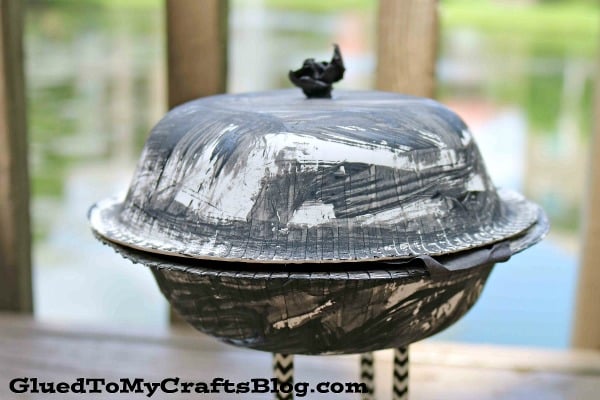
- Finally – take a small ball of black tissue paper and hot glue it to the other paper bowl for a decorative look on the “lid” of the grill.
- Now you are ready to display/play with it! The lid goes on top of the piece with the paper straws/tissue paper flames and kids can hold the popsicle stick as they pretend to make smores over the fire.
- You can also make a spatula out of a popsicle stick which I think would be an awesome element too! {which was an afterthought when I took these pictures for the blog – go figure!}
RELATED —> Handprint Grilling Apron


Summer is all about fun, creativity, and spending quality time together. This paper bowl pretend play grill ticks all those boxes and more. It’s inexpensive, educational, and most importantly, bursting with imaginative potential.
Now it’s time to gather your materials and spark some backyard pretend fun! Don’t forget to snap a few pictures of your kids’ creations along the way—we’d love to see how their paper bowl grills turn out. Be sure to share pictures with us on your various social media sites by tagging us or using the hashtag #gluedtomycrafts
Be sure to also check out our Daddy’s Grilling Partner Keepsake tutorial post for another OUTDOOR GRILL themed idea!
