
Are you looking for a fun and easy craft to keep the kids busy this summer? Look no further than our cupcake liner ice cream cone craft!

Ice Cream Craft Made With Cupcake Liners
I scream. You scream. We ALL scream for ICE CREAM!!!
Hi friends! Today’s summer themed kid craft is not only calorie free, mess-free and fun for all ages BUT it’s always – super simple and made with everyday supplies you probably have hiding in your cabinet right now! {hello inexpensive!!!}
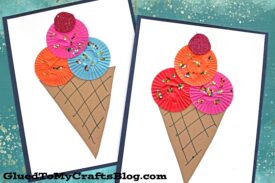
With just some fun colored cupcake liners, glue and a little imagination – you too can make this simple Cupcake Liner Ice Cream craft with your child today!
So what are you waiting for? Don’t let this grand idea melt away! Grab your craft supplies and follow our step-by-step tutorial below!
Happy celebrating and crafting away the summer, my friends!! I can’t wait to see what cupcake liner colors you choose to make your paper ice cream cone craft creations! I’m sure it’s going to turn out awesome!
RELATED —> Paint Splat Ice Cream Cones

With just some fun colored materials and a little imagination, you too can make this Cupcake Liner Ice Cream craft with your child today!
Craft Supplies:
- Small Cupcake Liners – 3 per craft
- Tan Cardstock Paper
- Red Cardstock Paper
- White Cardstock Paper
- Glue Stick
- Craft Scissors
- Black Marker
- Embellishments
Directions:
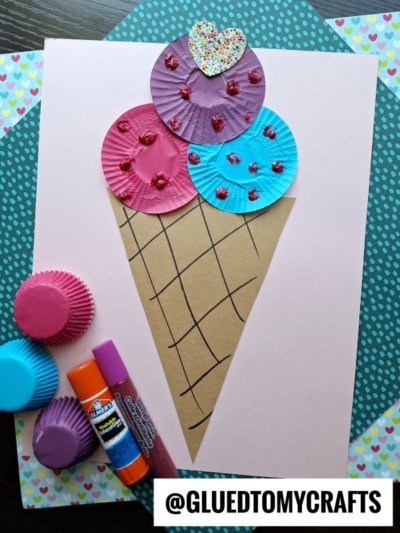
- First things first – decide what colors you want for your ice cream cone. Pull those out from your cupcake liners.
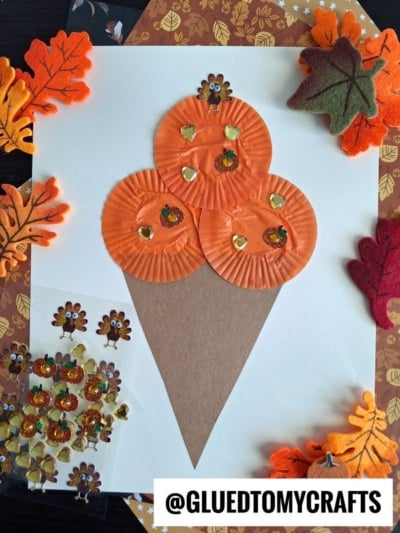
- Now have children flatten three cupcake liners and glue them in a triangle formation, in the center of a single sheet of white cardstock paper.
- Once the cupcake liners are down, grab your remaining cardstock paper sheets and scissors.
- Out of the tan cardstock paper – trim out a large triangle ice cream cone.
- Out of the red cardstock paper – trim out a small circular cherry.
- Use the black Sharpie marker to draw on “lines” on the ice cream cone piece to give it some dimension.
- To finish the Cupcake Liner Ice Cream Cone kids craft, have children glue their cardstock paper cone piece underneath the glued-down cupcake liners, while the cherry goes on top.
- Now children can also add other embellishments to their ice cream {like scrapbook stickers, glitter, rhinestones etc} that they see fit to really make it their own.
- Then display proudly!
RELATED —> Paper Cup Ice Cream Cone
If you are looking for even MORE easy kid craft ideas, from Glued To My Crafts, be sure to check out these fun posts listed below!
- Cupcake Liner Ladybugs
- Cupcake Liner Bunnies
- Cupcake Liner Rainbow Fish
- Cupcake Liner Egg Card
- Popsicle Stick Ice Cream
- Unicorn Ice Cream Cone
- Handprint Ice Cream
- Pumpkin Ice Cream Cone
- Cupcake Liner Bees
- Cupcake Liner Unicorn

Cupcake Liner Ice Cream Craft
Here’s your checklist of supplies to bring this craft to life:
- Cardstock Paper
- 3 Cupcake Liners
- Embellishments
Prepare your creative haven by laying down a protective cover before the crafting magic begins!
Directions:
- First things first - decide what colors you want for your ice cream cone. Pull those out from your cupcake liners.
- Now have children flatten three cupcake liners and glue them in a triangle formation, in the center of a single sheet of white cardstock.3 Cupcake Liners
- Once the cupcake liners are down, grab your remaining cardstock paper sheets and scissors.Cardstock Paper
- Out of the tan cardstock - trim out a large triangle ice cream cone.
- Out of the red cardstock - trim out a small circular cherry.
- Use the black Sharpie marker to draw on "lines" on the ice cream cone piece to give it some dimension.
- To finish the Cupcake Liner Ice Cream Cone kid craft, have children glue their cardstock cone piece underneath the glued-down cupcake liners, while the cherry goes on top.
- Now children can also add other embellishments to their ice cream {like scrapbook stickers, glitter, rhinestones etc} that they see fit to really make it their own.Embellishments
- Then display proudly!

CLICK HERE TO PRINT THE DIRECTIONS FOR THIS CRAFT