
Do you have little ones in your home that are looking for something fun and creative to do this summer?
Or, perhaps you’re an educator searching for the perfect craft idea to implement in your classroom? Look no further—we’ve got just the idea!

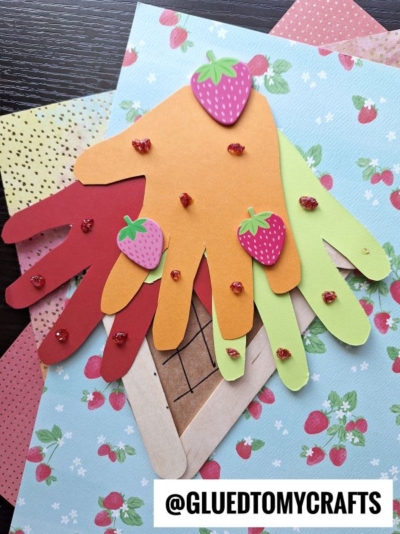
Popsicle Stick & Handprint Ice Cream Cone
Today’s post is a summer kids craft idea that is not only calorie free, mess-free and fun for all ages BUT it’s also super simple & made with everyday supplies you probably already have hiding in your cabinets right now! {hello inexpensive!!!}
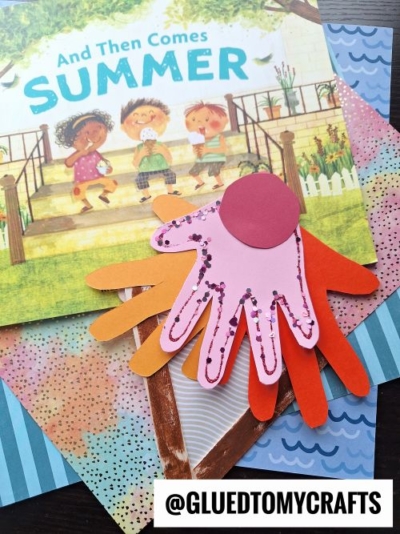
With just some cardstock paper, wooden craft sticks, glue and a little imagination – you too can make this simple Handprint Popsicle Stick Ice Cream craft with your child today! Then use as decoration and/or sweet popsicle stick keepsakes to remember this wonderful time of year!
So what are you waiting for? Grab your craft supplies, make space on the kitchen table and follow our step-by-step ice cream craft tutorial below!
Happy celebrating and crafting away the day, my friends!! Don’t forget to share pictures of your child’s finished ice cream cone from popsicle sticks and paper, on our Facebook page so we can admire their hard work from afar!
RELATED —> Cupcake Liner Ice Cream


Our handprint & popsicle stick ice cream cone craft is not only simple and easy-to-follow, but it also makes such a wonderfully sentimental keepsake.
Craft Supplies:
- Jumbo Popsicle Sticks – 3 per craft
- School Glue
- Craft Buttons or Sequins
- Craft Scissors
- Colored Cardstock Paper
Directions:
- First grab three popsicle sticks {three per ice cream} and glue them together to look like a triangle.
- Set aside to let it dry completely.
- Repeat for each ice cream piece you want to make today.
- While those popsicle stick pieces are drying, grab your paper materials and scissors.
- Start with the tan cardstock and cut out a triangle piece for inside the painted popsicle stick design. This will be the ice cream “cone.”
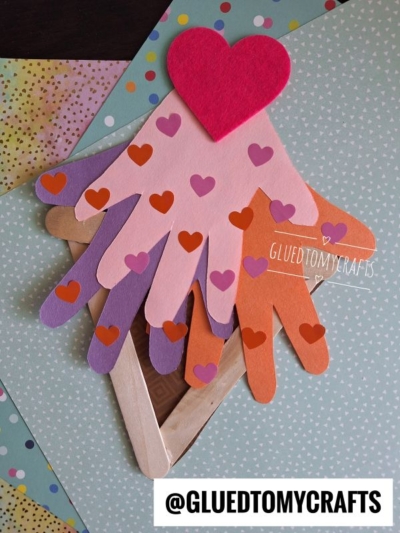
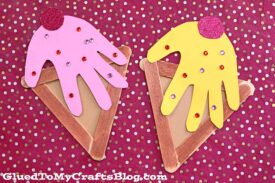
- At this time you should also grab the remaining cardstock and trace/trim out your child’s handprint for the ice cream part. We also cut out a cherry for on top!
- Go ahead and set aside your paper pieces till later.
- When the popsicle stick triangle is dry enough, go ahead and grab your craft paint, paint brush & paper plate.
- Squirt some paint on the paper plate.
- Go ahead and paint the triangle shape completely brown.
- To finish off the Popsicle Stick Ice Cream – have children glue their paper pieces in place, on the painted popsicle stick shape, as well as any other embellishments they see fit.
- Once done, set aside to let it dry completely before displaying proudly!
RELATED —> Paint Splat Ice Cream
If you are looking for even MORE easy spring themed kid craft ideas, from Glued To My Crafts, be sure to check out these fun posts listed below.
And “if” you decide to make our Popsicle Stick Ice Cream kid craft, please share a picture on our Facebook page or tag us on Instagram with #gluedtomycrafts for us to see. We love seeing our inspiration come to life!
- Popsicle Stick Mermaids
- Popsicle Stick Bunny
- Popsicle Stick Foxes
- Popsicle Stick Gnomes
- Popsicle Stick Owls
- Popsicle Stick Fish
- Popsicle Stick Whale
Handprint Popsicle Stick Ice Cream Craft Idea
Here’s your checklist of supplies to bring this craft to life:
- Cardstock Paper
- 3 Jumbo Popsicle Sticks
- Craft Paint
- Embellishments
- School Glue
- 1 Scissors
- 1 Pen or Pencil
Prepare your creative haven by laying down a protective cover before the crafting magic begins!
Directions:
- First grab three popsicle sticks {three per ice cream cone craft} and glue them together to look like a triangle.3 Jumbo Popsicle Sticks
- Set aside to let it dry completely.
- Repeat for each ice cream piece you want to make today.
- While those popsicle stick pieces are drying, grab your paper materials and scissors.
- Start with the tan cardstock and cut out a triangle piece for inside the painted popsicle stick design. This will be the ice cream "cone."
- At this time you should also grab the remaining cardstock and trace/trim out your child's handprint for the ice cream part. We also cut out a cherry for on top!
- Go ahead and set aside your paper pieces till later.
- When the popsicle stick triangle is dry enough, go ahead and grab your craft paint, paint brush & paper plate.Craft Paint
- Squirt some paint on the paper plate.
- Go ahead and paint the triangle shape completely brown.
- To finish off the Popsicle Stick Ice Cream – have children glue their paper pieces in place, on the painted popsicle stick shape, as well as any other embellishments they see fit.
- Once done, set aside to let it dry completely before displaying proudly!

Grab our favorite books via our Amazon affiliate link! In our Amazon storefront you will find books, toys and craft supplies we absolutely love using for our Glued To My Crafts tutorials!
