
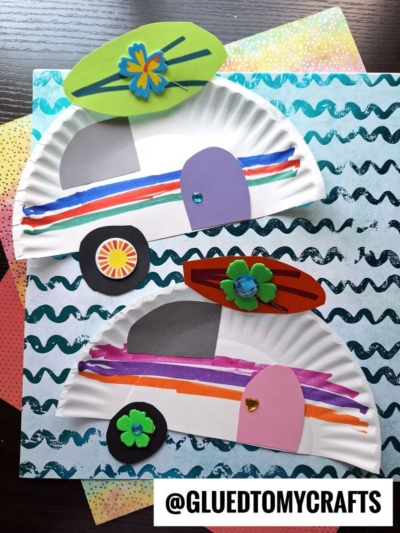
Get everyone in the summer spirit with our first-seen-here Paper Plate Beach Camper kid craft idea!
Everybody can make THEIR own version of what a travel trailer should look like when you take it to the beach!
Our unique craft idea is going to be so much fun when you make it yourself – I’m sure of it! Keep scrolling for ALL the details!

Beach Camper Craft Idea
Oh how I wish we could just go to the beach right now. I would even settle for just some quiet time on the sand. Till then – this latest paper plate kid craft tutorial from us will have to do. Hopefully you see my vision and want to recreate one with your child as well!
This beach themed air-stream camper is made from very basic supplies you probably already have in your home, one of which is just a simple large paper plate.
From there, all you need is some various colors of sharpie markers, a few small stickers and colored cardstock. That’s it! Super simple art materials that come together nicely for a fun gender-neutral craft for the summer season!
So stop what you are doing and add this unique DIY to your crafty to-do list right now! In fact – make sure you bookmark or “pin” this very post to make it easy to refer back to in the coming days.
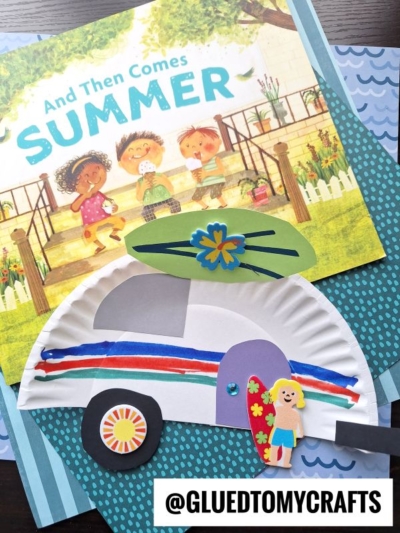
Then keep scrolling to check out the full paper plate summer camper with paper surf board on top tutorial below and get ready for a fun & extra memorable day of crafting! I bet even all the adults in your home will want to make one of these paper plate campers too! You could even have a friendly competition on who designs the best one!
I’ll let you get to it now. Happy crafting my friends!!! Please don’t forget to share pictures of your paper plate beach campers on our Facebook page! I can’t wait to see how you give it your own colorful summer, personal spin!!! #gluedtomycrafts
RELATED —> Paper Plate Surf Board


Get the kids excited for summer with this beach-themed paper plate craft! It’s super easy and customizable too!
Craft Supplies:
- Large Paper Plate
- Craft Scissors
- Sharpie Markers
- Cardstock Paper
- Glue Stick or School Glue
- Beach Themed Stickers
- Pom Pom Ribbon Garland
- Stapler
- Embellishments
Directions:
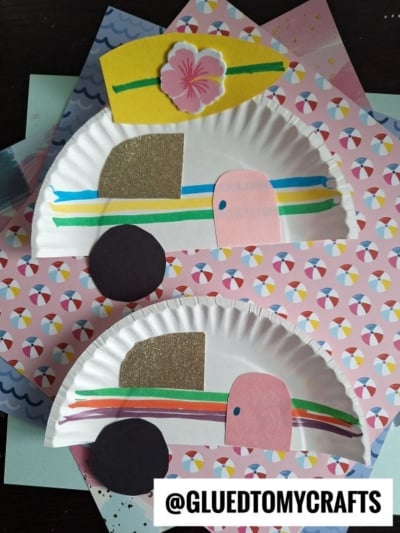
- First cut your large paper plate in half. Straight up the center!
- Reserve one half for today’s beach camper craft and save the other for a rainy day!
- Now grab your choice of colors in sharpie markers.
- Draw TWO straight lines across the paper plate. This just give it more of a camper look.
- Set aside the paper plate.
- Now grab all your cardstock paper sheets and scissors.
- Out of the black cardstock cut out a small circular wheel, as well as a small, thin rectangle for the “hitch” the camper.
- Out of the gray cardstock cut out a small window.
- Out of your choice of color, cut out a door shape.
- Out of the remaining choice of color, cut out a surf board shape.
- Use your choice of colored sharpie marker to draw on lines on the surf board and give it dimension.
- Use the black sharpie marker to draw a small door knob on the paper door piece you just made.
- Now glue ALL your paper pieces {besides the surf board} to the paper plate half from earlier.
- To finish off the Paper Plate Summer Camper kid craft – add some small beach themed stickers {I had some Hawaiian flowers in my stash} and staple the paper surf board to the top of the decorated paper plate piece.
- At this point in time you can also add your pom pom “garland” for some party flair!
- Add other embellishments to really give it that beach-y look.
- Then display proudly your camper creations!
- Now snap a few pictures of the completed craft to share with us on your social media sites!! #gluedtomycrafts
RELATED —> Happy Camper Keepsake
Celebrate summer in an extra crafty way with our easy step-by-step kid craft tutorials! Our DIY’s are unique and are sure to make memories that will last a lifetime!
Be sure to check out these fun posts, listed below, for even MORE crafty inspiration from the Glued To My Crafts website.
Popsicle Stick Patriotic Gnome
Paper Plate Cactus Fairy House

Paper Plate Beach Camper Craft
Here’s your checklist of supplies to bring this craft to life:
- 1 Large Paper Plate
- Cardstock Paper
- Craft Paint
- Craft Ribbon
- Ocean Stickers
Prepare your creative haven by laying down a protective cover before the crafting magic begins!
Directions:
- First cut your large paper plate in half. Straight up the center!
- Reserve one half for today's beach camper craft and save the other for a rainy day!
- Now grab your choice of colors in sharpie markers.
- Draw TWO straight lines across the paper plate. This just give it more of a camper look.
- Set aside the paper plate.
- Now grab all your cardstock paper sheets and scissors.
- Out of the black cardstock cut out a small circular wheel, as well as a small, thin rectangle for the "hitch" the camper.
- Out of the gray cardstock cut out a small window.
- Out of your choice of color, cut out a door shape.
- Out of the remaining choice of color, cut out a surf board shape.
- Use your choice of colored sharpie marker to draw on lines on the surf board and give it dimension.
- Use the black sharpie marker to draw a small door knob on the paper door piece you just made.
- Now glue ALL your paper pieces {besides the surf board} to the paper plate half from earlier.
- To finish off the Paper Plate Summer Camper craft – add some small beach themed stickers and staple the paper surf board to the top of the decorated paper plate piece.
- At this point in time you can also add your pom pom "garland" for some party flair!
- Add other embellishments to really give it that beach-y look.
- Then display proudly!

CLICK HERE TO PRINT THE DIRECTIONS FOR THIS CRAFT