
Are you ready to make some handy, creative and unique Christmas gifts this season? We’ve got the perfect DIY project for you – Sharpie painted mugs!
Not only are these affordable and easy to customize, but with our foolproof process, your designs won’t wash away in the dishwasher.
Get ready to get crafty – let’s bring out your inner artist and create something truly special that can be enjoyed year after year!

Custom Sharpie Painted Mugs For Gift Giving
Hi friends! I’m so glad you landed on our “How To Make Sharpie Painted Mug” post! We are going to make some awesome craft creations together today!
How many of you have seen those Sharpie painted DIY mugs all over Pinterest? Where people take basic Sharpie markers and paint on ceramic dollar store pieces with them? It’s such a popular gift idea right now, especially around the holidays!
These coffee mug tutorials typically just say to write on your mugs with some regular Sharpie markers, bake in the oven and you’re done. It’s the ideal way to get a personalized gift without spending a ton of money.
But how many of you know that the regular Sharpie marker designs will actually wash off in the dishwasher? Yup! I’m super sorry to disappoint with that statement but unless you are gently handwashing those DIY coffee mugs, your artistic masterpieces will probably go down the drain, along with all that ink.
Even hand washing will probably make the design go away after time. It’s actually a very flawed concept that has taken over the internet!
But no worries! After doing some careful research, I have discovered the DIY Sharpie mug trick that does actually works! Oil based paint pens to the rescue!
Sharpie happens to make these type of OIL-BASED paint pens too and your local craft store will probably have them in stock. I happen to pick up mine in The Home Depot paint aisle, a few months back. They are a bit more pricey than a regular Sharpie, but if you weigh the pros {the whole not wasting your time for it to go down the drain} than it’s probably worth it. Invest in the right pens and grab your mugs from Dollar Tree 😉 Plus I’m sharing a really cute way to monogram those boring mugs. Can we say stellar Christmas presents this year???
Now keep scrolling to see all the Sharpie dishwasher safe details below! Happy crafting, my friends!!!
RELATED —> Popsicle Stick Hot Chocolate Mug

Craft Supplies Needed:
This post contains affiliate links to Amazon for your shopping convenience.
- Plain White Mugs
- Oil Based Sharpie Paint Pens
- Scrapbook Letter Stickers
- Oven
- Rubbing Alcohol
- Several Clean Q-tips
FYI – if you can’t find a sticker like I used in my post, you can always invest in a Cricut maker machine and cut it that way 🙂


How To Paint Your Mugs:
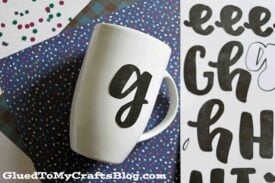
- To do a monogram design you will need some letter scrapbook stickers. Pick the monogram/design you want and stick it on your mug. I did a “G” for our last name.
- You will want to make sure it’s in the right place/angle etc. and as FLAT as possible on the mug. No edges should be lifting up on the mug.
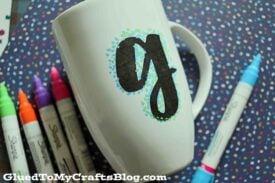
- Next you will want to make dots ALL around the scrapbook sticker. Follow the directions on the marker packaging to get the paint going. Do some practice dots on some cardboard before hand so you know how much pressure to put down.
- Once ready, start filling in the area around the sticker with TONS of dots. Really fill in the area so no white space is showing.
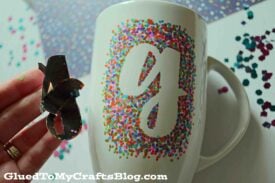
- Add a second color {or a few more} if you like on top of your first round of dots. BTW – If you mess up your design, just wipe it all away with some rubbing alcohol on a paper towel.
- Once you have the design you want on the mug and it’s dry enough – carefully peel off the scrapbook sticker to reveal your design underneath.
- Do more touch ups with the paint pens and if you need to, use some rubbing alcohol on a q-tip for the small spots.
- Next up – the baking step. Make sure your area is well ventilated and turn on your oven to 350.
- Set your mugs inside the oven, on the rake and let them bake for about 30 minutes.
- Once the 30 minutes is up, turn off the oven and let the mugs cool down inside the oven. I left mine in the oven for a few hours.
- When done, remove from oven.
- Wash and then of course, fill and enjoy with your favorite beverage to enjoy.
RELATED —> Popsicle Stick Camping Mug


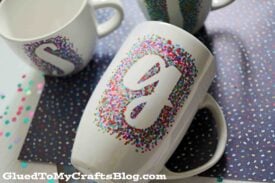
P.S. – we ran my Sharpie painted mugs through the dishwasher the next day and my designs were unharmed. YAY! I’m loving this quick DIY mug idea and can’t wait to make some specials presents for friends this Christmas season. Wouldn’t this be great with some hot chocolate packets and a nice bow tied around the handle? You could even maybe even a coffee shop gift card! So many ways to make your DIY coffee mugs even more personal!
Let me know how your mug painting project goes! You can tag us on Instagram to show off your Sharpie painted mug creations! I can’t wait to hear what you think!!!
RELATED —> Cotton Ball Hot Cocoa Mug

Customized Sharpie Painted Mugs
Here’s your checklist of supplies to bring this craft to life:
- Plain White Mugs
- Scrapbook Letter Stickers
Prepare your creative haven by laying down a protective cover before the crafting magic begins!
Directions:
- To do a monogram design you will need some letter scrapbook stickers. Pick the monogram/design you want and stick it on your mug. I did a "G" for our last name.

- You will want to make sure it's in the right place/angle etc. and as FLAT as possible on the mug. No edges should be lifting up on the mug.
- Next you will want to make dots ALL around the scrapbook sticker. Follow the directions on the marker packaging to get the paint going. Do some practice dots on some cardboard before hand so you know how much pressure to put down.
- Once ready, start filling in the area around the sticker with TONS of dots. Really fill in the area so no white space is showing.
- Add a second color {or a few more} if you like on top of your first round of dots. BTW - If you mess up your design, just wipe it all away with some rubbing alcohol on a paper towel.
- Once you have the design you want on the mug and it's dry enough - carefully peel off the scrapbook sticker to reveal your design underneath.
- Do more touch ups with the paint pens and if you need to, use some rubbing alcohol on a q-tip for the small spots.
- Next up - the baking step. Make sure your area is well ventilated and turn on your oven to 350.
- Set your mugs inside the oven, on the rake and let them bake for about 30 minutes.
- Once the 30 minutes is up, turn off the oven and let the mugs cool down inside the oven. I left mine in the oven for a few hours.
- When done, remove from oven.
- Wash and then of course, fill and enjoy with your favorite beverage to enjoy.

Grab our favorite books via our Amazon affiliate link! In our Amazon storefront you will find books, toys and craft supplies we absolutely love using for our Glued To My Crafts tutorials!