Get crafty with your kids this summer! Make their own camping mugs with just popsicle sticks, paint and some imagination.


The great outdoors has an irreplaceable charm, one that resonates on a profoundly nostalgic level.
Kids and adults alike can find solace, joy, and a sense of wonder in the simplicity of nature, and what better way to celebrate that connection than with a craft that captures the essence of outdoor adventure?
Our Popsicle Stick Camping Mug craft tutorial is not just a fun and creative project for children, but a keepsake that embodies the spirit of camping!

Inspired by the summer season, today we are sharing our creative version of a Popsicle Stick Camping Mug!
Craft Supplies:
- Jumbo Popsicle Sticks
- School Glue
- Dark Blue Craft Paint
- White Craft Paint
- Large Paint Brush
- Small Paper Plate
- Old Toothbrush
- Baby Wipes
- Paper Craft Scissors
- Blue Cardstock Paper
- Black Cardstock Paper
- Embellishments
Directions:
- First glue your popsicle sticks together to look like a fence. You will want to lay 7 next to each other and follow that up with the remaining two, the other direction to make the mug shape.
- Set aside your newly made shape to let it dry completely.
- Once dry enough, you are ready for paint.
- Go ahead and squirt the blue craft paint on the paper plate.
- Use a paint brush to paint your popsicle stick mug shape completely blue {or honestly – any color you like!}
- Now squirt some white paint on the same paper plate.
- Dip the toothbrush in the white craft paint.
- Use your thumb to “spray” some of the white paint on the popsicle stick shape. You just want to rub your thumb gently over the toothbrush bristles, facing the popsicle stick shape, to make the speckled look on top of the blue paint.
- Repeat until you have the look you like.
- Clean off excess white paint from your finger with a baby wipe.
- Now grab your blue cardstock and scissors.
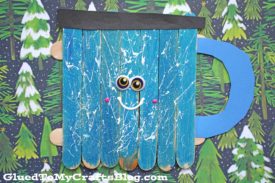
- Cut out a simple mug handle shape from it.
- At this point in time you can also cut out a rectangular “rim” or mug lip from the black cardstock.
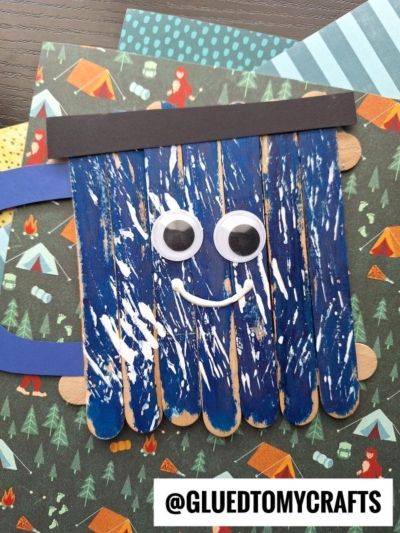
- To finish off your Popsicle Stick Camping Mug – glue on your paper pieces in place, as well as any other embellishments you see fit {like how I did the face on mine!}
- Then display your creative mug piece proudly for all to see! Cheers!
RELATED —> Liquid Chalk & Toothbrushes
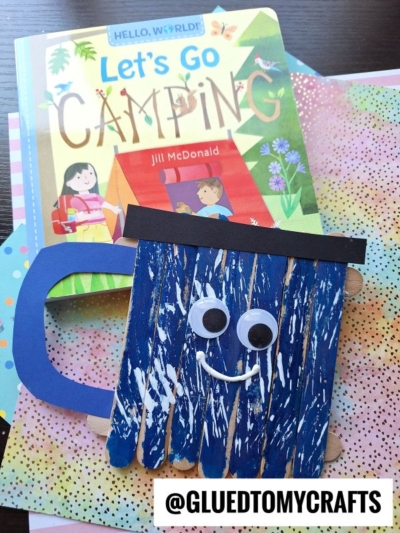
On our website, we LOVE a good kid craft idea for summer! So before you leave our lovely kids craft site, come check out our Pool Float, Food Truck and Smores popsicle stick craft posts!
They won’t disappoint and would pair nicely with today’s popsicle stick camping mug tutorial – hint hint!

Popsicle Stick Camping Mug Craft Idea For Kids
Get crafty with your kids this summer! Make their own camping mugs with just popsicle sticks, paint and some imagination.
Here’s your checklist of supplies to bring this craft to life:
- School Glue
- 1 Old Toothbrush
Prepare your creative haven by laying down a protective cover before the crafting magic begins!
Directions:
- First glue your popsicle sticks together to look like a fence. You will want to lay 7 next to each other and follow that up with the remaining two, the other direction to make the mug shape.
- Set aside your newly made shape to let it dry completely.
- Once dry enough, you are ready for paint.
- Go ahead and squirt the blue craft paint on the paper plate.
- Use a paint brush to paint your popsicle stick mug shape completely blue {or honestly - any color you like!}
- Now squirt some white paint on the same paper plate.
- Dip the toothbrush in the white craft paint.
- Use your thumb to "spray" some of the white paint on the popsicle stick shape. You just want to rub your thumb gently over the toothbrush bristles, facing the popsicle stick shape, to make the speckled look on top of the blue paint.
- Repeat until you have the look you like.
- Clean off excess white paint from your finger with a baby wipe.
- Now grab your blue cardstock and scissors.
- Cut out a simple mug handle shape from it.
- At this point in time you can also cut out a rectangular "rim" or mug lip from the black cardstock.
- To finish off your Popsicle Stick Camping Mug - glue on your paper pieces in place, as well as any other embellishments you see fit {like how I did the face on mine!}
- Then display your creative mug piece proudly for all to see! Cheers!

CLICK HERE TO PRINT THE DIRECTIONS FOR THIS CRAFT
If you've enjoyed our content or have any thoughts to share, we'd love to hear from you! Mention @gluedtomycrafts or tag #gluedtomycrafts on Instagram!