Summer is here, and with it comes long days of fun, creativity, and sun-soaked activities for kids. If you’re looking for a crafty way to combine the relaxed beach vibes with engaging art, this Paint Splat Beach Day Craft is perfect!
Easy to set up and brimming with colorful fun, this activity brings the beach to life on paper while sparking your little one’s imagination!
No need to get sunburned or sand in places you don’t want! Bring the summer fun indoors with FULL paint splat beach day tutorial below!
Craft Supplies:
Before you set up your workspace, make sure you have all the materials you need. Here’s a handy list to get you prepared:
- Free Printable – on our landing page
- Skin Tone Colored Cardstock Paper
- Markers/Crayons/Coloring Pencils
- Scissors
- Glue Stick or School Glue
- Light Brown Construction Paper
- Scrapbook Paper
- Brown Puffy Paint
- Gold Puffy Paint
- Loose Gold Craft Glitter
- Embellishments
Directions:
Before you start, cover your table with a disposable tablecloth or some old newspaper. Paint splat crafts can get a little messy (in the best way possible), so it’s best to prepare in advance to keep clean-up stress-free.
- First things first – download and print the FREE template provided above. Each sheet includes six cutouts for you to use.
- Gather your favorite coloring supplies and start decorating two or more of the body shapes. Get creative and customize each one to reflect your personal style.
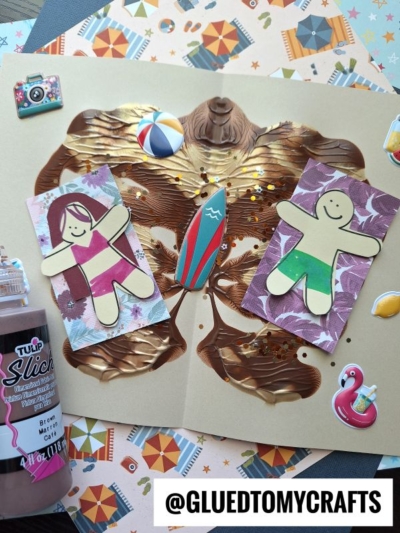
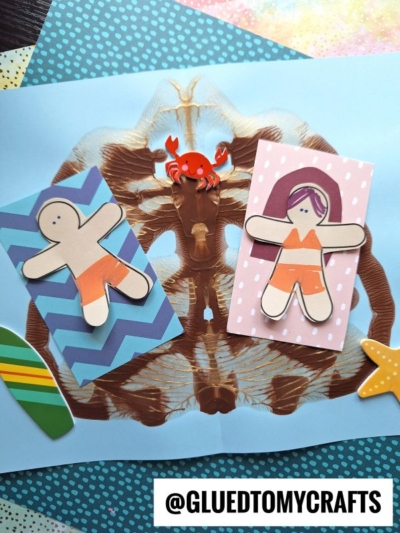
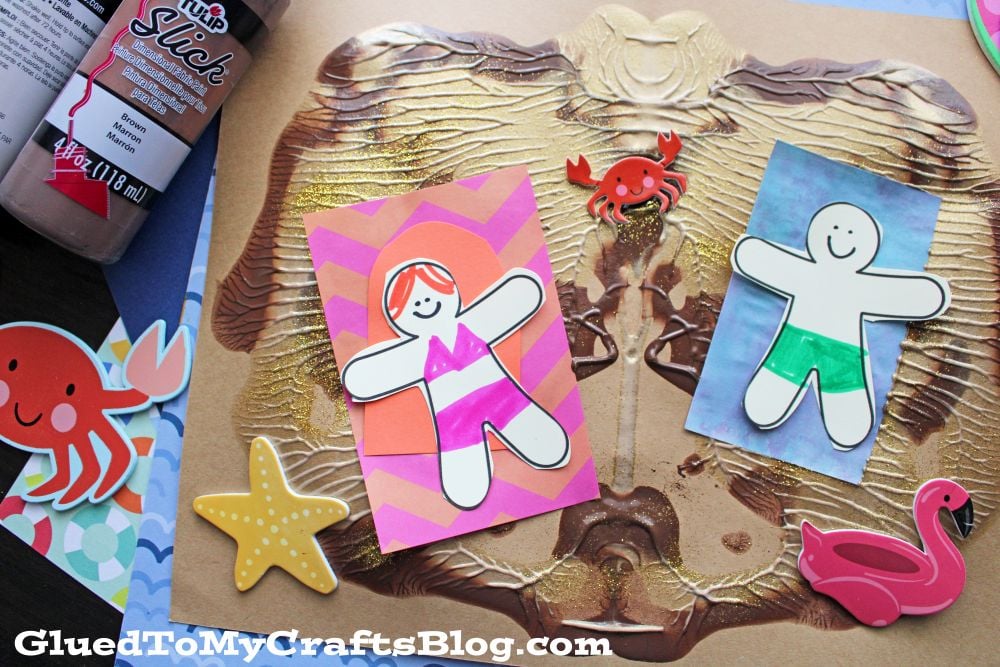
- Once you’re done decorating, carefully cut out the designs using scissors. At this point in time you should cut out TWO large rectangles for the beach blankets. Set all your paper cutouts aside.
- Next up – fold a piece of brown cardstock in half, then open it back up. This crease will act as a guideline when creating your design and ensure symmetry.
- Add blobs of paint to one half of the cardstock. There’s no need to be precise here; the more irregular and vibrant, the better!
- When ready, carefully fold the cardstock back along the crease, sandwiching the paint inside.
- Now comes the fun part! Press down on the paper and gently rub your hand along its surface, smearing the paint inside. When you unfold it, you’ll reveal a symmetrical and surprising splatter design. If desired, shake some gold glitter on top of the “sand” to make it sparkle.
- Next, attach your decorated people cutout{s} to the center of each rectangle cutout from either. Position them so they appear to be relaxing and laying on the beach. Glue those to your paint splatter seen.
- For the finishing touches, add pool-themed stickers, glitter, or rhinestones to make your artwork stand out and shine.
- Once complete, proudly display your beach blanket artwork for everyone to enjoy!
Did your kids create a summer masterpiece? We’d love to see it! Share their artwork on social media with the hashtag #GluedToMyCrafts and inspire other families and little artists to join in the fun.
RELATED —> Tissue Paper & Paper Plate Beach Ball