
This is a great kid craft idea that will keep them entertained for hours. It’s simple to make and they can be as creative as they want with it. Let your kids get creative with this fun dinosaur craft project from us!

Paper Plate and Tissue Paper Covered Dinosaur
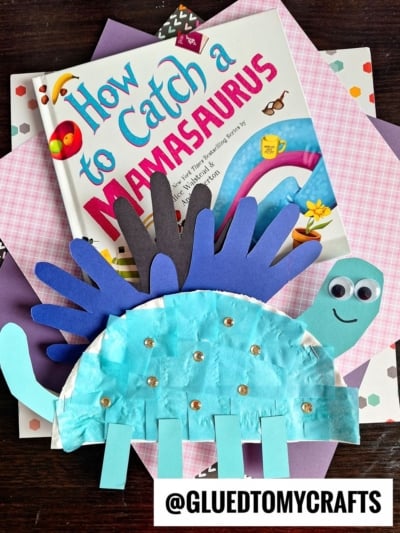
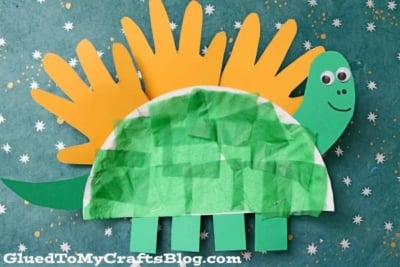
Today’s Paper Plate and Tissue Paper Covered Dinosaur craft idea is simply ROAR-SOME for crafters of ALL ages! My favorite part is the handprint strikes we added along his back!
On that note – what kid doesn’t love dinosaurs? And with this kid craft tutorial being simple to put together – parents and caretakers will love it too!
So don’t “stomp” in frustration on ways to beat the boredom blues today! Grab those craft supplies, check out the full tutorial below and make a one-of-a-kind dinosaur friend with your dino-loving child today!
Happy crafting, my friends! Please don’t forget to share pictures of your handprint and paper plate dinosaur creations by tagging us on Instagram to see!
I just LOVE seeing the inspiration come to life in your home and can’t wait to hear from YOU! #gluedtomycrafts
RELATED: Princess Puppet and Lumberjack Bear

This is a great kid craft idea that is perfect for dinosaur lovers of all ages. It’s simple, easy, and most importantly- lots of fun! Try it out today!
Craft Supplies:
- Large Paper Plate – 1 per craft
- Green Tissue Paper
- School Glue
- Scissors
- Small Wiggle Eyes
- Green Cardstock Paper
- Orange Cardstock Paper
- Yellow Cardstock Paper
- Pencil or Marker
- Stapler
Directions:
- First have your children cut their green tissue paper into small squares {perfect for practicing cutting skills}
- Take your paper plate and cut it into half. Straight up the center to make TWO equal halves.
- Reserve one for your dinosaur craft and save the other for another day {perhaps even using it for our Paper Plate Umbrella craft}
- Now put a good amount of glue all over the paper plate half.
- Have children place the tissue paper on top of the glue, until it’s completely covered.
- Set it aside till the last step.
- Now grab your two sheets of cardstock.
- Out of the green, cut out a long neck, tail and the dinosaur’s legs/feet. Use a Sharpie marker to draw on facial features on the head piece.
- Out of the remaining cardstock paper, you are going to trace and cut out your child’s handprints for the strikes. We did THREE handprint cutouts for ours.
- To finish off the Paper Plate Dinosaur kid craft – simply staple on the cardstock pieces to their designated spots on the paper plate and display proudly for all to see!
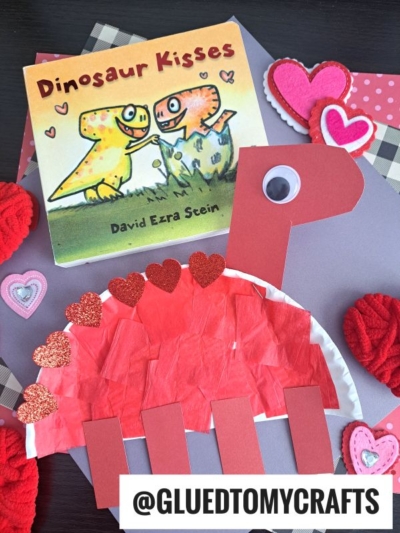
RELATED —> Valentine Dinosaur
AFFILIATE LINK – PAIR OUR CRAFT IDEA WITH THIS BOOK RECOMMENDATION
If you are looking for even MORE easy kid craft ideas, from Glued To My Crafts, be sure to check out these fun posts below!
Tissue Paper Chocolate Chip Cookie
Super Easy Paper Avocado
Popsicle Stick Dinosaur
Cupcake Liner Robots
Sidewalk Chalk Butterfly
Paper Plate Hot Air Balloon
Hatching Baby Dinosaur
Cupcake Liner Dinosaur Card

Paper Plate Dinosaur Craft Idea w/Handprint Spikes
Here’s your checklist of supplies to bring this craft to life:
Prepare your creative haven by laying down a protective cover before the crafting magic begins!
Directions:
- First have your children cut their green tissue paper into small squares {perfect for practicing cutting skills}
- Take your paper plate and cut it into half. Straight up the center to make TWO equal halves.
- Reserve one for your dinosaur craft and save the other for another day {perhaps even using it for our Paper Plate Umbrella craft}
- Now put a good amount of glue all over the paper plate half.
- Have children place the tissue paper on top of the glue, until it’s completely covered.
- Set it aside till the last step.
- Now grab your two sheets of cardstock.
- Out of the green, cut out a long neck, tail and the dinosaur's legs/feet. Use a Sharpie marker to draw on facial features on the head piece.
- Out of the remaining cardstock paper, you are going to trace and cut out your child's handprints for the strikes. We did THREE handprint cutouts for ours.
- To finish off the Paper Plate Dinosaur kid craft – simply staple on the cardstock pieces to their designated spots on the paper plate and display proudly for all to see!

CLICK HERE TO PRINT THE DIRECTIONS FOR THIS CRAFT