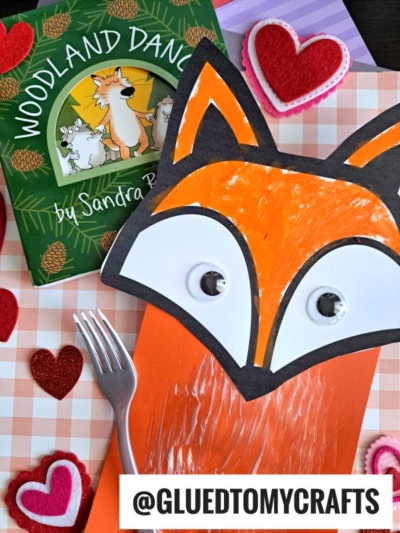
Get creative with the kids this weekend and create a fox with a plastic fork, paint and paper! It's simple, fun, and a great way to keep the little ones busy.

Learn how to make a cute fork painted fox with supplies like cardstock paper, a plastic fork, white craft paint, and more. Get started with the provided fox head printable in this very post!

Are your kids looking for something to do that is both creative and fun? Are they bored of the same old crafts? Why not spark their imaginations with this cute fork painted fox craft idea!
With some patience, creativity, and a few simple materials like paint, cardstock paper, googly eyes — you can create a beautiful artwork as unique as the little artist creating it.
It’s an ideal activity on a rainy day or whenever your kid wants to express themselves through art – perfect for ages 4-7! So grab those supplies today and get crafting with this fork painted fox creation!

Get creative with the kids this weekend and create a fox with a plastic fork, paint and paper! It’s simple, fun, and a great way to keep the little ones busy.
Craft Supplies:
- Fox Head Printable – on our landing page
- White Cardstock Paper
- Orange Crayon
- Scissors
- Orange Cardstock Paper
- White Craft Paint
- Small Paper Plate
- Clean, Plastic Fork
- Glue Stick
- Googly Eyes – two per craft
Directions:
- Start by printing out our “fox head printable” on a single sheet of white cardstock. You’ll need one printable per fox craft.
- Next, grab an orange crayon and color in the fox head on the printable.
- Once colored, carefully cut out the head using scissors. Set the head piece aside and discard the excess paper.
- Take a sheet of orange cardstock and fold it in half horizontally (hamburger style). Use scissors to cut it down the center, creating two equal rectangular pieces. One rectangle will become the fox’s body, while the other will be cut into a tail shape.
- Now it’s time to add some texture! Pour a small amount of white craft paint onto a paper plate (about the size of a quarter).
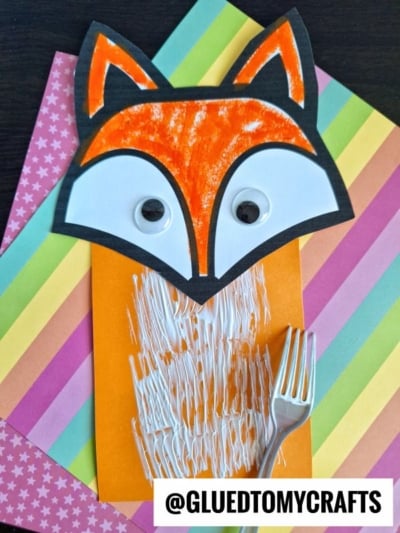
- Using a plastic fork as your paintbrush, dip the fork into the paint and create line strokes across both orange paper pieces. This will give your fox some charming “white fur” details.
- Repeat the strokes until you’re happy with the look.
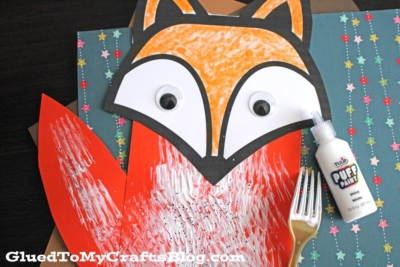
- Once the paint has dried, assemble your fox! Glue the tail to the back of the body and attach the head on top. Don’t forget to glue on the fox’s eyes!
- Allow the entire craft to dry completely before displaying your adorable fox creation with pride.
RELATED —> Paper Bag Fox
If you are looking for even MORE easy kid craft ideas from Glued To My Crafts, be sure to check out these fun posts listed below.
And “if” you decide to make our Fork Painted Orange Fox craft idea, please share a picture on our Facebook page or tag us on Instagram with #gluedtomycrafts for us to see. We love seeing our inspiration come to life!
- Paper Plate Llama
- Chalk Art Hedgehog
- No Place Like Gnome
- Chalk Art Duck In Pond
- Chalk Art Troll Hair
- Thumbprint Ants Picnic
- Fork Painted Bunny
- Fork Painted Tree Craft
- Paper Bag Zebra Puppet

Fork Painted Fox Craft Idea For Kids
Get creative with the kids this weekend and create a fox with a plastic fork, paint and paper! It's simple, fun, and a great way to keep the little ones busy.
Here’s your checklist of supplies to bring this craft to life:
Prepare your creative haven by laying down a protective cover before the crafting magic begins!
Directions:
- First things first - print out our provided "fox head printable" on a single sheet of white cardstock paper. You will need ONE printable per fox craft.
- Next up - grab your orange crayon and color in the head shape on the printout.
- When done - trim out the piece with your scissors. Discard excess paper and set aside the head piece.
- Now grab your sheet of orange cardstock paper and the scissors again.
- Fold the paper in half {hamburger style} and trim it down into two equal sized pieces. Straight up the center to create two rectangle pieces. One piece will be the fox's body, while the second piece you will want to cut into a tail shape.
- Now for the painting step. Grab your white craft paint, the plastic fork and your small paper plate.
- Squirt a small amount of the paint on the paper plate. You don't need a lot. The size of a quarter is a good starting point.
- Grab your fork and rub it in the craft paint.
- Now, using the fork as your paint brush, make several line strokes all over the TWO orange paper pieces to give the fox some white fur.
- Repeat over and over again until you have the look you want.
- When you are done with the painting step, go ahead and glue together the entire craft. Glue the tail to the back, while the head on top. At this point in time you should also glue on his eyes.
- Allow it to dry completely before displaying proudly for all to see!


NEED MORE HELP DOWNLOADING OUR FREE PRINTABLES? PLEASE REFER TO OUR FAQ PAGE
If you've enjoyed our content or have any thoughts to share, we'd love to hear from you! Mention @gluedtomycrafts or tag #gluedtomycrafts on Instagram!