Glued To My Crafts

Join thousands of others who have gotten GLUED to our craft tutorials!

  • Home
  • Privacy Policy
  • Craft Safety Guidelines
  • Craft Themes
    • New Years
    • Valentine’s Day
    • St. Patrick’s Day
    • Spring
    • Easter
    • Mother’s Day
    • Summer
    • Father’s Day
    • Patriotic
    • Halloween
    • Thanksgiving
    • Fall
    • Winter
    • Christmas
    • Snowmen
    • Story Time
  • Favorite Craft Materials
    • Cupcake Liners
    • Torn Paper Crafts
    • Paper Plates
    • Popsicle Sticks
    • Sidewalk Chalk
    • Clothespin Crafts
    • Tulip Puffy Paint
    • Paper Bags
    • Craft Foam Hearts
    • Puffy Paint
  • About Us
  • Most Popular Tutorials

Popsicle Stick Bugs – Ladybug, Butterfly & Bee Craft

When engaging in craft activities, it is important for young children to have adult supervision at ALL times. It is also recommended to use supplies that are suitable for your child's age. Feel free to modify materials or steps to meet your specific requirements. Please refer to our safety guidelines for more information.

As an Amazon Associate I earn from qualifying purchases. This post may contain affiliate links. For more information, please see our disclosure policy.

Popsicle Stick Bugs - Ladybug, Butterfly & Bee Kid Craft Idea

Spring brings warmer weather, blooming flowers, and the perfect opportunity to create colorful crafts with your kids. These adorable popsicle stick bugs are simple to make, budget-friendly, and guaranteed to keep little hands busy for hours.

Whether you’re looking for a rainy day activity or planning a spring-themed party, these DIY insects will buzz their way into your heart!

Popsicle Stick Bugs - Kid Craft

Although I’m personally not a big fan of critters – the little Popsicle Stick Bugs I’m sharing today are ALWAYS welcome in my home!

Craft Supplies:

Before diving into your bug-making adventure, gather these basic supplies:

  • Regular Sized Popsicle Sticks – 12 per bug
  • School Glue
  • Craft Paint
  • Paint Brushes
  • Craft Scissors
  • Cardstock Paper
  • Pen or Pencil

Directions:

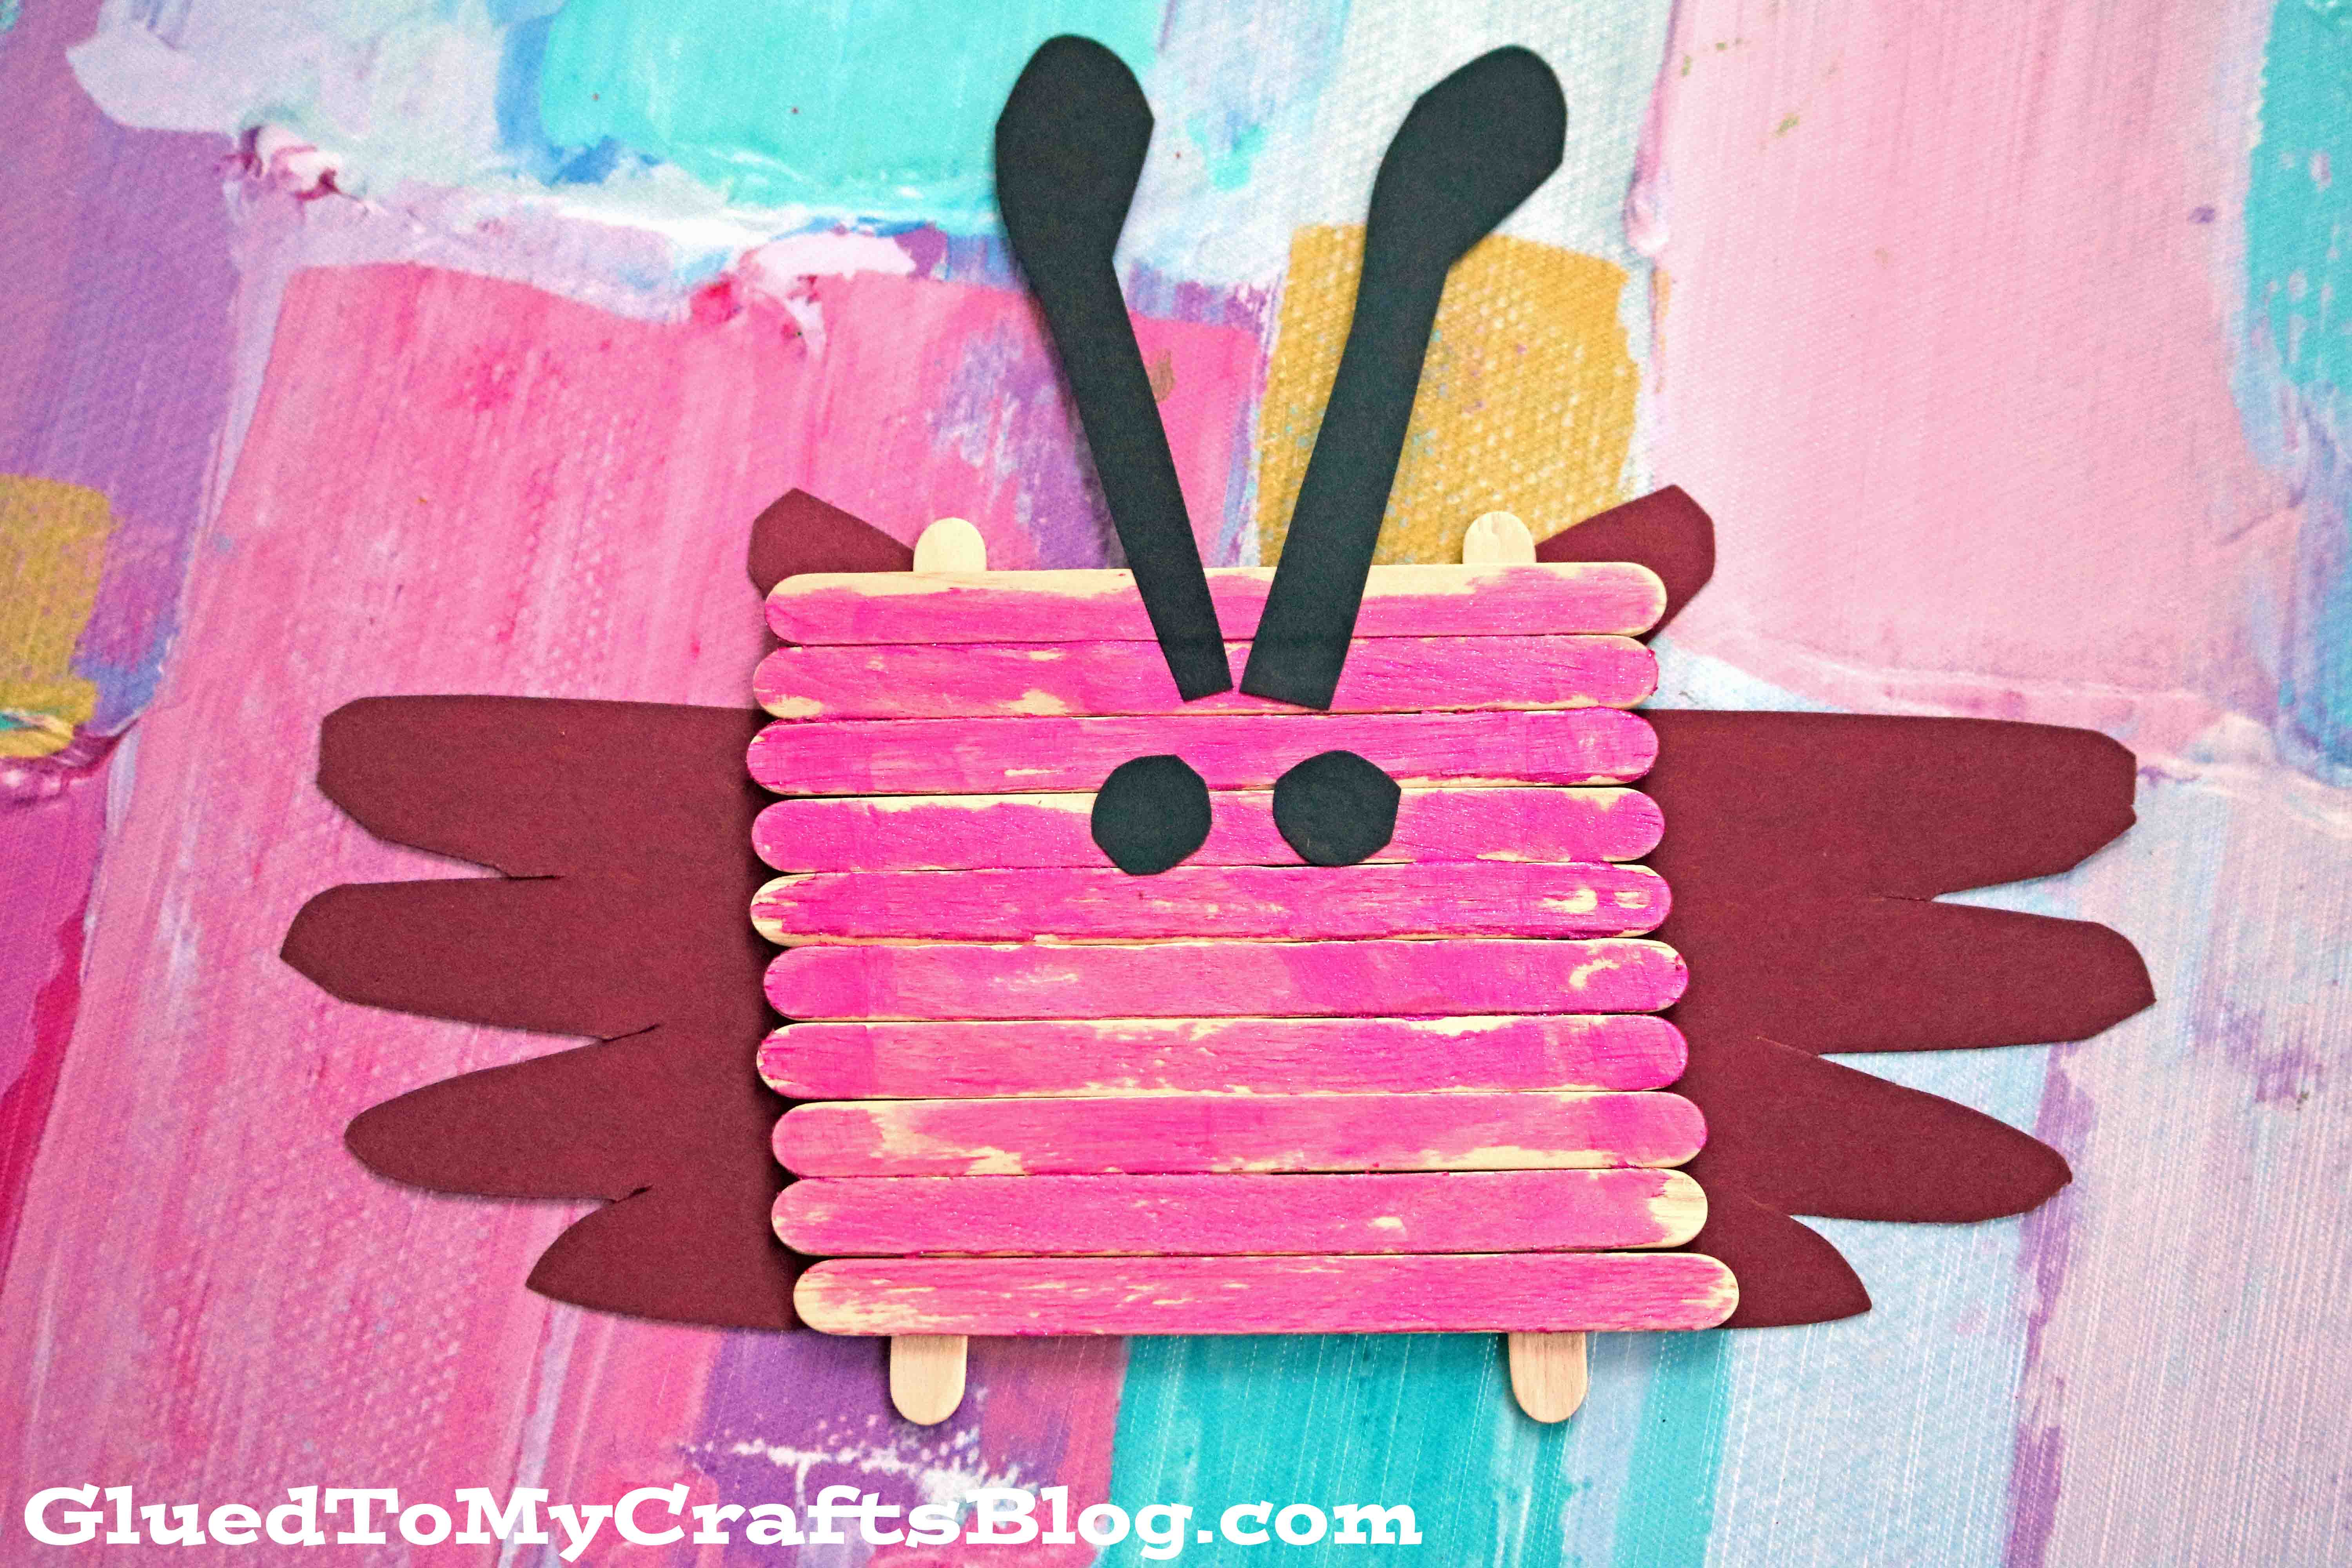
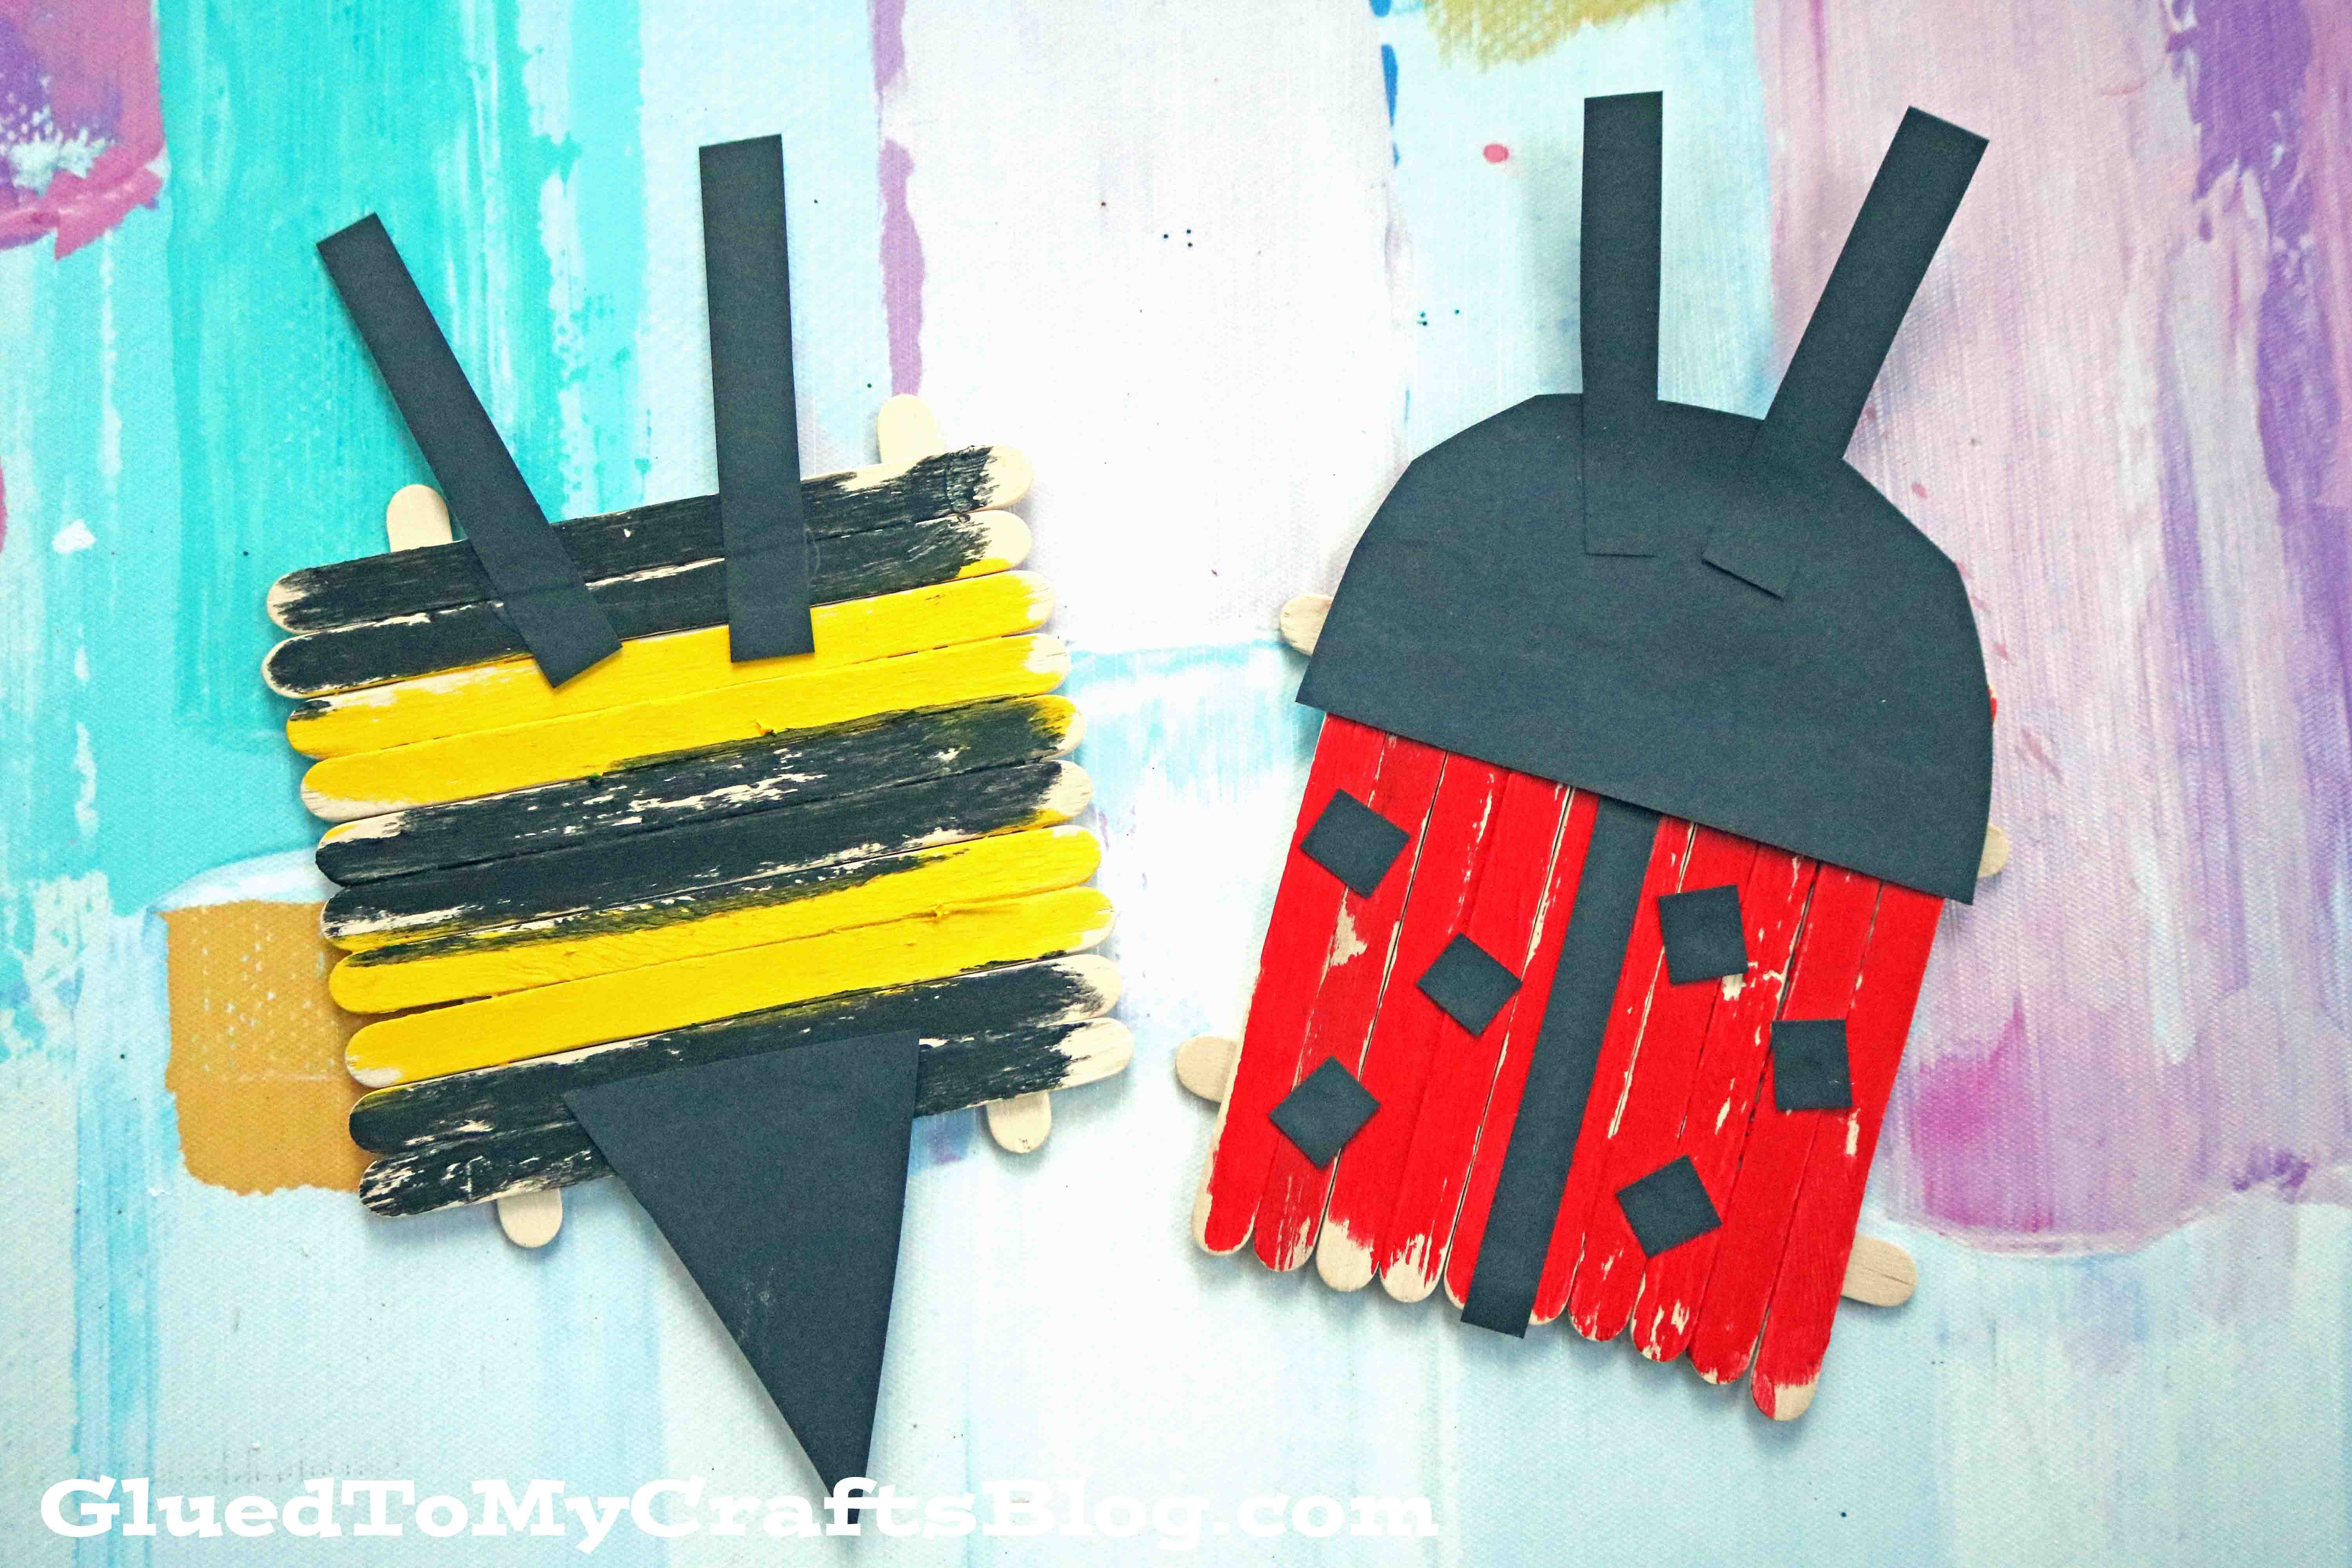
  • First assemble the base of your bugs. Although we did three different bugs – they all had the same basic SQUARE frame shape. For each, simply glue your popsicle sticks together to look like a fence.
  • Set aside to let it dry completely.
  • Next have your child paint the front of the popsicle stick fences. We did one frame in red for a ladybug, yellow/black stripes for a bee and orange for a butterfly.
  • Set aside to let them dry completely.
  • Now cut out the cardstock embellishments to give your pieces life. For the ladybug and bee we just got out antennas, while for the butterfly we traced Lil Man’s hands for the wings.
  • To finish off the Popsicle Stick Bugs craft, glue on the paper embellishments and let it all dry completely, before displaying proudly!

RELATED —> Handprint Ladybug Keepsake

Popsicle Stick Bugs - Kid Craft Popsicle Stick Bugs - Kid Craft

If you are looking for even MORE easy spring themed kid craft ideas from us, be sure to check out these fun posts listed below:

  • Cupcake Liner Bunnies
  • Popsicle Stick Flowers
  • Paper Plate Bird Nest
  • Paper Plate Ladybug
  • Cupcake Liner Umbrellas
  • Potato Stamped Ladybug Cards
  • Cupcake Liner Ladybugs

stacey-signature-2023


Craft Activity Safety Guidelines:

Always Ensure Adult Supervision - Young children should be supervised at all times when engaging in craft activities. This is essential to keep them safe and ensure materials are used correctly. Use Age-Appropriate Supplies - Choose craft supplies that are suitable for your child’s age. Check labels for recommendations and avoid items with small parts or sharp edges for younger children. Modify as Needed - Feel free to adapt materials or steps to meet your child's abilities and safety needs. For example, substitute scissors with safety scissors if necessary. Keep an Eye on Allergies - Be mindful of potential allergens in craft materials like glue, paint, or certain fabrics. Opt for non-toxic and hypoallergenic options whenever possible. Organize and Secure Supplies - Keep all craft tools and materials organized. Store sharp objects, small parts, and potentially hazardous items out of reach when not in use. Following these guidelines will ensure that crafts remain fun, creative, and, most importantly, safe for everyone involved!


OUR PRIVACY POLICY

  • Email
  • Facebook
  • Instagram
  • Pinterest
  • Twitter
  • YouTube

LOOKING FOR SOMETHING?

EXPLORE OUR SITE:

© 2012–2025 Glued To My Crafts
All activities should be supervised by an adult at all times. Please refer to our safety guidelines for more information.


Please note that all the content of the website, including printables, are for classroom and personal use only. This means that any digital item you download from our site can be used for non-commercial use only. We kindly request that you do not reproduce or sell our creations. We appreciate your understanding and cooperation in respecting our content and intellectual property rights.