We think everyone should take some time out of their day to make this beautiful handprint ladybug keepsake – regardless if you love crafting or have very limited artistic skills!

Paper & Pom Pom Ladybug
Creating the perfect keepsake with your little one is such a special thing. It’s an opportunity to capture moments that can be cherished for years to come and this handprint red ladybug tutorial ticks all of those boxes!
This easy-to-create red and black bug art project will not only keep you and your little ones busy on a rainy day, but it’ll also end up as something that can be treasured forever. We think everyone should take some time out of their day to make this beautiful handprint wings on ladybug keepsake – regardless if you love crafting or have very limited artistic skills!
This simple yet adorable ladybug craft only requires basic crafting supplies but will provide hours of delight creating something unique with your little munchkins or closest pals. So grab some paper, small pom poms and our free provided printable and let’s get crafting!!!
RELATED —> Cupcake Liner Ladybugs

Keep your kids busy with this easy and fun handprint ladybug keepsake craft!
Craft Supplies:
- Ladybug Printable {on our spring landing page}
- White Cardstock Paper
- Red Cardstock Paper
- Marker or Pencil
- Paper Scissors
- School Glue
- Small Black Buttons or Pom Poms
- Small Wiggle Eyes – two per ladybug craft
Directions:
- First things first – print out the provided printable, in color, on a single sheet of white cardstock paper. Set it aside.
- Now grab your red cardstock, marker and scissors.
- Trace BOTH of your child’s hands on the red cardstock paper.
- Use scissors to trim out the two traced designs.
- Discard remaining cardstock paper.
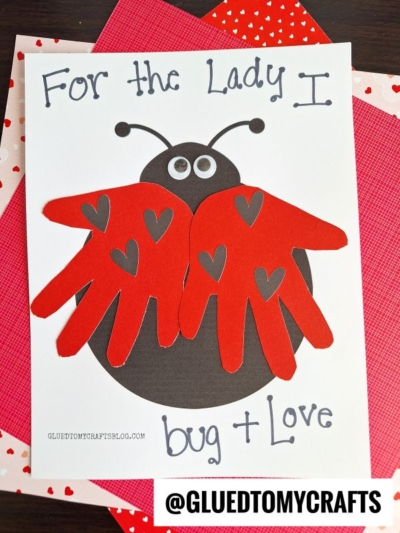
- Go ahead and now glue the handprint cutouts to the center of the printable to create his wings.
- To finish your Handprint Ladybug kid craft, have children glue on wiggle eyes, as well as the black buttons to the wings to complete the look.
- Add other embellishments you see fit, as well as having children sign the bottom.
- Then display/gift away proudly!
RELATED —> Paper Plate Ladybug
You can also change this up by doing your handprints with red craft paint instead! So many ideas on how to take this craft to the next level and we hope the inspiration started right here on Glued To My Crafts!
But wait – don’t click away so fast! Before you go, we want YOU to keep the crafty fun going. Come check out our Paper Handprint Fish craft post and recreate it with your child today, as well!
FOLLOW US ON PINTEREST SO YOU NEVER MISS A NEW TUTORIAL FROM US!
