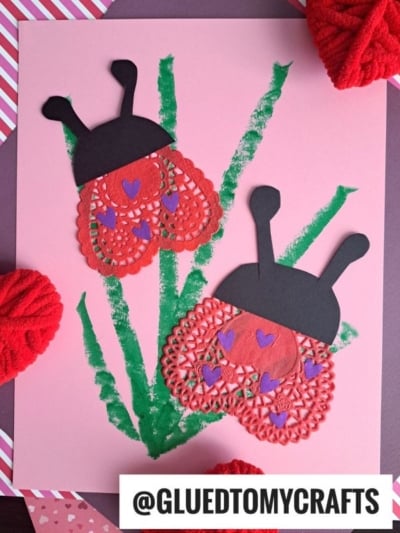
These adorable ladybugs are perfect for Valentine's Day! They're easy to make and use simple supplies that you probably already have on hand.


These adorable ladybug valentines are perfect for kids to recreate during the month of February! They’re easy to make and use simple supplies that you probably already have on hand.
Kids can typically make these DIY ladybug pieces by themselves {mom MIGHT have to step in for a little guidance or directions} but really, these are great for any school age kid to recreate by themselves AND have some awesome “buggy” customization at their fingertips as well.
Whether for a boy or girl – these ladybug cards are sure to be a real winner in the classroom, so be sure to make a whole bunch all at once!!!

No need to be scared of these LOVE BUG CARDS made out of heart doilies! They are super simple to recreate AND are perfect for your Valentine’s Day craft plans!
Craft Supplies:
- Small Red Heart Doilies – two per card
- Cardstock Paper
- Adhesive/Glue Stick
- Scissors
- Large Glue Dots
- Chocolate Heart Candies
- Black Heart Stickers
- Black Marker
Directions:
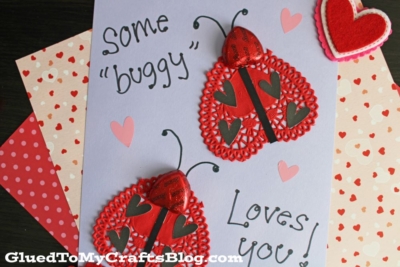
- First things first – use adhesive to adhere your TWO paper heart doilies to the center of a single sheet of cardstock paper.
- Next up – use a large glue dot to add ONE heart shaped chocolate to each heart doily. This is the head of the ladybug.
- Use the marker to draw on antennas coming from each chocolate piece.
- Now take your embellishments and give each doily the look of a ladybug.
- Now the final step – write a punny message around the ladybug designs and add any other embellishments you see fit.
- Then it’s time to gift your beautiful “heart doily ladybug card” creation away proudly!
RELATED —> Handprint Ladybug Keepsake

AFFILIATE LINK – PAIR OUR CRAFT IDEA WITH THE BOARD BOOK “YOU’RE MY LITTLE CUDDLE BUG”
For further inspiration this Valentine’s Day holiday, be sure to check out our Unicorn version of this craft!

Paper Heart Doily Ladybug Valentine's Day Card
These adorable ladybugs are perfect for Valentine's Day! They're easy to make and use simple supplies that you probably already have on hand.
Here’s your checklist of supplies to bring this craft to life:
- Red Paper Heart Doilies
- Cardstock Paper
- Large Glue Dots
- Chocolate Heart Candies
- Embellishments
Prepare your creative haven by laying down a protective cover before the crafting magic begins!
Directions:
- First things first - use adhesive to adhere your TWO paper heart doilies to the center of a single sheet of cardstock paper.
- Next up - use a large glue dot to add ONE heart shaped chocolate to each heart doily. This is the head of the ladybug.
- Use the marker to draw on antennas coming from each chocolate piece.
- Now take your embellishments and give each doily the look of a ladybug.
- Now the final step - write a punny message around the ladybug designs and add any other embellishments you see fit.
- Then it's time to gift your beautiful creation away!

CLICK HERE TO PRINT THE DIRECTIONS FOR THIS CRAFT
If you've enjoyed our content or have any thoughts to share, we'd love to hear from you! Mention @gluedtomycrafts or tag #gluedtomycrafts on Instagram!