When engaging in craft activities, it is important for young children to have adult supervision at ALL times. It is also recommended to use supplies that are suitable for your child’s age. Feel free to modify materials or steps to meet your specific requirements.

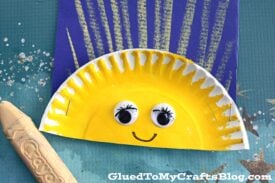
Paper Plate & Chalk Yellow Sunshine Craft
We are hoping to spread TONS of crafty rays of sunshine into your home, with our super easy and extra unique Paper & Sidewalk Chalk Sunshine kids craft tutorial!
Whether for a rainy day craft or just to beat the boredom blues, we hope this “first seen here” tutorial is something you are excited to recreate with your little one today or during the month of MAY!
Now are you ready to make it happen? Well then – keep scrolling for all the details, so you can get started super fast and have it done by the afternoon! Happy crafting, my friends!!!
RELATED —> My Sunshine Keepsake


Looking for a fun and easy craft project to do with your kids? This sidewalk chalk art sunshine craft is perfect!
Craft Supplies:
- Small Paper Plate
- Scissors
- Yellow Craft Paint
- Foam Paint Brush
- Blue Cardstock Paper
- Yellow Sidewalk Chalk
- Baby Wipes
- School Glue or Glue Stick
- Stapler
- Large Wiggle Eyes
- Black Marker
Directions:
- First things first – grab your small paper plate and scissors.
- Cut the paper plate, straight down the center, into TWO equal halves.
- Reserve one half for today’s chalk smiling sunshine craft and save the other for a rainy day when you need some sunshine in your life {maybe for our chalk art troll tutorial!}
- Now grab your yellow colored craft paint and foam paint brush.
- Squirt some paint in the middle of the paper plate half and move it around with the foam paint brush, until the paper plate is completely covered.
- When done painting, set aside the paper plate to allow it to dry completely.
- Now grab your dark blue colored cardstock and the scissors again.
- Fold the blue cardstock paper in half and open it back up.
- Use scissors to again to cut straight up the center, to create two equal pieces.
- Reserve one blue paper piece for today’s craft and save the other for another day.
- Now grab your yellow piece of colored chalk.
- Make several lines, all over the blue cardstock, to recreate sunbeams. Add as much lines {and different colors if you like} or as little as you like.
- When done with the chalk step, go ahead and grab your painted yellow paper plate piece, as well as the stapler.
- Staple the painted paper plate half to the bottom of the blue cardstock with the chalk lines. You want it to look like a sun shape with the beams coming out of it.
- Add any other embellishments you see fit {like the wiggle eyes and drawn on smile with the Sharpie marker.}
- Then display your custom one-of-a-kind paper chalk art sunshine piece proudly for all to see!
- Don’t forget to share pictures of your chalk art smiling sunshine craft with us on your social media sites! #gluedtomycrafts
RELATED —> Popsicle Stick Sunshine
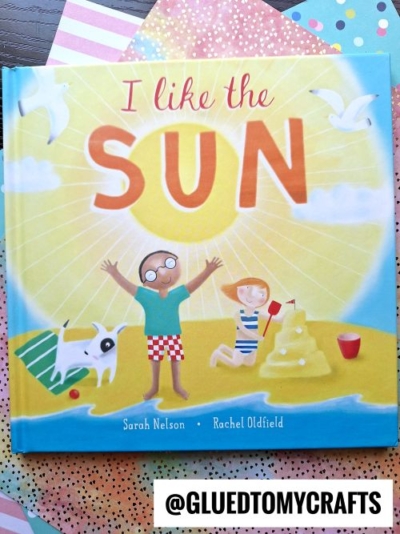
AFFILIATE LINK – PAIR OUR CRAFT IDEA WITH THE “I LIKE THE SUN” BOOK
If you are looking for even MORE easy kid craft ideas that are perfect to spread some cheer on a rainy day, be sure to check out these fun posts listed below! All of which are my personal favorites on our website right now!
- Paper Handprint Owl Hug
- Paper & Chalk Art Cat
- Cute Mouse and Cheese Craft
- Paper Plate Ice Cream Truck
- Paper Plate and Popcorn Sheep
- Chocolate Covered Strawberry
- Washi Tape Lion Mane
- Dad You Are My Sunshine
- Chalk Art Ballerina Dress Craft
FOLLOW US ON PINTEREST SO YOU NEVER MISS A NEW TUTORIAL!


Chalk Art Sunshine Craft Idea For Kids
Craft a chalk art sunshine with your kids! This fun and creative summer DIY project is perfect for little hands and brings brightness to seasonal crafting.
Here’s your checklist of supplies to bring this craft to life:
Prepare your creative haven by laying down a protective cover before the crafting magic begins!
Directions:
- First things first - grab your small paper plate and scissors.1 Small Paper Plate
- Cut the paper plate, straight down the center, into TWO equal halves.
- Reserve one half for today's chalk smiling sunshine craft and save the other for a rainy day when you need some sunshine in your life {maybe for our chalk art troll tutorial!}
- Now grab your yellow colored craft paint and foam paint brush.Craft Paint
- Squirt some paint in the middle of the paper plate half and move it around with the foam paint brush, until the paper plate is completely covered.
- When done painting, set aside the paper plate to allow it to dry completely.
- Now grab your dark blue colored cardstock and the scissors again.Cardstock Paper
- Fold the blue cardstock paper in half and open it back up.
- Use scissors to again to cut straight up the center, to create two equal pieces.
- Reserve one blue paper piece for today's craft and save the other for another day.
- Now grab your yellow piece of colored chalk.Sidewalk Chalk
- Make several lines, all over the blue cardstock, to recreate sunbeams. Add as much lines {and different colors if you like} or as little as you like.
- When done with the chalk step, go ahead and grab your painted yellow paper plate piece, as well as the stapler.
- Staple the painted paper plate half to the bottom of the blue cardstock with the chalk lines. You want it to look like a sun shape with the beams coming out of it.
- Add any other embellishments you see fit {like the wiggle eyes and drawn on smile with the Sharpie marker.}2 Large Wiggle Eyes
- Then display your custom one-of-a-kind paper chalk art sunshine piece proudly for all to see!

CLICK HERE TO PRINT THE DIRECTIONS FOR THIS CRAFT
If you've enjoyed our content or have any thoughts to share, we'd love to hear from you! Mention @gluedtomycrafts or tag #gluedtomycrafts on Instagram!