It’s time to get creative! With this simple handprint craft, your little one can show just how much they appreciate those special in their life!
Could Not Blossom Without You Keepsake
Whether for Mother’s Day, teacher appreciation week or just because, you and your child can make something extra special this spring season with our Handprint “I Couldn’t Blossom Without You” craft idea!
It’s the perfect excuse to get crafty with the kids AND make an adorable paper keepsake that is sure to be loved by whoever receives it! It’s going to BLOSSOM so much fun into your home today!
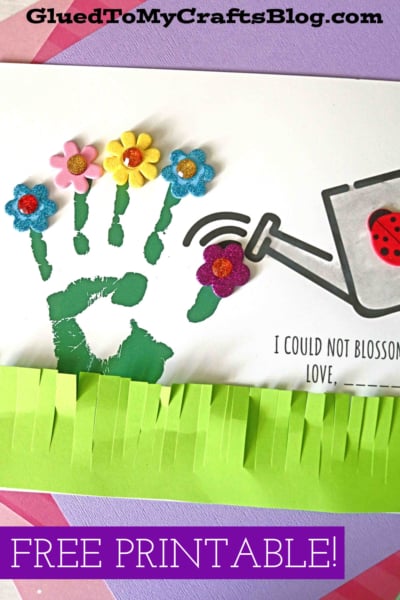
In this post, I’ve included a free printable, so all you need to do is print out the provided file, grab some green craft paint and have your children add their handprint to complete the watering can themed craft.
From there, they {or you} can decorate it with flower stickers and a line of paper green grass on the bottom, to make it appear as so the watering can {in the template} is watering the handprint flower design. I hope you see the vision I was going for! Honestly – this paper spring craft is so simple to recreate, you have NO excuse NOT to do it today!
So what are you waiting for? Download the file below and get to work on making a one-of-a-kind paper handprint piece today.
Then place the finished piece in a beautiful frame or in a scrapbook album, to enjoy for years to come. Whatever you do with it – I hope you enjoy making it with your child!
RELATED —> Thumbprint Cherry Blossom

Your child can make something extra special this spring season with our Handprint “I Couldn’t Blossom Without You” craft idea!
Craft Supplies:
- Blossom Printable – on our landing page
- White Cardstock Paper
- Washable, Green Craft Paint
- Large, Foam Paint Brush
- Small Paper Plate
- Baby Wipes
- Crayons, Markers or Coloring Pencils
- Small Flower Stickers
- Green Cardstock Paper
- Scissors
- Glue Stick
Directions:
- First grab the FREEBIE template listed above in the supply list.
- Now print it out, on a single sheet of white cardstock {or any color you like!} You only need one print per keepsake craft.
- Next grab your green craft paint and paper plate.
- Squirt a small amount of craft paint on the paper plate. Dip the paint brush in it.
- Now pick a hand – any hand!
- Paint the palm and fingers of your child’s hand completely green & working quickly, press it on the side of the printable, right next to the where the watering can is pouring out water. You want it to look like the fingers are flower stems that are being hydrated by the water.
- Be sure to wiggle each finger so the paint really transfers to the paper.
- When ready, lift up their hand and remove excess paint with a few baby wipes & a quick trip to the sink.
- While they are doing that, set aside the printable to let it dry completely.
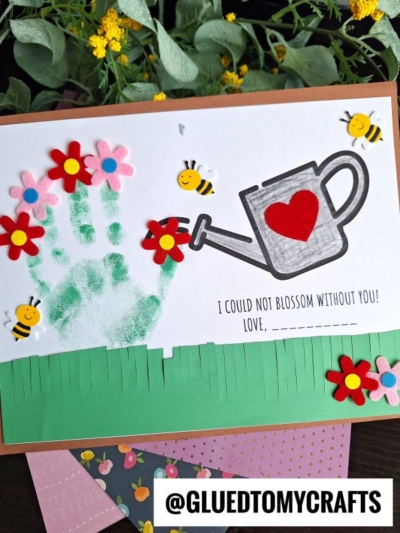
- When ready, it’s time to bring it to life! Start by coloring in the water can in the printable.
- Follow that up by adding the flower stickers {one on each fingertip} to make the flowers.
- Now grab your green cardstock paper and scissors.
- Cut out a 2 inch long strip from the paper. Set aside the remaining paper for another craft {like our bunny in the grass tutorial!}
- Go ahead and now add some “fringe” along that strip to make grass. Use your hands to bend a few pieces, to give it dimension.
- Now finally – glue that piece to the bottom of the decorated printable.
- Add any other embellishments you see fit {like a few more flower or even bee stickers.
- Then display/gift proudly!
RELATED —> Paper Punch Cherry Blossom Tree
Love this flowerpot bloom handprint craft idea? Be sure to check out our Handprint Roundup for even more ideas that can be made into gifts for spring!
My personal fav is our Handprint My Little Love Bird Keepsake post! It’s perfect for spring AND Mother’s Day!
