
If you’re looking for a fun and creative way for your kids to get into the Easter spirit, this paper plate & paint splat baby chick craft is just what you need!

Paint Splat & Paper Plate Chick
Paint splat crafts meet Glued To My Crafts again! Today I’m sharing this “Paper Plate & Paint Splat Baby Chick” kids craft idea that is perfect for the Easter & spring season we are currently in!
I recently took our popular and absolutely favorite paint splat concept and changed it up “again” to make a Paint Splat Yellow Chick come to life within minutes!
And with it my vision turning out as cute as can be, I just had to share with you guys so YOU can recreate it with your child as well!
Like seriously – it’s an adorable “ball of yellow fluff” on paper that literally took THREE craft supplies and less than a handful of steps. Even kids as young as TWO {with some adult help} can make this DIY today!
Anyways… everything you need to know can be found in the full tutorial below. I hope you give it a try today! Happy crafting, my friends! #gluedtomycrafts
RELATED —> Cherry Blossom Popcorn Tree

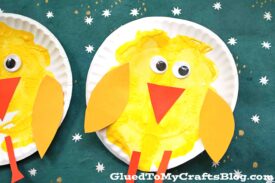
Get crafty with your kids this weekend with this easy paper plate baby chick tutorial! It’s perfect for spring!
Craft Supplies:
- Small Paper Plate
- Yellow Tulip Puffy Paint
- Scissors
- Orange Cardstock Paper
- Yellow Cardstock Paper
- Googly Eyes
- School Glue
- Stapler
- Baby Wipes
Directions:
- Please make sure you have a good working area because paint will more than likely squeeze out of the sides of this craft! Please also keep in mind that it WILL take some extra time {and patience} between the paint & assembling steps!
- First things first – fold your small paper plate in half. Straight up the center so it looks like a taco.
- Unfold the paper plate and squirt yellow craft paint, on one side of it. Be sure to keep the paint inside the paper plate and not place too much down. Three-four LIGHT SQUEEZE squiggles is all you need.
- Once the paint is down, go ahead and re-fold/squish your paper plate together again.
- Be sure to rub your hand all over the folded piece, so the paint will cover your the inside nicely {paint WILL more than likely squeeze out the sides, so be sure to pay attention to that and clean up with baby wipes!}
- Now carefully unfold your piece to reveal your marbled paint design inside.
- Set aside the paper plate piece to allow the paint to dry a few hours before moving onto the next step.
- When the paint is dry {and I repeat – it needs to be DRY!} grab it, along with your scissors and two pieces of cardstock paper.
- Go ahead and cut out wings, a nose, legs etc. for your chick.
- To finish the Paper Plate And Paint Splat Chick – staple and glue your paper pieces to the decorated paper plate.
- Follow that up with the wiggle eyes in the center to really give it life.
- And that’s it! Now display your beautiful new bird friend proudly for ALL to see!
- Don’t forget to snap a few pictures to share with us! #gluedtomycrafts
RELATED —> Popsicle Stick Easter Friends

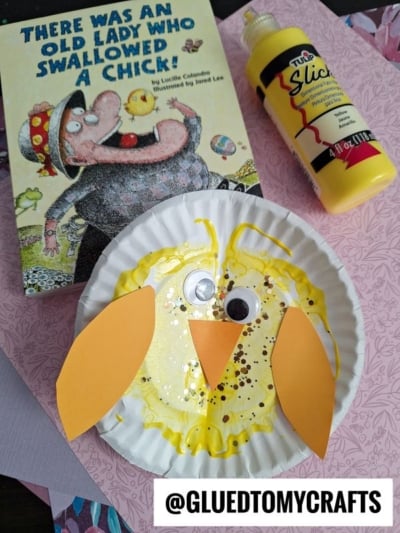
AFFILIATE LINK – PAIR OUR CRAFT IDEA WITH THIS BOOK RECOMMENDATION
Love this paper plate baby chick craft idea? We sure hope you do! So don’t let the fun stop here!!!
Check out our Bunny Cupcake and Chick Handprint Card craft posts for even more crafty inspiration from Glued To My Crafts!

Paint Splat Baby Chick Craft Idea For Spring
Here’s your checklist of supplies to bring this craft to life:
- School Glue
Prepare your creative haven by laying down a protective cover before the crafting magic begins!
Directions:
- Please make sure you have a good working area because paint will more than likely squeeze out of the sides of this craft!
- First things first - fold your small paper plate in half. Straight up the center so it looks like a taco.
- Unfold the paper plate and squirt yellow craft paint, on one side of it. Be sure to keep the paint inside the paper plate and not place too much down. Three-four LIGHT SQUEEZE squiggles is all you need.
- Once the paint is down, go ahead and re-fold/squish your paper plate together again.
- Be sure to rub your hand all over the folded piece, so the paint will cover your the inside nicely {paint WILL more than likely squeeze out the sides, so be sure to pay attention to that and clean up with baby wipes!}
- Now carefully unfold your piece to reveal your marbled paint design inside.
- Set aside the paper plate piece to allow the paint to dry a few hours before moving onto the next step.
- When the paint is dry {and I repeat - it needs to be DRY!} grab it, along with your scissors and two pieces of cardstock paper.
- Go ahead and cut out wings, a nose, legs etc. for your chick.
- To finish the Paper Plate And Paint Splat Chick - staple and glue your paper pieces to the decorated paper plate.
- Follow that up with the wiggle eyes in the center to really give it life.
- And that's it! Now display your beautiful new bird friend proudly for ALL to see!

CLICK HERE TO PRINT THE DIRECTIONS FOR THIS CRAFT