
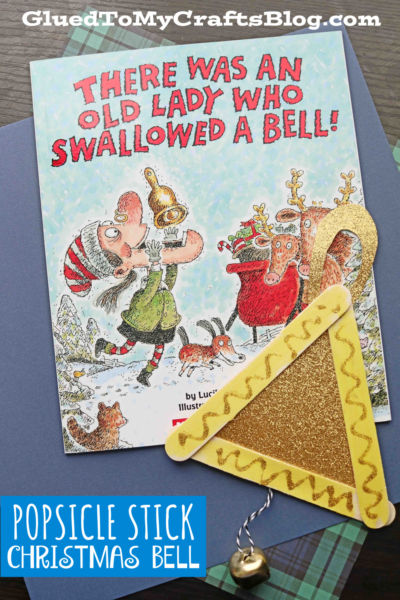
These popsicle stick Christmas bells are a great kids craft idea, and they’re really easy to make too. Plus, they go perfectly with the classic children’s book “There Was An Old Lady Who Swallowed A Bell!” Give it a try this holiday season!
Christmas Bell Made From Craft Sticks
Calling all my crafty friends! Do you need a last minute kids craft idea for Christmas or perhaps something to beat the winter boredom blues with? Well look no further because today’s popsicle stick Christmas bell craft idea is extra special just for YOU!
Not only is our craft stick Christmas bell craft tutorial super simple and fun for all ages but it also goes along perfectly with a Christmas themed STORY TIME event! Pair it along with the wacky {but super fun} holiday children’s book There Was An Old Lady Who Swallowed A Bell! {affiliate link} by Lucille Colandro and you are sure to have a great time!
A wacky new Christmas version of the classic “There Was an Old Lady” song!
This time, the hungry old lady swallows a bell, bows, gifts, a sack, a sleigh, and some reindeer! She’s about to swallow a candy cane for dessert, when she hears a jolly “Ho! Ho! Ho!” Santa Claus is waiting for a ride! Watch what happens when she whistles, with amazing results!
With rhyming text and funny illustrations, this lively version of a classic song will appeal to young readers with every turn of the page–a fun story for Christmastime!
This is a wonderful companion to Colandro and Lee’s other Old Lady books!
So why does the old lady swallow a bell? Well – you will have to read the book to find out and celebrate with our popsicle stick bell craft afterwards! You can find ALL the details below in the full tutorial!
Happy crafting my friends! Don’t forget to share pictures with us your child’s Christmas bell made from popsicle sticks, on our Facebook page! #gluedtomycrafts
RELATED: Wood Slice Gnome and Popsicle Stick Yeti
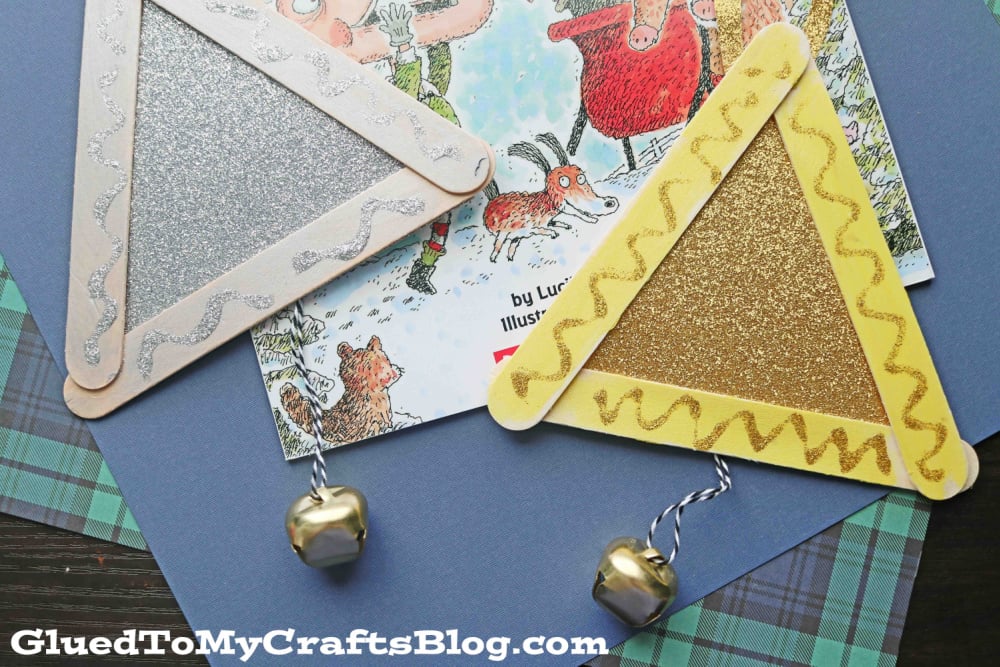
These popsicle stick Christmas bells are a great kids craft idea, and they’re really easy to make too!
Craft Supplies:
- Jumbo Popsicle Sticks – 3 per craft
- School Glue
- Choice of Cardstock Pape
- Craft Scissors
- Twine/String
- Small Craft Bell {adult supervision!}
Directions:
- First grab three popsicle sticks {three per bell} and glue them together to look like a triangle.
- Set aside to let it dry completely.
- At this point in time, children can also paint their “bell” if they like!
- While those are drying, grab your cardstock paper and cut a triangular shape that will be placed within the popsicle stick design.
- At this time, you should also cut out a “loop” for the bell to hang from, as well as cutting a piece of string and stringing your bell on it.
- To finish off the Popsicle Stick Christmas Bell – have children glue their paper pieces in place, as well as gluing the bell piece in place.
- Follow that up by adding other embellishments they see fit to complete the look.
- Once done, set aside to let it dry completely before displaying proudly!
- Don’t forget to share pictures with us on your various social media sites! #gluedtomycrafts
RELATED —> Popsicle Stick Christmas Trucks

AFFILIATE LINK – PAIR OUR CRAFT IDEA WITH THE “THERE WAS AN OLD LADY WHO SWALLOWED A BELL” BOOK
Now don’t let the crafty fun stop here!!! Although this popsicle stick bell tutorial should be made right away, you should also come check out our Egg Carton Bells and Christmas Trains craft tutorials, as well!

Popsicle Stick Christmas Bell Craft
Here’s your checklist of supplies to bring this craft to life:
- 3 Jumbo Popsicle Sticks
- Cardstock Paper
- Twine or Ribbon
- 1 Small Craft Bell
Prepare your creative haven by laying down a protective cover before the crafting magic begins!
Directions:
- First grab three popsicle sticks {three per bell} and glue them together to look like a triangle.
- Set aside to let it dry completely.
- At this point in time, children can also paint their "bell" if they like!
- While those are drying, grab your cardstock paper and cut a triangular shape that will be placed within the popsicle stick design.
- At this time, you should also cut out a "loop" for the bell to hang from, as well as cutting a piece of string and stringing your bell on it.
- To finish off the Popsicle Stick Christmas Bell – have children glue their paper pieces in place, as well as gluing the bell piece in place.
- Follow that up by adding other embellishments they see fit to complete the look.
- Once done, set aside to let it dry completely before displaying proudly!


CLICK HERE TO PRINT THE DIRECTIONS FOR THIS CRAFT