
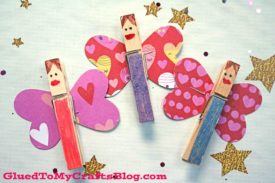
These easy wood clothespin fairies are the perfect craft project for kids of all ages!
They’re simple to make and so much fun to decorate with various craft embellishments.

Clothespin Fairy Puppet
Inspired by the popularity of my recent Popsicle Stick Garden Fairies tutorial, today’s Clothespin Fairies art project idea is for the crafty little girls in your life!
Today’s tutorial is absolutely PERFECT to celebrate the glorious spring weather outside OR any day of the year really – these beautiful creations can be used in home decor or in your child’s creative imaginative play.
So enough chit chat from me – let’s grab our supplies and throw some pixie dust in the air as we make these adorable & completely customizable fairies together! Then display as is OR set up shop for some “fairy” playtime in the living room. Whatever you do – you AND your child have fun with it! Happy crafting my friends!
RELATED —> Chalk Art Fairy

These easy and adorable Wood Clothespin Fairies make perfect craft ideas for kids. They’re simple enough for even the youngest crafters, but still charming and fun.
Craft Supplies:
- Wooden Clothespins – 1 per craft
- Cardstock or Scrapbook Paper
- School Glue
- Paint Pens {or craft paint & paint brushes}
- Heart Paper Craft Punch
- Embellishments
Directions:
- First have children punch out TWO hearts for their fairy. This will be the wings. Repeat for each fairy you want to make.
- Now grab your paint pens and draw on a face, hair and of course – a nice pretty dress along one side of the clothespin {see my picture for example}
- At this point in time, they should also paint on other embellishments that give the “glamorous” look.
- To finish the clothespin fairies, have children glue on the hearts for the wings on the other side of the clothespin.
- Add other embellishments {like scrapbook stickers, glitter, rhinestones} that they see fit to really make it their own.
- Then display and play with proudly!
RELATED —> Pumpkin Fairy House
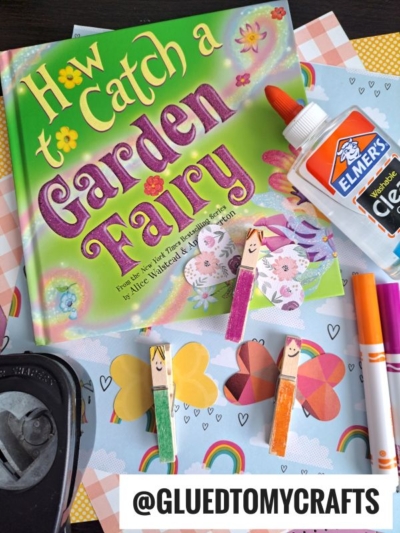

AFFILIATE LINK – PAIR OUR CRAFT IDEA WITH THE “HOW TO CATCH A GARDEN FAIRY” BOOK
If you are looking for even MORE easy craft ideas, from Glued To My Crafts, be sure to check out these fun posts listed below:
- Popsicle Stick Apple
- Paper Plate Sloth
- Paper Bag Unicorn
- Clothespin Leaf Fairies
- Wooden Spoon Fairies
- Valentine Fairy House
- Christmas Fairy House
- Magical Fairy Crafts For Kids

Wood Clothespin Fairy Craft Idea For Kids
Here’s your checklist of supplies to bring this craft to life:
- Cardstock Paper
- Wooden Clothespins
- Embellishments
Prepare your creative haven by laying down a protective cover before the crafting magic begins!
Directions:
- First have children punch out TWO hearts for their fairy. This will be the wings. Repeat for each fairy you want to make.
- Now grab your paint pens and draw on a face, hair and of course – a nice pretty dress along one side of the clothespin {see my picture for example}
- At this point in time, they should also paint on other embellishments that give the “glamorous” look.
- To finish the clothespin fairies, have children glue on the hearts for the wings on the other side of the clothespin.
- Add other embellishments {like scrapbook stickers, glitter, rhinestones} that they see fit to really make it their own.
- Then display and play with proudly!
Grab our favorite books via our Amazon affiliate link! In our Amazon storefront you will find books, toys and craft supplies we absolutely love using for our Glued To My Crafts tutorials!