
We are not slow-poking around here on Glued To My Crafts! The crafty fun just keeps coming for the new year!
Today we are sharing another new kid craft tutorial and we hope you LOVE our Paper Plate Sloth as we much as we do!

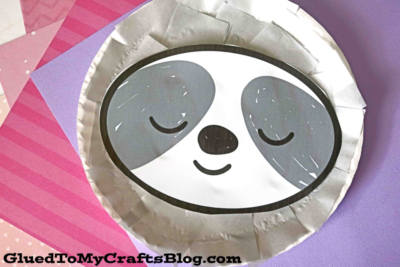
Sloth Paper Plate Craft
Sloths seem to be making a HUGE impression this year. I’ve seen so much cute merchandise the last few days, at various stores, I just couldn’t help myself and had to join the “trend” as well!
As you probably already know, paper plates have always been a HUGE staple in our tutorials throughout the years. They are pretty much the “craft supply” that BUILT Glued To My Crafts from the ground up.
Paper plates {in all sizes and shapes!} are readily available at many stores and for a pack of 100, you typically only pay around $5 for the bundle. With that price and that amount of paper plates, the possibilities are simply endless {especially with the help of us here at GTMC!}
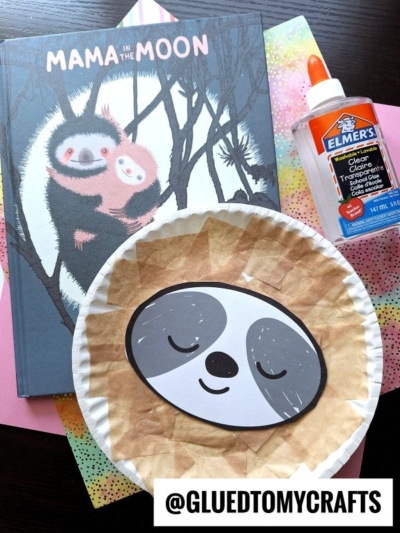
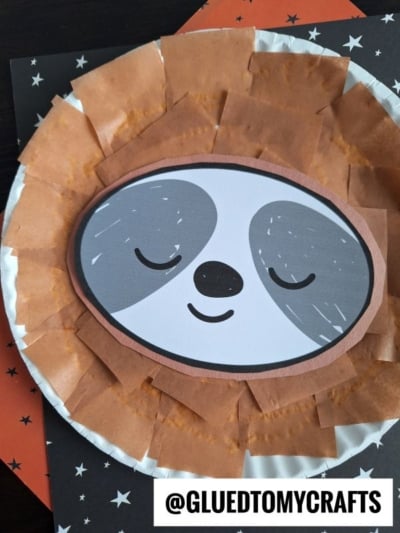
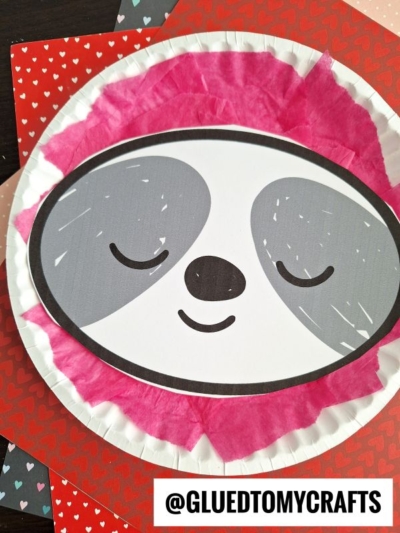
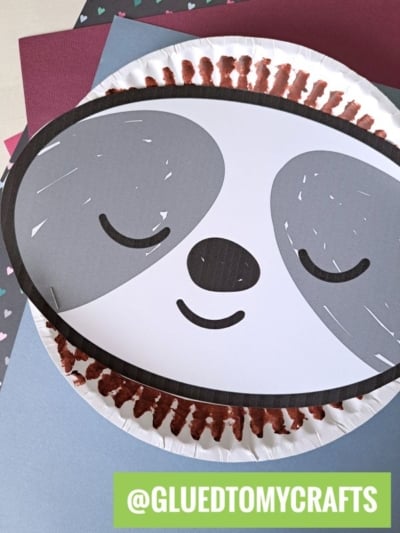
Anyways – today’s sloth kids craft idea involves taking a plain paper plate, tissue paper and some cardstock paper to bring it to life. That’s it! Plus with the help of us, I’ve even included a free printable for you to take advantage of, making it even more possible for you to tackle it with your child today!
So on that note, although sloths are typically slow – this idea is NOT! It’s super easy and rather fast to recreate. Just cut, paste and admire! Just keep scrolling to see how I pulled together so you can make it happen today as well! Happy crafting, my friends! #gluedtomycrafts
RELATED —> Popsicle Stick Sloth


If you’re looking for an easy craft idea for kids, look no further than this paper plate sloth! Your little ones will love bringing this adorable creature to life.
Craft Supplies:
- Large Paper Plate
- Gray or Tan Tissue Paper
- Scissors
- White Cardstock Paper
- Sloth Printable – on our landing page
- School Glue
Directions:
- First things first – grab the tissue paper and cut a handful of small squares out.
- Grab the paper plate. Covered it entirely in school glue.
- Next, have children place the tissue paper squares all over the glue covered paper plate, until it’s completely covered.
- Once done, set aside.
- Now grab the printable and your scissors.
- Cut out the sloth face design from the printable.
- Discard excess paper.
- Finally – to assemble the paper plate sloth – have children glue the cardstock piece in the center of the tissue paper covered paper plate.
- At this point in time you can add any other embellishments you see fit.
- Then set aside to let it dry completely, before displaying proudly for ALL to see!
RELATED —> Cupcake Liner Sloth Cards
Roll up your sleeves and join us in the crafty fun today!
We have SEVERAL different craft tutorials that are sure to make you and your child’s day extra fun! Just check out our Paint Splat Butterflies, Thumbprint Smart Cookie and Loads of Love Truck craft tutorials to see what I’m talking about.
All three of these crafty ideas from us won’t disappoint and would pair nicely with today’s paper plate sloth tutorial – hint hint!

Paper Plate Sloth Craft Idea For Kids
Here’s your checklist of supplies to bring this craft to life:
- 1 Scissors
- 1 School Glue
Prepare your creative haven by laying down a protective cover before the crafting magic begins!
Directions:
- First things first - grab the tissue paper and cut a handful of small squares out.
- Grab the paper plate. Covered it entirely in school glue.
- Next, have children place the tissue paper squares all over the glue covered paper plate, until it's completely covered.
- Once done, set aside to let it dry.
- Now grab the printable and your scissors.
- Cut out the sloth face design from the printable.
- Discard excess paper.
- Finally - to assemble the paper plate sloth - have children glue the cardstock piece in the center of the tissue paper covered paper plate.
- At this point in time you can add any other embellishments you see fit.
- Then set aside to let it dry completely, before displaying proudly for ALL to see!


NEED MORE HELP DOWNLOADING OUR FREE PRINTABLES? PLEASE REFER TO OUR FAQ PAGE