Painting is a great way for kids to express their creativity, but sometimes it’s nice to mix things up a bit! With this homemade puffy paint recipe, your child can still paint like they normally would, but the final step will create a cool textured effect on paper.
This kid-friendly craft is super easy to make and only requires a few household ingredients. Plus, it’s an inexpensive way to keep your little ones entertained on a rainy day.
So gather up your supplies and get ready to add some dimension to your child’s artwork!
Shaving Cream Puffy Paint Recipe For Crafts
This homemade puffy paint recipe is so easy to make and it’s a great kids craft idea!
You can still paint like you normally would, but the final step will create a cool textured effect on paper.
All you need is some shaving cream, food coloring, and glue. Simply mix them all together and you’re ready to start painting! The best part is that this puffy paint recipe is super versatile. You can use any color combination you like, and you can even add in glitter or other embellishments to really make your paintings pop. So grab your supplies and get ready to have some fun!
Ready to make it in your home today? Just check out our tutorial below and recreate some of your own puffy paint with very basic home items! Happy crafting, my friends! #gluedtomycrafts
RELATED —> Puffy Paint Brains On Paper


This is a craft idea that kids of all ages will enjoy. So gather up your supplies and get ready to have some fun!
Craft Supplies:
- Muffin Tin or Small Ceramic Bowls
- White Shaving Cream
- Basic Elmer’s School Glue
- Food Coloring
- Foam Paint Brushes
- optional materials – paper plates or white cardstock paper
Directions:
- First grab your choice of container, school glue and shaving cream.
- Pour equal amounts of glue and shaving cream into the dish.
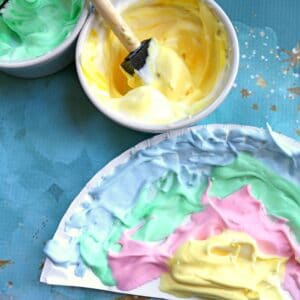
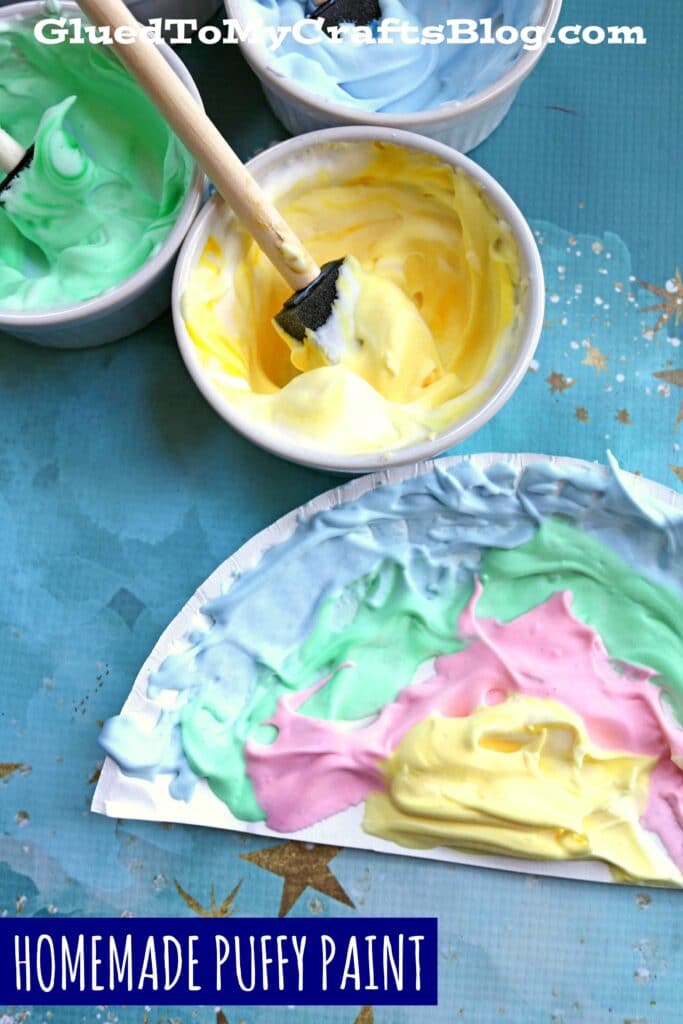
- Now grab your foam paint brush and choice of color in food coloring.
- Add one to two drops of the food coloring into the glue/shaving cream mixture. Just keep in mind that the puffy paint will dry a darker shade than what it is in it’s “wet” state.
- Now take your foam paint brush and start mixing everything together until it’s a frosting consistency.
- And that’s basically it! You are ready to use it as paint.
- Now repeat the above steps for each color you want to make today.
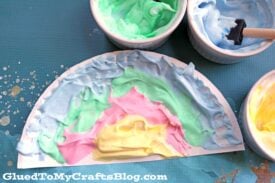
- As a fun craft idea, you can cut a large paper plate in half and use your newly made puffy paint to make a rainbow design.
- When done “painting” with your paint, simply set aside your artwork piece to allow it to dry completely.
- Unfortunately the paint can’t be stored after it’s made but you should be able to rinse it out off the container easily with a little dish soap and warm water.
RELATED —> Puffy Paint Leprechaun Beard

If you enjoyed this DIY homemade puffy paint craft post, you may also enjoy these kid friendly craft ideas listed below from us!
- Fly Swatter Painting
- Recycled Egg Carton Tree
- Puffy Paint Ghost
- Pom Pom Carrot Patch Painting
- Paint Splat Polar Bear
- Kool-Aid Liquid Sidewalk Chalk
- Puffy Paint Watermelon Slices
- Fork Painted Butterfly

Homemade Puffy Paint Recipe
Here’s your checklist of supplies to bring this craft to life:
- Muffin Tin or Small Ceramic Bowls
Prepare your creative haven by laying down a protective cover before the crafting magic begins!
Directions:
- First grab your choice of container, school glue and shaving cream.
- Pour equal amounts of glue and shaving cream into the dish.
- Now grab your foam paint brush and choice of color in food coloring.
- Add one to two drops of the food coloring into the glue/shaving cream mixture. Just keep in mind that the puffy paint will dry a darker shade than what it is in it's "wet" state.
- Now take your foam paint brush and start mixing everything together until it's a frosting consistency.
- And that's basically it! You are ready to use it as paint.
- Now repeat the above steps for each color you want to make today.
- As a fun craft idea, you can cut a large paper plate in half and use your newly made puffy paint to make a rainbow design.
- When done "painting" with your paint, simply set aside your artwork piece to allow it to dry completely.

CLICK HERE TO PRINT THE DIRECTIONS FOR THIS CRAFT