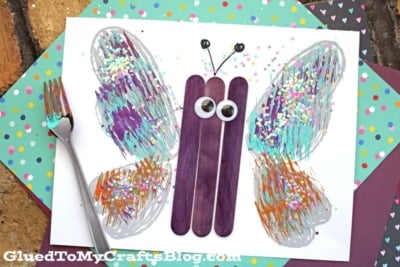
Are you looking for an easy and creative project to keep the kids occupied? Look no further than this fun fork-painted butterfly craft!
It not only encourages their imagination, but also develops fine motor skills. Plus, there are so many ways to customize it – let them go wild with bright colors and crazy patterns or stick with a classic look.
Whatever your child creates is sure to turn out beautiful. Perfect for classrooms and homes alike, this fork painted butterfly craft is guaranteed to be a hit with both teachers and students!
Just keep on scrolling for the full tutorial AND free provided printable! HAPPY CRAFTING!
RELATED —> Craft Ideas To Do This May
Even the simplest things can be turned into something beautiful with a little creativity! So grab some paint and a plastic fork so you can recreate this beautiful BUTTERFLY craft with your child today!
Craft Supplies:
- Plastic Fork
- Craft Paint – two or three different colors
- Small Paper Plate
- White Cardstock Paper
- Butterfly Printable {on our spring landing page}
- Loose Craft Glitter
- Jumbo Popsicle Sticks – three per craft
- School Glue
- Googly Eyes
- Sharpie Marker
Directions:
- First things first – print out the blank wing template, listed above, on a single sheet of white cardstock paper. You only need ONE print per butterfly craft.
- Next up – squirt a small amount of each of your craft paints on your paper plate.
- Now take your fork, which is now your paint brush, to make the wings come to life on your printable. Just dip in the paint and then on the printable, right inside the wings. Repeat. You will want to stay within the printed design with your paint.
- When done painting, shake some loose craft glitter on top of the wet paint for some dimension and extra sparkle.
- Go ahead and shake off the excess when done.
- Finally – the last step of this fork painted butterfly craft is to glue on THREE jumbo popsicle sticks, right next to each other, in the center of the painted design. This is now the body of the butterfly.
- Follow that up by gluing on the wiggle eyes and drawing on the antennas.
- When done decorating the paper, set it aside to let it dry completely before displaying proudly!
RELATED —> Paper Plate Caterpillars
We want YOU to check out our super popular Handprint Butterfly, Bunny Cupcake and Bunny House craft posts! Then pair all three of these unique craft ideas with today’s easy butterfly fork painting tutorial for an epic day!
We also LOVE talking crafts with our lovely readers. Come join our private Facebook group where we chit chat, share and laugh together! Everyone is welcomed so come join the fun and share their craft creations!!! #gluedtomycrafts
Fork Painted Butterfly Craft Idea
Here’s your checklist of supplies to bring this craft to life:
Prepare your creative haven by laying down a protective cover before the crafting magic begins!
Directions:
- First things first - print out the blank wing template, listed above, on a single sheet of white cardstock paper. You only need ONE print per butterfly craft.Cardstock Paper
- Next up - squirt a small amount of each of your craft paints on your paper plate.Craft Paint
- Now take your fork, which is now your paint brush, to make the wings come to life on your printable. Just dip in the paint and then on the printable, right inside the wings. Repeat. You will want to stay within the printed design with your paint.
- When done painting, shake some loose craft glitter on top of the wet paint for some dimension and extra sparkle.Loose Craft Glitter
- Go ahead and shake off the excess when done.
- Finally - the last step of this fork painted butterfly craft is to glue on THREE jumbo popsicle sticks, right next to each other, in the center of the painted design. This is now the body of the butterfly.3 Jumbo Popsicle Sticks
- Follow that up by gluing on the wiggle eyes and drawing on the antennas.Googly Eyes
- When done decorating the paper, set it aside to let it dry completely before displaying proudly!


NEED MORE HELP DOWNLOADING OUR FREE PRINTABLES? PLEASE REFER TO OUR FAQ PAGE


