
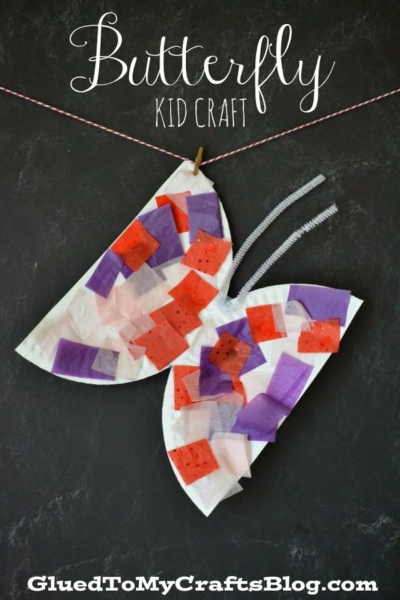
This fun paper plate butterfly craft is perfect for kids of all ages! It’s easy to make and a great way to teach them about butterflies.

Butterfly Craft Made With A Paper Plate
Are you looking for a fun, creative craft idea to keep kids busy and learning? Look no further than this paper plate butterfly craft idea!
Not only is it easy to make with supplies most of us have at home, but it’s also incredibly versatile. Whether you’re a teacher wanting an engaging lesson plan for your classroom or a mom crafting projects with her children, this paper plate and tissue paper butterfly is perfect!
Everyone will have fun designing their own unique butterflies using different colors and shapes cut out of tissue paper. These colorful creations can be hung up in windows or on bulletin boards around the house – guaranteed to bring some extra sunshine into any room!
If you would like to recreate it with your child today, find all the details below! Happy crafting, my friends! #gluedtomycrafts
RELATED —> Paint Splat Butterflies

This is an easy crafting activity that encourages creative expression while letting your little ones learn more about the wonders of nature. So grab some paper plates and get ready to start creating these beautiful butterflies with your child today!
Craft Supplies:
- Tissue Paper {2-3 different colors!}
- Cardstock Paper
- Large Paper Plate
- School Glue
- Pipe Cleaner
- Scissors
- Stapler
Directions:
- First cut your large paper plate in half.
- Stapler the two halves together, facing the opposite direction now, to look like a butterfly.
- Fold a pipe cleaner in half and stapler to the paper plate. This is the antennas of the butterfly.
- Cut your tissue paper into small squares.
- Put a good layer of glue all over the paper pieces.
- Have your child stick the tissue paper on the glue, until the butterfly is completely covered.
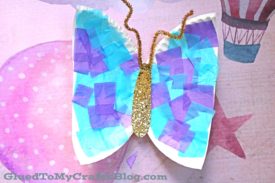
- Grab your gold cardstock and cut out a center piece for the body of the butterfly.
- Staple it to the paper plate piece.
- Let your paper plate rainbow colored butterfly project dry completely before displaying proudly for all to see!
RELATED —> Handprint Butterfly
If you enjoyed this paper butterfly craft post, you may also enjoy these spring themed kid friendly crafts from Glued To My Crafts:
- Clothespin Flowers
- Balloon Butterfly Cards
- Butterfly Keepsake
- Clothespin Bunnies
- Sidewalk Chalk Butterfly
- Footprint Butterfly
- Popsicle Stick & Torn Paper Butterfly

Paper Plate Butterfly Craft Idea
Here’s your checklist of supplies to bring this craft to life:
Prepare your creative haven by laying down a protective cover before the crafting magic begins!
Directions:
- First cut your paper plate in half. Straight up the center to create two equal pieces.
- Now staple the two halves together, facing the opposite direction now, to look like a butterfly.
- Fold a pipe cleaner in half and stapler to the paper plate. This is the antennas of the butterfly.
- Cut your tissue paper into small squares.
- Put a good layer of glue all over the paper pieces.
- Have your child stick the tissue paper on the glue, until the butterfly is completely covered.
- Grab your gold cardstock and cut out a center piece for the body of the butterfly.
- Staple it to the paper plate piece.
- Let your paper plate butterfly project dry completely before displaying proudly for all to see!

CLICK HERE TO PRINT THE DIRECTIONS FOR THIS CRAFT