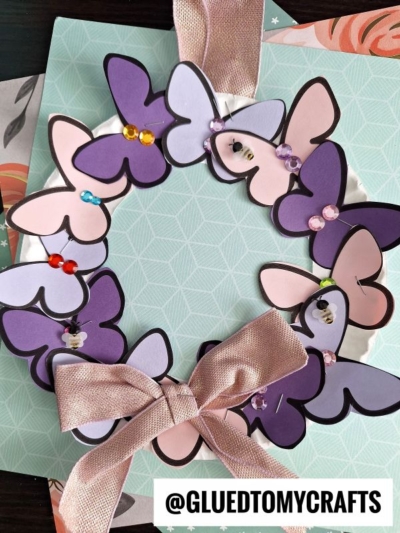
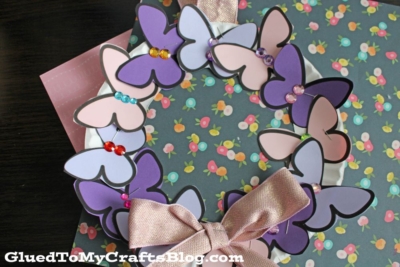
We’ll be crafting a Paper Plate Butterfly Wreath, a cheerful and simple project that’s not only a great indoor activity but also makes for lovely seasonal decor!

Transform your home into a springtime haven with this delightful Paper Plate Butterfly Wreath craft! Perfect for little hands and creative minds, this project combines the beauty of fluttering butterflies with the joy of crafting.
Not only does it make for a charming seasonal decoration, but it also encourages kids to explore their creativity, develop fine motor skills, and celebrate the vibrant transformation of spring.
Gather your supplies, let your imagination take flight, and create a wreath that’s as cheerful as the season itself!

Springtime stands as a season of transformation and rebirth, with fluttering butterflies becoming an iconic symbol of this time of year. What better way to celebrate the bloom and cheer of spring with your little ones than a craft that marries whimsy with learning and fun?
Craft Supplies:
- Large Paper Plate
- Cardstock Paper – two to three sheets
- Butterfly Printable – on our landing page
- Craft Scissors
- Stapler
- Craft Ribbon
- Small Rhinestone Stickers
Directions:
- First things first – cut the center of your paper plate out, leaving a ring for the base of your butterfly wreath.
- Discard the center of the paper plate.
- Now for the butterfly flowers – go ahead and print out copies of our provided butterflies printable on three different colors of cardstock paper.
- Trim out each butterfly design from the printable for your wreath.
- Next up, start laying and planning out the different sizes to be on your paper plate wreath shape.
- Use your stapler to staple them in place, around the rim of the plate.
- At this point, you can also add some rhinestones stickers to the center of each butterfly but that is completely optional.
- Once the plate is completely covered and there are no blank spaces on the paper plate, staple on a ribbon “bow” to the bottom or top of the wreath to complete the butterfly covered wreath craft.
- At this point in time you can also add a smaller piece of ribbon to the back of the paper plate, for easy hanging.
- Then display your beautiful paper butterfly spring wreath proudly for ALL to see!
RELATED —> Handprint Butterfly Keepsake
If you are looking for even MORE easy spring themed kid craft ideas, be sure to check out these fun posts listed below:
- Easter Photo Ornaments
- Cherry Blossom Popcorn Tree
- Handprint Flowerpot
- Wooden Spoon Snakes
- Paper Plate Carrot House
- Paint Splat Butterflies
- Cotton Ball Bunny
- Popsicle Stick Butterflies
FOLLOW US ON PINTEREST SO YOU NEVER MISS A NEW TUTORIAL FROM US!


Butterfly Wreath Craft Idea For Kids
Create a beautiful butterfly wreath using paper plate and cardstock paper. Follow our step-by-step guide for this fun and easy craft project.
Here’s your checklist of supplies to bring this craft to life:
Prepare your creative haven by laying down a protective cover before the crafting magic begins!
Directions:
- First things first - cut the center of your paper plate out, leaving a ring for the base of your butterfly wreath.
- Discard the center of the paper plate.
- Now for the butterfly flowers - go ahead and print out copies of our provided butterflies printable on three different colors of cardstock paper.
- Trim out each butterfly design from the printable for your wreath.
- Next up, start laying and planning out the different sizes to be on your paper plate wreath shape.
- Use your stapler to staple them in place, around the rim of the plate.
- At this point, you can also add some rhinestones stickers to the center of each butterfly but that is completely optional.
- Once the plate is completely covered and there are no blank spaces on the paper plate, staple on a ribbon "bow" to the bottom or top of the wreath to complete the butterfly covered wreath craft.
- At this point in time you can also add a smaller piece of ribbon to the back of the paper plate, for easy hanging.
- Then display your beautiful paper butterfly spring wreath proudly for ALL to see!



NEED MORE HELP DOWNLOADING OUR FREE PRINTABLES? PLEASE REFER TO OUR FAQ PAGE
If you've enjoyed our content or have any thoughts to share, we'd love to hear from you! Mention @gluedtomycrafts or tag #gluedtomycrafts on Instagram!