Easter is coming up, and we’ve got the perfect craft idea for you! This easy tutorial will show you how to make a paper plate bunny using cotton balls.

Paper Plate Bunny Craft Idea
One of the many icons of spring is a big, fluffy bunny. Right?
And with Easter just around the corner, I wanted to give some last minute inspiration for a simple and quick kids craft idea that ANY mom can pull together on the fly.
You can totally pull this Cotton Ball Bunny craft idea together for a group of kids that may be attending your Easter celebrations this weekend or even in a classroom setting. It doesn’t take a lot of materials OR a many steps either.
And as always on Glued To My Crafts – this craft DIY is super easy to recreate and is sure to please any age and/or skill level. Plus one pack of cotton balls and paper plates will go a long way so be prepared to put this white Easter bunny idea on REPEAT this holiday season!
So friends – without delay, now is the time HOP to it! Find all the crafty details you need to know in the full tutorial below!
Happy crafting my friends!!! Please don’t forget to snap a few pictures of your child’s finished bunny made from a paper plate and cotton balls, by tagging us on Instagram to see it! #gluedtomycrafts
RELATED: Popcorn Sheep and Crinkle Paper Crafts

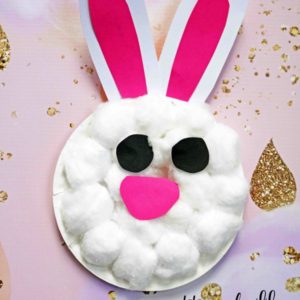
Hop into Easter with this easy paper plate and cotton ball bunny craft! Your kids will love making these adorable bunnies.
Craft Supplies:
- Large or Small Paper Plate – 1 per craft
- White Cotton Balls
- School Glue
- Scissors
- Stapler
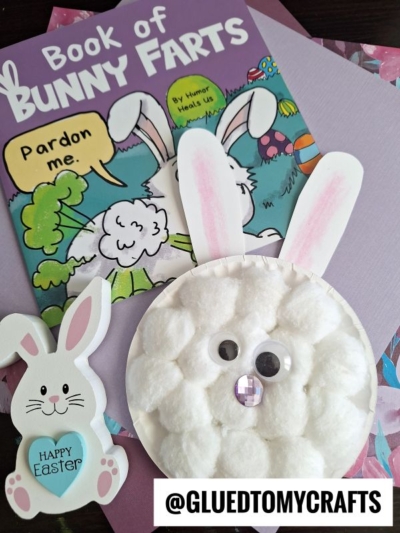
- Large Wiggle Eyes
- White Cardstock Paper
- Pink Cardstock Paper
- Black Cardstock Paper
Directions:
- First put a good layer of glue all over your paper plate.
- Next have your child completely cover the paper plate in cotton balls.
- Set aside to let it dry completely.
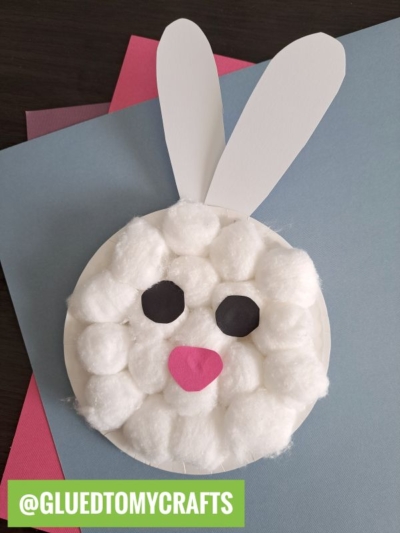
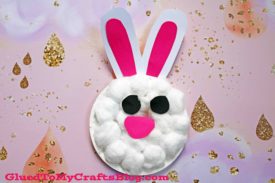
- Using scissors, cut out some bunny elements out of your cardstock. Think nose, whiskers and of course, big white ears.
- To finish off the Cotton Ball Bunny – staple/glue your pieces onto the paper plate to finish it off.
- Don’t forget to add the eyes so he can see!
- Then add other embellishments you see fit and display proudly for ALL to see!
RELATED —> Cotton Ball Bunny Cupcake

If you enjoyed this cotton ball Easter bunny craft idea on Glued To My Crafts, you may also enjoy these past posts:
- Caterpillars On Handprint Branch
- Pom Pom Painted Polka Dot Eggs
- Bunny Superhero
- Popsicle Stick Bunny Gnome
- Thumbprint Bunny Cards
- Easter Egg Wreath
- Wood Clothespin Bunny
Paper Plate And Cotton Ball Bunny Craft Idea
Here’s your checklist of supplies to bring this craft to life:
- 1 Paper Plate
- White Cotton Balls
- Cardstock Paper white, pink and black
- 2 Large Wiggle Eyes
Prepare your creative haven by laying down a protective cover before the crafting magic begins!
Directions:
- First put a good layer of glue all over your paper plate.
- Next have your child completely cover the paper plate in cotton balls. Set aside to let it dry completely.
- Using scissors, cut out some bunny elements out of your cardstock. Think nose, whiskers and of course, big white ears.
- To finish off the Cotton Ball Bunny - staple/glue your pieces onto the paper plate to finish it off. Don't forget to add the eyes so he can see!
- Then add other embellishments you see fit and display proudly for ALL to see!

Grab our favorite books via our Amazon affiliate link! In our Amazon storefront you will find books, toys and craft supplies we absolutely love using for our Glued To My Crafts tutorials!
