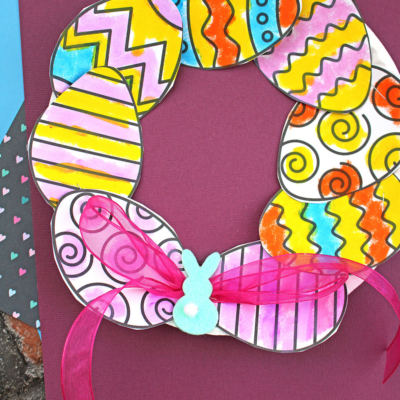
It’s that special time of year again – spring is coming! Celebrate and have some creative fun with the kids by making this easy and cheerful paper plate Easter wreath craft.

Paper Plate Egg Wreath
Are you looking for a fun, easy and unique way to express your creativity with the kids this spring season? Look no further – we have just the thing with today’s Paper Plate Easter Egg Wreath craft idea!
This unique Easter egg decoration is sure to spark joy in any heart, as it involves bringing simple supplies such as inexpensive paper plates, paint crayons and cardstock paper together to create something meaningful that everyone can be proud of.
Not only will the finished product look lovely on a front door or any wall in your home but it’ll also create lasting memories as you make it together with the ones most important to you.
For all those looking for something that combines practicality, artistry and lots of giggles along the way; let’s jump right in! You can find ALL the details you need to know, in the instructions below! Happy crafting, my friends!
RELATED —> Flower Pot Bunny

Our latest tutorial is the perfect way to get creative together by making an Easter egg wreath with just a few simple supplies such as a paper plate and cardstock paper. It’s also a great opportunity for teaching children how to use their imaginations as they create a piece that is just as unique as them!
Craft Supplies:
- Large Paper Plate
- White Cardstock Paper
- Easter Egg Printable – on our landing page
- Paint Crayons
- Craft Scissors
- Stapler
- Craft Ribbon
- Embellishments
Directions:
- First things first – cut the center of your paper plate out, leaving a ring for the wreath.
- Discard the center of the paper plate.
- Now for the paper eggs – go ahead and print out TWO copies of our provided egg shape printable.
- Next use paint crayons to color in the various egg designs. You can add as little or as much color as you like to each one!
- When done coloring, trim out each piece from the printable for your wreath.
- Next up, start laying and planning out where you want each egg cutout to be on your paper plate wreath shape.
- Use your stapler to staple them in place, around the rim of the plate.
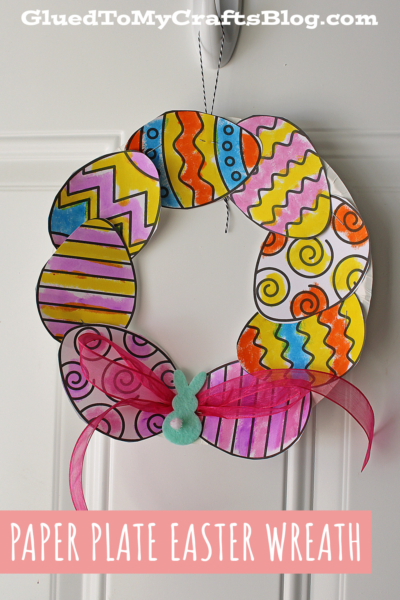
- Once the plate is completely covered and there are no blank spaces on the paper plate, staple on a ribbon “bow” to the bottom or top of the wreath to complete the Easter craft.
- At this point in time you can also add a smaller piece of ribbon to the back of it, for easy hanging.
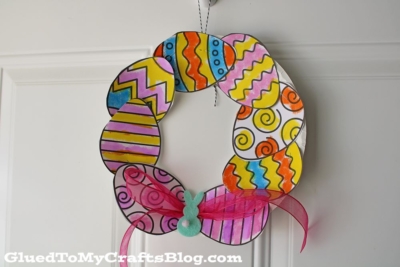
- Then display your beautiful Easter egg wreath proudly for ALL to see!
RELATED —> Bunny Superhero Puppet
Do you love what you see in our paper plate egg wreath tutorial? Be sure to check out our Popsicle Stick Carrot Car craft post as well! It would pair nicely together with today’s theme!
BTW – you can ALWAYS find us “pinning” away on our Pinterest boards so be sure to follow us there so you never miss a new tutorial from us!

Paper Plate Easter Egg Wreath Craft
Here’s your checklist of supplies to bring this craft to life:
Prepare your creative haven by laying down a protective cover before the crafting magic begins!
Directions:
- First things first - cut the center of your paper plate out, leaving a ring for the wreath.
- Discard the center of the paper plate.
- Now for the paper eggs - go ahead and print out TWO copies of our provided egg shape printable.
- Next use paint crayons to color in the various egg designs. You can add as little or as much color as you like to each one!
- When done coloring, trim out each piece from the printable for your wreath.
- Next up, start laying and planning out where you want each egg cutout to be on your paper plate wreath shape.
- Use your stapler to staple them in place, around the rim of the plate.
- Once the plate is completely covered and there are no blank spaces on the paper plate, staple on a ribbon "bow" to the bottom or top of the wreath to complete the Easter craft.
- At this point in time you can also add a smaller piece of ribbon to the back of it, for easy hanging.
- Then display your beautiful Easter egg wreath proudly for ALL to see!


NEED MORE HELP DOWNLOADING OUR FREE PRINTABLES? PLEASE REFER TO OUR FAQ PAGE