
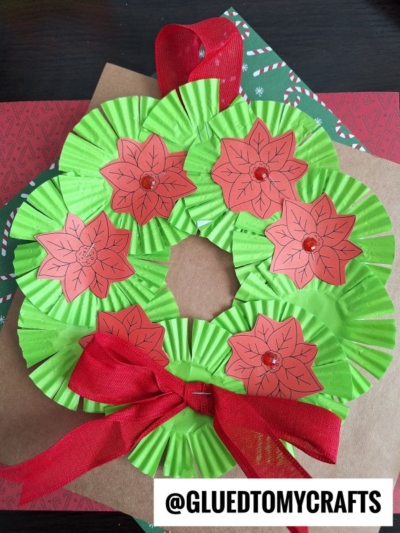
Get creative this season and make your own beautiful cupcake liner Christmas wreath!

Christmas Wreath Craft Using Cupcake Liners
Celebrate this beautiful time of year with this awesome Cupcake Liner Christmas Wreath craft idea!!!
Using inexpensive green cupcake liners you probably have left over from your holiday baking – this kid friendly activity won’t break the bank or cause any tears either! It’s super simple – promise!!!
So what are you waiting for? Let’s gather those craft supplies and follow the easy step-by-step holiday wreath tutorial below!
Happy crafting my friends! Don’t forget to share pictures of your cupcake liner wreath creations on our Facebook page wall, so we can admire your hard work from a far this season! I can’t wait to see how awesome it turns out!
RELATED —> Paper Plate Christmas Wreath

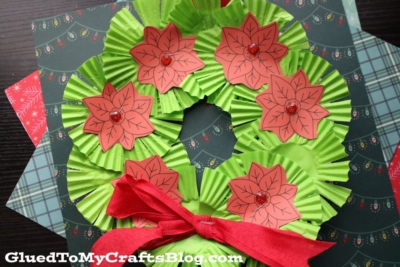
Create a festive and fun craft with these cupcake liners that are meant for baking. You can create an adorable wreath to hang in your home or give as a gift.
Craft Supplies:
- Large Paper Plate
- Red Cardstock Paper
- Flower Printable – on our landing page
- Green, Cupcake Liners {about 20}
- Scissors
- Stapler
- Red Craft Ribbon
- Small Red Rhinestone Stickers
Directions:
- First things first – cut out the center of your paper plate, leaving a simple ring shape for the wreath.
- Discard the center piece you just cut out.
- Now grab your GREEN cupcake liners, your stapler and the scissors.
- For each “Christmas flower” on the wreath, you are going to want TWO large cupcake liners.
- Flatten each set out with your hands and stack them on top of each other.
- Use the stapler to secure them together in the center.
- Next use the scissors to cut a simple fringe around the edge.
- Use your fingers to “fluff” it up and give it even more dimension. Set them all aside for now.
- Now grab your print out.
- Cut out each red flower from the paper.
- Use your stapler to staple ONE red flower, on top of each green cupcake liner set.
- Now we are ready to finally assemble the wreath. Go ahead and staple one cupcake liner “flower” to the rim of the paper plate.
- Repeat for each “flower” on the wreath until the paper plate is completely covered.
- Once the plate is completely covered and there are no blank spaces left, staple a large red bow to the front.
- Go ahead and also add the small rhinestones in the center of each flower design.
- If desired, add a ribbon “hanger” to the back of the finished piece.
- Then display your beautiful paper plate Christmas wreath in your home or on the front door proudly for ALL to see!
RELATED —> Popsicle Stick Christmas Trucks
If you are looking for even MORE fun holiday themed kid crafts, be sure to check out the Christmas tab on Glued To My Crafts! My personal favorite as of late is our Paper Plate Bearded Gnome tutorial!
And as always – if today’s cupcake liner Christmas wreath post inspires you, let us know! We are on all the major social media sites {such as Facebook and Instagram} and we have a special branded hashtag #gluedtomycrafts for you to use!
We just LOVE seeing our inspiration come to life in your home, so please be sure to tag us when you can!

Cupcake Liner Christmas Wreath Craft
Here’s your checklist of supplies to bring this craft to life:
Prepare your creative haven by laying down a protective cover before the crafting magic begins!
Directions:
- First things first - cut out the center of your paper plate, leaving a simple ring shape for the wreath.
- Discard the center piece you just cut out.
- Now grab your GREEN cupcake liners, your stapler and the scissors.
- For each "Christmas flower" on the wreath, you are going to want TWO large cupcake liners.
- Flatten each set out with your hands and stack them on top of each other.
- Use the stapler to secure them together in the center.
- Next use the scissors to cut a simple fringe around the edge.
- Use your fingers to "fluff" it up and give it even more dimension. Set them all aside for now.
- Now grab your print out.
- Cut out each red flower from the paper.
- Use your stapler to staple ONE red flower, on top of each green cupcake liner set.
- Now we are ready to finally assemble the wreath. Go ahead and staple one cupcake liner "flower" to the rim of the paper plate.
- Repeat for each "flower" on the wreath until the paper plate is completely covered.
- Once the plate is completely covered and there are no blank spaces left, staple a large red bow to the front.
- Go ahead and also add the small rhinestones in the center of each flower design.
- If desired, add a ribbon "hanger" to the back of the finished piece.
- Then display your beautiful paper plate Christmas wreath in your home or on the front door proudly for ALL to see!


NEED HELP DOWNLOADING OUR FREE PRINTABLES? PLEASE REFER TO OUR FAQ PAGE