
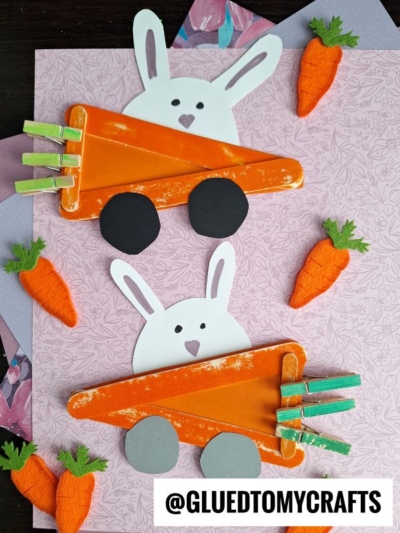
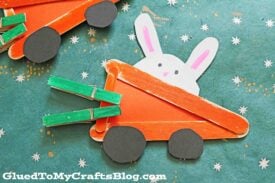
Looking for a fun Easter craft to keep the kids entertained? These popsicle stick carrot cars are perfect for an afternoon boredom buster!
Not only are they easy to make, but the bunnies inside add an extra bit of fun. Let’s get crafting!

Easter Craft Idea: Popsicle Stick Carrot Cars
In the spirit of the upcoming spring weather and Easter holiday, we are driving by with a fun tutorial for Popsicle Stick Carrot Cars {perfect for the little race car lovers in your life!} It’s a first seen here idea for Glued To My Crafts and I truly hope you see my vision today!
And I have to say, like I always do, this carrot themed kid craft is really SIMPLE and almost costs nothing {what parents love to hear!}
My little boy had fun creating these pieces and I’m sure older kids will too! Plus they double as awesome pretend play pieces and/or décor pieces.
If you are planning on having an Easter party or similar celebration this year – just attach string to the back for easy hanging on doors, windows and walls. Easy peasy – so get right on it!
Happy crafting my friends! Don’t forget to share pictures of your child’s finished carrots cars made from popsicle sticks, by tagging us on Instagram to admire your hard work from afar! #gluedtomycrafts
RELATED: Carrots In The Garden and Paper Plate Carrot Car

This is a fun Easter craft for kids! They can make their very own carrot cars with popsicle sticks and bunnies inside. It’s easy to do and they will love it!
Craft Supplies:
- Jumbo Popsicle Sticks – 2 per craft
- Mini Popsicle Sticks – 1 per craft
- School Glue
- Orange Craft Paint
- Green Craft Paint
- Paint Brushes
- Small Paper Plate
- Wood Clothespins – 2 or 3 per craft
- Orange Scrapbook Paper
- White Cardstock Paper
- Black Cardstock Paper
- Black Marker
- Craft Scissors
- Pencil
Directions:
- First grab your THREE popsicle sticks {three per carrot} and glue them together to look like a triangle.
- Set aside to let it dry completely. Repeat for each carrot car craft you want to make today.
- Once dry, go ahead and have children paint the popsicle stick shape completely orange, while painting the TWO clothespins green. Set aside.
- While those are drying, grab your orange scrapbook paper and cut a triangle that will fit inside the popsicle stick design.
- At this time, you should also cut out a bunny shape from the white and two wheels from the black.
- To finish off the Popsicle Stick Carrot Cars – have children glue their paper pieces in place and top off with any other embellishments they see fit.
- Go ahead and “pinch” the two clothespins to the larger side of the popsicle stick shape.
- Once done, set aside to let it dry completely before displaying/playing with proudly!
RELATED —> Popsicle Stick Carrot House
Love our Popsicle Stick Carrots Cars craft idea? Be sure to check out our Paper Bag Bunny Superheroes idea as well!
It’s perfect to pair with today’s simple Easter craft idea and make a whole day out of it!

Popsicle Stick Carrot Car Craft Idea
Here’s your checklist of supplies to bring this craft to life:
- 2 Jumbo Popsicle Sticks
- 1 Mini Popsicle Sticks
- 2 Wooden Clothespins
- Craft Paint orange and green
- Cardstock Paper black and white
- Scrapbook Paper orange
Prepare your creative haven by laying down a protective cover before the crafting magic begins!
Directions:
- First grab your THREE popsicle sticks {three per carrot} and glue them together to look like a triangle.
- Set aside to let it dry completely. Repeat for each carrot car craft you want to make today.
- Once dry, go ahead and have children paint the popsicle stick shape completely orange, while painting the TWO clothespins green. Set aside.
- While those are drying, grab your orange scrapbook paper and cut a triangle that will fit inside the popsicle stick design.
- At this time, you should also cut out a bunny shape from the white and two wheels from the black.
- To finish off the Popsicle Stick Carrot Cars – have children glue their paper pieces in place and top off with any other embellishments they see fit.
- Go ahead and "pinch" the two clothespins to the larger side of the popsicle stick shape.
- Once done, set aside to let it dry completely before displaying/playing with proudly!

CLICK HERE TO PRINT THE DIRECTIONS FOR THIS CRAFT