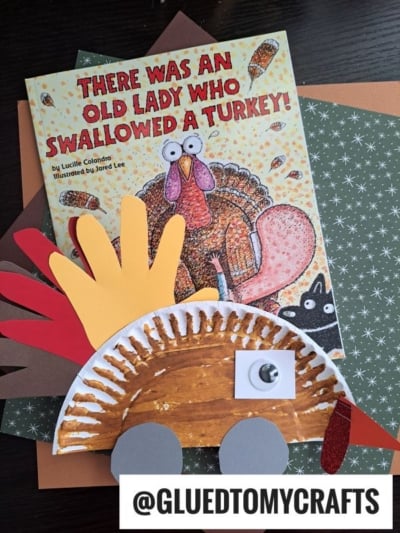
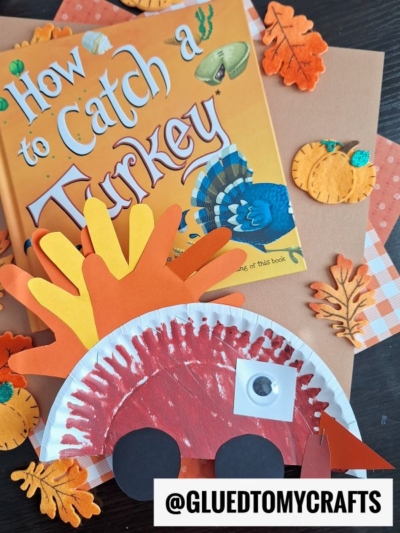
These Thanksgiving-themed paper plate cars are perfect for kids of all ages! They're easy to make and even easier to play with.

Gobble gobble, my crafty friends! We are DRIVING into the Thanksgiving crafts today and I’m super excited to be sharing this Paper Plate Turkey Cars kid craft tutorial! Of course, it’s inspired by my son and I hope you like it as much as we do!

Do you have a little one in your home who is dreaming of a “car” themed craft to do this Thanksgiving season? Maybe you are looking for something outside the traditional this year?
As usual with these car themed kid craft ideas on Glued To My Crafts, this Paper Plate Turkey Car tutorial is inspired by my son and his love of things with wheels. He loves cars and I love incorporating his love into all the seasons. Hopefully you can appreciate that gesture too and will find this DIY idea useful! It’s perfect for boys and girls alike! Plus don’t you just love the handprint “feathers” that I incorporated too??!
Find all the details below! Happy crafting, my friends!!! Don’t forget to share pictures with us afterwards so we can admire your hard work from afar. You can ALWAYS tag us on Facebook or Instagram for easy sharing. I can’t wait to see what you create! #gluedtomycrafts


It’s that time of year again! The leaves are changing color, the air is getting crisp and thanksgiving is just around the corner. What better way to get into the holiday spirit than by making your very own Thanksgiving turkey car craft?
This easy kid-friendly craft is perfect for thanksgiving parties, decorating the house or even as a puppeteering activity for the little ones.
Craft Supplies:
- Large Paper Plate – 1 per craft
- Basic Craft Scissors
- Brown Craft Paint
- Paint Brush
- White Cardstock Paper
- Red Cardstock Paper
- Yellow Cardstock Paper
- Orange Cardstock Paper
- Black Cardstock Paper
- Pencil or Pen
- School Glue and/or Stapler
- Black Sharpie Marker
Directions:
- First things first – cut your LARGE paper plate in half. You only need ONE paper plate half per turkey car.
- Next up – paint the paper plate half completely brown with a paint brush.
- Set aside your painted piece to let it dry completely.
- Now it’s time for making the paper embellishments! Grab all your paper, scissors and pencil.
- Trace your child’s hand on the choice of colors for the feathers. I did three handprints per car but that is up to you as far as how many you make and what colors you choose.
- Using scissors, trim out the traced handprints.
- With the remaining colored paper, cut out wheels, a triangle nose, window etc. for your car.
- Once the paper plate is dry and you have everything cut out, it’s time to start assembling your turkey car.
- Glue/staple the cardstock embellishments in place on the paper plate.
- Use the black Sharpie marker to draw on a simple eye in the cardstock window.
- Finally – if desired, add anything else you like for that custom look, before displaying proudly!
RELATED —> Clothespin Leaf Turkeys
Make the Thanksgiving season extra memorable with tons of crafty inspiration from us! We want YOU to check out our popular Turkey Gnome, Turkey Pudding Cups and Handprint Turkey Potholder craft posts!
We also LOVE talking crafts with our lovely readers. Come join our private Facebook group where we chit chat, share and laugh together! Everyone is welcomed so come join!!!

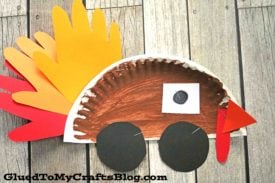
Paper Plate Turkey Cars w/Handprint Feathers
These Thanksgiving-themed paper plate cars are perfect for kids of all ages! They're easy to make and even easier to play with.
Here’s your checklist of supplies to bring this craft to life:
- Pencil or Pen
Prepare your creative haven by laying down a protective cover before the crafting magic begins!
Directions:
- First things first - cut your LARGE paper plate in half. You only need ONE paper plate half per turkey car.
- Next up - paint the paper plate half completely brown with a paint brush. Set aside your painted piece to let it dry completely.
- Now it's time for making the paper embellishments! Grab all your paper, scissors and pencil.
- Trace your child's hand on the choice of colors for the feathers. I did three handprints per car but that is up to you as far as how many you make and what colors you choose.
- Using scissors, trim out the traced handprints.
- With the remaining colored paper, cut out wheels, a triangle nose, window etc. for your car.
- Once the paper plate is dry and you have everything cut out, it's time to start assembling your turkey car.
- Glue/staple the cardstock embellishments in place on the paper plate.
- Use the black Sharpie marker to draw on a simple eye in the cardstock window.
- Finally - if desired, add anything else you like for that custom look, before displaying proudly!

CLICK HERE TO PRINT THE DIRECTIONS FOR THIS CRAFT
If you've enjoyed our content or have any thoughts to share, we'd love to hear from you! Mention @gluedtomycrafts or tag #gluedtomycrafts on Instagram!