This easy, yet creative activity is sure to keep your preschoolers (or yourself!) entertained while allowing their imagination to run free as they create these adorable little chick friends.
Easter Chick Fork Painting
Are you looking for a fun and creative Easter craft project to do with your kids? Look no further! This fork painted fluffy chick craft tutorial is the perfect way to spend quality family time together, unleash your creativity, and whip up something special that will add warmth to your home this holiday season.
Not only is this fun Easter craft easy enough for younger children of all ages to make, but it can also help you cultivate valuable artistic skills in them while deepening their appreciation of the art form.
So on that note, let’s gather our supplies, roll up our sleeves and get going on creating these delightful little critters – what could be more exciting than bright springtime chicks hopping around as part of your festive décor?! Happy crafting, my friends!!!
RELATED —> Handprint Chick
Not only will painting with forks make this activity more manageable for little ones but it’s also an excellent sensory opportunity for them too. Plus, when done with supervision, it can unleash artistic creativity without making too much of a mess!
Craft Supplies:
- Plastic Fork
- Yellow Tulip Puffy Paint
- Loose Craft Glitter
- Light Blue Cardstock Paper
- Orange Cardstock paper
- White Cardstock Paper
- Egg Printable – on our landing page
- Scissors
- School Glue
- Large Googly Eyes
Directions:
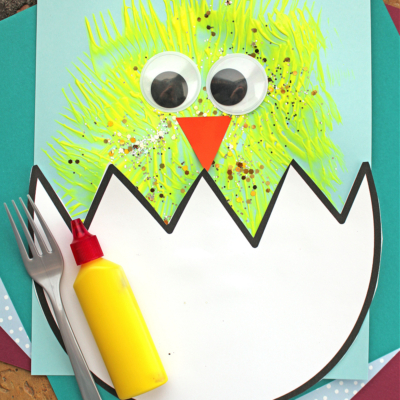
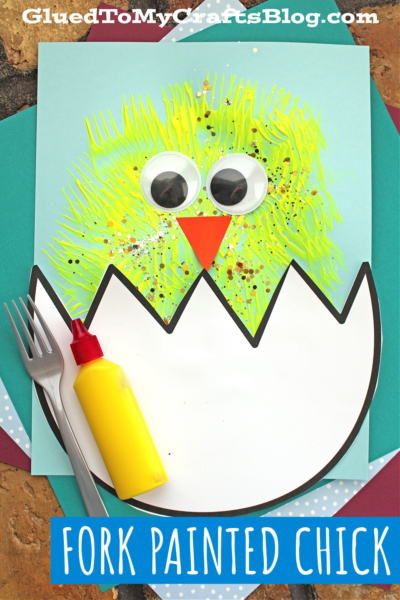
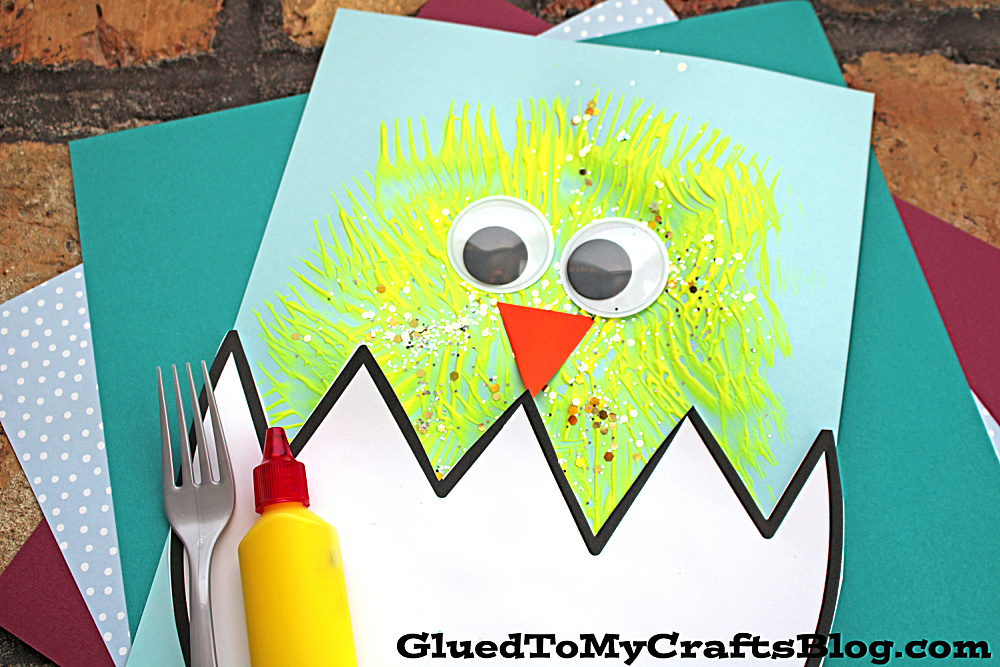
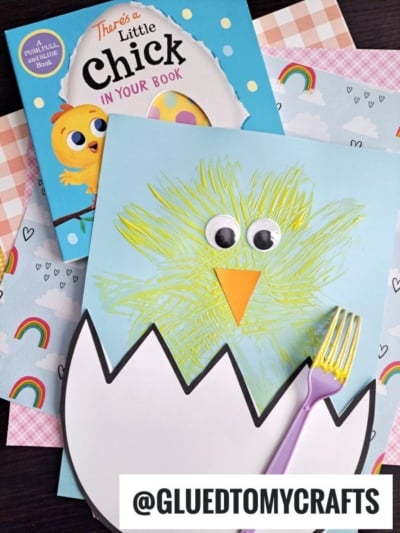
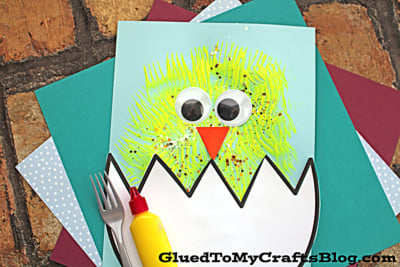
- First things first – download and print out the broken egg printable on white paper. You need ONE print per yellow chick craft.
- Go ahead and use scissors to trim out the egg design.
- Discard excess paper and set aside the paper cutout till later.
- Next up – squirt several circles of YELLOW paint, in the center of your light blue cardstock paper. You don’t need a lot at first. Start off with the size of a quarter and gradually add more after your child starts the next painting step.
- Now have children take their fork – which is their “paintbrush” to spread the paint all around the piece of paper, to make the feathers of their baby chick. Just make sure they keep the paint on the paper but they can move it anywhere and in any design/shape/angle they like.
- Once they are done creating the body of the chick, go ahead and sprinkle some loose craft glitter on top of the wet paint, to really make it shine!
- Finally – the last step of this fork painted chick craft. Glue your cardstock egg piece towards the body of the painted design. Follow that up with an orange triangle beak nose and wiggle eyes to the center of the painted piece.
- And that’s it! At this point you are done BUT you can add other embellishments if you choose, to give it your special touch!
- When done, set aside to let it dry completely before displaying proudly!
- BTW – this craft can be done in different colors so don’t feel limited by our example pictures!
RELATED —> Paint Splat Baby Chick
Make your craft plans SUPER FRESH with tons of inspiration from Glued To My Crafts! We have tons of easy peasy craft activities just for you!
We want YOU to check out our super popular Easter Friends, Bunny Cupcake and Easter Bunny House craft posts! Then pair all three of these Easter craft ideas with today’s easy chick fork painting tutorial for an epic day!
We also LOVE talking crafts with our lovely readers. Come join our private Facebook group where we chit chat, share and laugh together! Everyone is welcomed so come join the fun and share their craft creations!!! #gluedtomycrafts

Fork Painted Easter Chick Craft Idea For Spring
Here’s your checklist of supplies to bring this craft to life:
- Tulip Puffy Paint yellow
- Loose Craft Glitter
- SPRING PRINTABLE - LANDING PAGE
- Cardstock Paper light blue, orange and white
- 2 Large Googly Eyes
- School Glue
Prepare your creative haven by laying down a protective cover before the crafting magic begins!
Directions:
- First things first - download and print out the broken egg printable on white paper. You need ONE print per yellow chick craft.
- Go ahead and use scissors to trim out the egg design.
- Discard excess paper and set aside the paper cutout till later.
- Next up - squirt several circles of YELLOW paint, in the center of your light blue cardstock paper. You don't need a lot at first. Start off with the size of a quarter and gradually add more after your child starts the next painting step.Tulip Puffy Paint, Cardstock Paper
- Now have children take their fork - which is their "paintbrush" to spread the paint all around the piece of paper, to make the feathers of their baby chick. Just make sure they keep the paint on the paper but they can move it anywhere and in any design/shape/angle they like.
- Once they are done creating the body of the chick, go ahead and sprinkle some loose craft glitter on top of the wet paint, to really make it shine!Loose Craft Glitter
- Finally - the last step of this fork painted chick craft. Glue your cardstock egg piece towards the body of the painted design. Follow that up with an orange triangle beak nose and wiggle eyes to the center of the painted piece.2 Large Googly Eyes
- And that's it! At this point you are done BUT you can add other embellishments if you choose, to give it your special touch!
- When done, set aside to let it dry completely before displaying proudly!


NEED MORE HELP DOWNLOADING OUR FREE PRINTABLES? PLEASE REFER TO OUR FAQ PAGE