Get in the winter spirit with this fun and easy craft idea for kids!


Making crafts with kids can be a fun and creative way to spend quality time together as well as celebrate the season. On that note, this Fork Painted Snowman Ice Cream Cone craft idea is perfect for holiday festivities, bringing families and educators joy!
The traditional white winter setting that accompanies the snowman ice cream cone turns any environment into a festive wonderland, making this project an ideal craft for moms, teachers and those extra crafters or creative people out there who love taking on a challenge. Easier than it looks, let’s jump into how you can make your own version today!
So don’t delay – get the kids {and adults} involved and BUILD some snowy friends together! Happy crafting, my friends!!!

This Fork Painted Snowman Ice Cream Cone craft idea is definitely one to add to your winter to-do list! It may look difficult – but it’s actually so easy and fun to do; this craft takes only minutes yet produces something fantastically festive.
Craft Supplies:
- Plastic Fork
- White Tulip Puffy Craft Paint
- Blue Cardstock Paper
- Loose Craft Glitter
- Scissors
- School Glue
- Orange Cardstock Paper
- Black Cardstock Paper
- Cone Printable – on our landing page
- Brown Cardstock Paper
Directions:
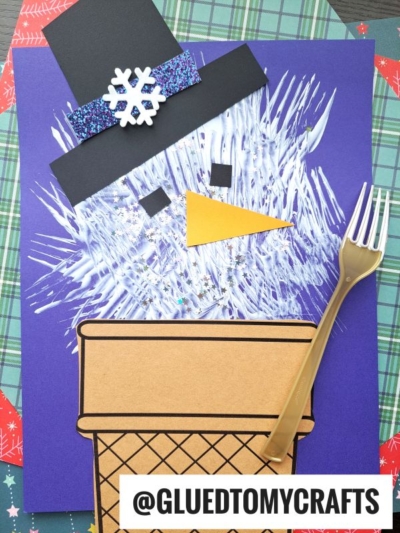
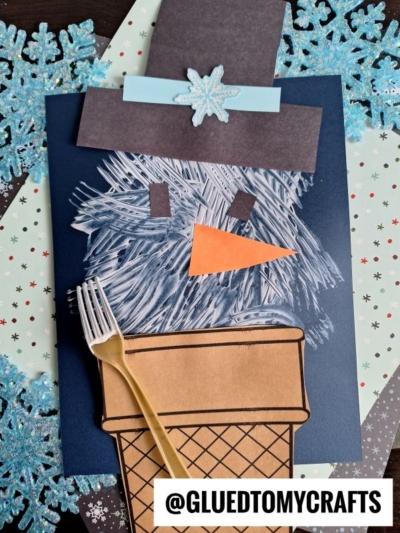
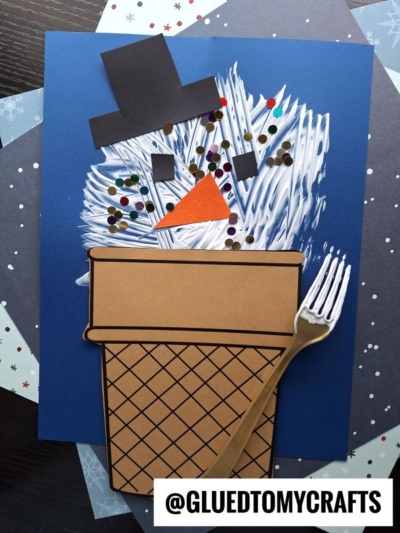
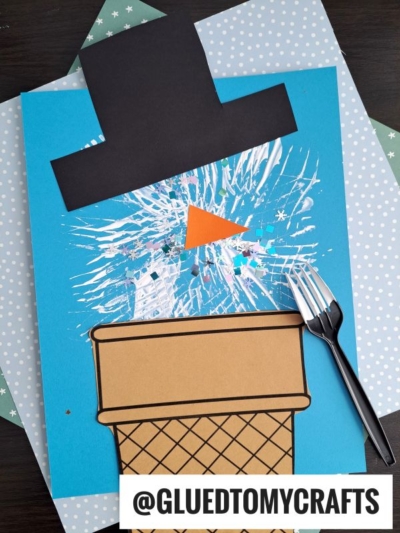
- First things first – squirt a few circular swirls of WHITE craft paint in the center of your BLUE cardstock. You don’t need a lot. Maybe three to five squirts.
- Have children take their fork {AKA – the paint brush} and spread the paint ALL around to make a “ball” shape. Just make sure they keep the paint on the paper but they can move it anywhere and in any design/shape/angle they like.
- Once they are done creating the “ice cream” go ahead and sprinkle a little bit of loose craft glitter on top of the wet paint.
- Set it aside for now.
- Now grab the remaining cardstock paper and scissors.
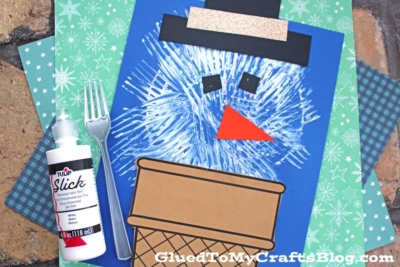
- Cut out a large hat, eyes, nose and of course – the ice cream cone shape from the printable.
- Finally – the last step of this fork painted snowman craft! Glue your cardstock pieces and ice cream cutout to the painted piece of paper. The embellishments will go ON the painted design, the cone will go UNDER it.
- Go ahead and add any other embellishments you see fit.
- Set aside to let it dry completely before displaying proudly!
RELATED —> Washi Tape Bear In Sweater
Don’t let the crafty fun stop here!!!
Be sure to check out our Paper Bowl Snowman and Snowman Button Cards posts for two more DIY’s to make this winter season! Both are just as easy as today’s post!!!

Fork Painted Snowman Ice Cream Cone Craft Idea For Kids
Get in the winter spirit with this fun and easy craft idea for kids!
Here’s your checklist of supplies to bring this craft to life:
- School Glue
Prepare your creative haven by laying down a protective cover before the crafting magic begins!
Directions:
- First things first - squirt a few circular swirls of WHITE craft paint in the center of your BLUE cardstock. You don't need a lot. Maybe three to five squirts.Tulip Puffy Paint, Cardstock Paper
- Have children take their fork {AKA - the paint brush} and spread the paint ALL around to make a "ball" shape. Just make sure they keep the paint on the paper but they can move it anywhere and in any design/shape/angle they like.
- Once they are done creating the "ice cream" go ahead and sprinkle a little bit of loose craft glitter on top of the wet paint.Loose Craft Glitter
- Set it aside for now.
- Now grab the remaining cardstock paper and scissors.
- Cut out a large hat, eyes, nose and of course - the ice cream cone shape from the printable.
- Finally - the last step of this fork painted snowman craft! Glue your cardstock pieces and ice cream cutout to the painted piece of paper. The embellishments will go ON the painted design, the cone will go UNDER it.
- Go ahead and add any other embellishments you see fit.
- Set aside to let it dry completely before displaying proudly!


NEED MORE HELP DOWNLOADING OUR FREE PRINTABLES? PLEASE REFER TO OUR FAQ PAGE
If you've enjoyed our content or have any thoughts to share, we'd love to hear from you! Mention @gluedtomycrafts or tag #gluedtomycrafts on Instagram!