
Get creative and beat the winter blahs! This paper bowl snowman craft is your perfect “snow day” activity for the little ones in your life. Let their imaginations run wild and be amazed at what they can create!

Snowman Craft Made From A Paper Bowl!
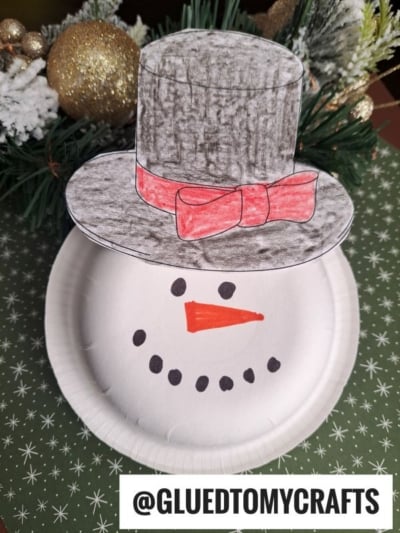
Let’s build a snowman today! Our Paper Bowl Snowmen kid craft tutorial is a creative way to beat the winter blues AND stay warm & toasty inside!!!
Using inexpensive {and easy to find} white paper bowls, you and your child can “build” snowmen all day long, that are not only melt-free but completely customizable too! No two pieces will be alike!!!
These JOLLY FELLAS are sure to bring smiles all around! So check out the FULL tutorial below and make it a “date” today!
Keep scrolling for all the details and be sure to tag us on Instagram or Facebook if you share pictures of your snowmen creations, so we can see them as well! Much love to you all and happy crafting, my dear friends! #gluedtomycrafts
RELATED —> Craft Foam Snowman

Our paper bowl snowmen kid craft tutorial is a creative way to beat the winter blues AND stay warm & toasty inside!
Craft Supplies:
- White Paper Bowls
- Hat Printable – on our landing page
- White Cardstock Paper
- Crayons, Coloring Pencils or Markers
- Scissors
- School Glue
- Embellishments
RELATED —> Popsicle Stick Snowman
Directions:
- First things first – if you haven’t already, go ahead and print off the FREE snowman hat printable. This will give you TWO hats to work with today.
- Go ahead and color in one of the hat designs however you like.
- When done, trim it out and set it aside.
- Now grab your paper bowl and some markers.
- Flip over the bowl so the bottom side is facing you.
- Draw on a snowman face {triangle nose and dotted eyes & mouth.}
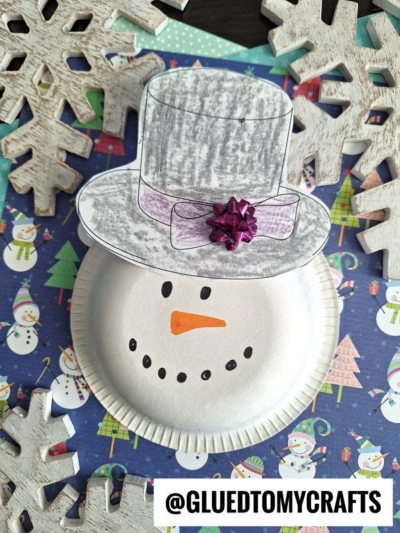
- To finish off the paper bowl snowman craft, simply glue the snowman cutout {from earlier} to the decorated bowl.
- And that’s it! You can go ahead and add other embellishments you see fit before displaying it proudly for all to see!
RELATED —> Potato Stamped Snowman Card
If you loved today’s paper bowl snowman craft idea, check out our Snowman Snow Globe and Polar Bear tutorial posts for TWO more crafty ideas to pair along with it!

Paper Bowl Snowman Craft
Here’s your checklist of supplies to bring this craft to life:
Prepare your creative haven by laying down a protective cover before the crafting magic begins!
Directions:
- First things first - if you haven't already, go ahead and print off the FREE snowman hat printable. This will give you TWO hats to work with today.
- Go ahead and color in one of the hat designs however you like.
- When done, trim it out and set it aside.
- Now grab your paper bowl and some markers.
- Flip over the bowl so the bottom side is facing you.
- Draw on a snowman face {triangle nose and dotted eyes & mouth.}
- To finish off the paper bowl snowman craft, simply glue the snowman cutout {from earlier} to the decorated bowl.
- And that's it! You can go ahead and add other embellishments you see fit before displaying it proudly for all to see!


NEED MORE HELP DOWNLOADING OUR FREE PRINTABLES? PLEASE REFER TO OUR FAQ PAGE
remove