
Crafting with children can have MANY benefits. It’s good for hand-eye coordination, fine motors skills and you can even throw in some learning skills along the way, as well!
Take for example today’s tutorial. “T” is for tree and this popsicle stick kid craft idea is the PERFECT way to reinforce that idea!

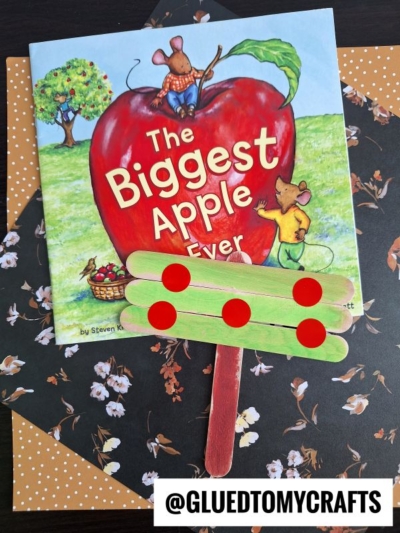
Popsicle Stick Apple Tree Craft
Inspired by my preschool age son {I’m trying to step up his letter recognition right now} today I’m sharing another kid friendly activity that is SUPER simple for kids and adults of all ages to pull together to celebrate the moment in time!
This Popsicle Stick Tree craft tutorial has endless possibilities since you can have children decorate it for ALL the seasons {perfect to in-cooperate in to the classroom all year long!} And it’s just that – a “T” shape that we turned into an apple tree! All you have to do after assembling it, is to decorate with various embellishments to really hit the idea on the nail {in our case – red sequined apples for the fall season!} Sounds super fun – am I right?!
Now let’s grab our craft supplies and get to work on this simple to follow step-by-step tutorial, listed below!
Happy crafting my friends! Please don’t forget to share pictures of your “popsicle stick trees” with us on our Facebook community wall. I can’t wait to see what you come up with! #gluedtomycrafts
RELATED —> “T” is for Tractor

Get creative with your kids and the letter T! We will show you how easy it is to make an apple tree out of popsicle sticks!
Craft Supplies:
- Jumbo Popsicle Sticks – 4 per craft
- School Glue
- Green Craft Paint
- Brown Craft Paint
- Foam Paint Brushes
- Red Rhinestone Stickers
Directions:
- First things first – pull out FOUR jumbo popsicle sticks per tree craft.
- Go ahead paint three of the jumbo popsicle sticks, completely green.
- The remaining one popsicle stick should be painted brown.
- Set them all aside to allow them to dry completely.
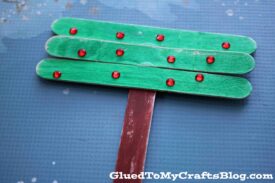
- When they are dry enough to touch, glue your painted popsicle sticks together to look like an “T.” Three jumbo popsicle sticks glued across the one brown popsicle stick.
- To finish off your Popsicle Stick Tree kid craft – have children add rhinestone “apples” to the newly made popsicle stick shape. You want to keep all the rhinestone stickers in the green area.
- Then let it all sit aside to let it dry completely before displaying proudly!!!
- Don’t forget to share pictures with us on Facebook!
Customize It: be sure to think out side the box for different seasons and fruit trees. You could switch out the paint colors for orange, yellow and red, for a fall tree or change out the red rhinestones for orange, for an orange tree! I hope those ideas inspire you!
Book Pairing Ideas:
Looking for the perfect reads to complement our latest craft tutorial? Here are some book suggestions that pair beautifully with your creative journey! Dive into these titles and let your imagination flow while you craft. Happy reading and crafting!
- Sour Apple by Linda Liu
- Little Naturalists: Johnny Appleseed by Kate Coombs
- Goodbye Summer, Hello Autumn by Kenard Pak
- It’s Fall! by Renée Kurilla
- Bad Apple: A Tale of Friendship by Edward Hemingway
- Apple Countdown by Joan Holub
- Halloween in the Orchard by Phyllis Alsdurf
- The Biggest Apple Ever by Steven Kroll
- How to Make an Apple Pie and See the World by Marjorie Priceman
- Winston and the Missing Apples by Simply Country Ranch
RELATED —> “T” is for Turkey
Be sure to check out these awesome past posts on Glued To My Crafts, for more crafty inspiration to recreate today!!!
- Tissue Paper Apple
- Popsicle Stick Pie Slice
- Painted Pumpkin Patch
- Paper Bowl Play Grill
- Paper Holly Wreath Craft
- Craft Stick Owl On Branch
- Popsicle Stick Owls
- “T” is for Turkey Craft

The Letter "T" is for Tree Craft
Here’s your checklist of supplies to bring this craft to life:
Prepare your creative haven by laying down a protective cover before the crafting magic begins!
Directions:
- First things first - pull out FOUR jumbo popsicle sticks per tree craft.
- Go ahead paint three of the jumbo popsicle sticks, completely green. The remaining one popsicle stick should be painted brown.
- Set them all aside to allow them to dry completely.
- When they are dry enough to touch, glue your painted popsicle sticks together to look like an "T." Three jumbo popsicle sticks glued across the one brown popsicle stick.
- To finish off your Popsicle Stick Tree kid craft – have children add rhinestone "apples" to the newly made popsicle stick shape. You want to keep all the rhinestone stickers in the green area.
- Then let it all sit aside to let it dry completely before displaying proudly!!!

CLICK HERE TO PRINT THE DIRECTIONS FOR THIS CRAFT