Create a festive Popsicle Stick Nutcracker Craft with this fun Christmas project! Perfect for kids, using simple materials to spark creativity and holiday cheer.


Nutcrackers are simply stunning to look at during the Christmas season, don’t you think?! There are so many different versions, personalities and even decor elements to them. Some are decked out in glitter and rhinestones, while others are simpler but still just as impressive.
You can say the same about our latest kids craft tutorial. Just like the real Christmas icon, you can take our Popsicle Stick Nutcracker craft and make it just how YOU like it! Whether you want it to be sparkly out or just be a little more subtle, you can do just that!
Keep scrolling to check out the full Popsicle Stick Nutcracker Face tutorial and recreate one today!

This is a great craft to do with the kids this Christmas season. It’s simple and easy, but it still looks really festive and fun. The best part is that you can customize it however you want. So get creative and have some fun!
Craft Supplies:
Before starting your popsicle stick nutcracker craft, gather these essential supplies:
- Jumbo Popsicle Sticks – 3 per craft
- Mini Popsicle Sticks – 2 per craft
- School Glue or Hot Glue Gun
- Paper Craft Scissors
- Cardstock Paper
- Mustache Paper Punch
- Small Wiggle Eyes – 2 per craft
- Craft Rhinestones
- Sharpie Markers
Directions:
- First glue your popsicle sticks together to look like a fence {3 jumbo next to each other with two mini across}
- Set aside to let it dry completely.
- Repeat for each nutcracker face you want to make.
- Now {if you would like too} paint the flat side of your popsicle stick shape anyway you like. I liked the natural wood look so I skipped this step 🙂 You just want to paint before you start the other steps, so keep that in mind!
- Next grab all your sheets of colored cardstock paper.
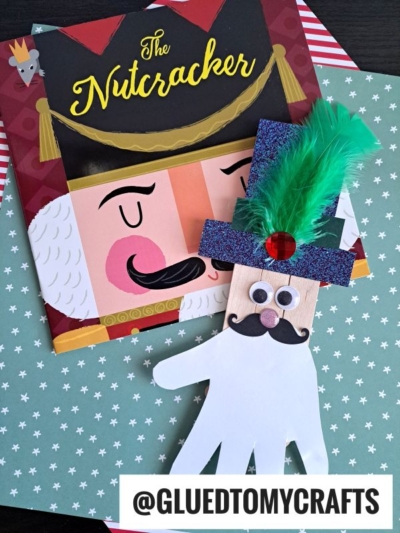
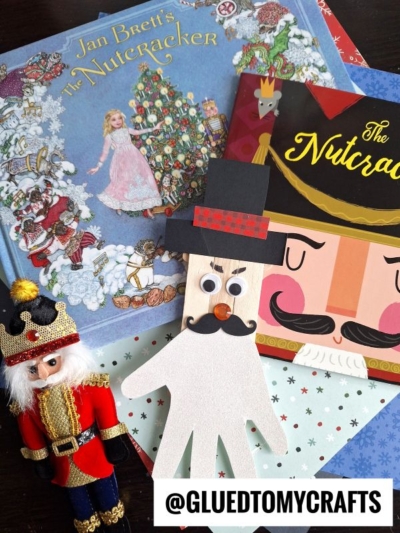
- Cut a tall black hat, white HANDPRINT beard, small black mustache and anything else out of the cardstock paper.
- To finish off your Popsicle Stick Nutcracker – glue on your cardstock pieces to the craft stick shape, as well as the wiggle eyes and any other fun embellishments you like – most importantly the rhinestone nose in the center, as well as on the hat, to really make it POP!
- At this point in time you can also use a black marker to draw on some eyebrows as well.
- When done decorating and assembling the nutcracker, set it aside to let it dry completely before displaying proudly!!!
- Don’t forget to share pictures with us your new nutcracker friends with us! #gluedtomycrafts
RELATED —> Nutcracker Ballerina Puppet

AFFILIATE LINK – PAIR OUR CRAFT IDEA WITH THIS BOOK RECOMMENDATION
If you’re looking for MORE crafty inspiration for this year’s Christmas celebrations, check out our Grinch & Friends, Christmas Tree and Reindeer Car craft posts! All three of these won’t disappoint you in the craft department!!!

Popsicle Stick Nutcracker Craft Idea For Christmas
Create a festive Popsicle Stick Nutcracker Craft with this fun Christmas project! Perfect for kids, using simple materials to spark creativity and holiday cheer.
Here’s your checklist of supplies to bring this craft to life:
- 1 Scissors
Prepare your creative haven by laying down a protective cover before the crafting magic begins!
Directions:
- First glue your popsicle sticks together to look like a fence {3 jumbo next to each other with two mini across}
- Set aside to let it dry completely.
- Repeat for each nutcracker face you want to make.
- Now {if you would like too} paint the flat side of your popsicle stick shape anyway you like. I liked the natural wood look so I skipped this step 🙂 You just want to paint before you start the other steps, so keep that in mind!
- Next grab all your sheets of colored cardstock paper.
- Cut a tall black hat, white HANDPRINT beard, black mustache and anything else out of the cardstock paper.
- To finish off your Popsicle Stick Nutcracker – glue on your cardstock pieces to the craft stick shape, as well as the wiggle eyes and any other fun embellishments you like - most importantly the rhinestone nose in the center, as well as on the hat, to really make it POP!
- At this point in time you can also use a black marker to draw on some eyebrows as well.
- When done decorating and assembling the nutcracker, set it aside to let it dry completely before displaying proudly!!!


CLICK HERE TO PRINT THE DIRECTIONS FOR THIS CRAFT
If you've enjoyed our content or have any thoughts to share, we'd love to hear from you! Mention @gluedtomycrafts or tag #gluedtomycrafts on Instagram!