
What makes this craft so engaging is its simplicity and creativity. Kids get the chance to exercise their fine motor skills while working with their hands, and they’ll love the vibrant pops of fall colors.
This craft also provides an opportunity for bonding time, where adults and kids can work together on something fun and rewarding. Best of all, the finished product makes a charming decoration for the season!
Now, let’s jump right in and get started!

Recreating this popsicle stick owl on a branch tutorial is the perfect way to encourage creativity and enjoy the fall season with kids. With simple materials, hands-on customization, and fall-inspired colors, this project offers hours of fun and a keepsake that celebrates the beauty of autumn.
Craft Supplies:
Before we begin crafting, make sure you have all the supplies ready. This project uses common, inexpensive materials, many of which you may already have on hand. Here’s what you’ll need:
- Jumbo Popsicle Sticks – 1 per craft
- Mini Popsicle Sticks – 4 per craft
- Craft Paint
- Paint Brushes
- Paper Plate
- School Glue
- Scissors
- Cardstock Paper
- Small Wiggle Eyes
Directions:
- First things first – if you are going to paint your popsicle sticks, do that first.
- Squirt your craft paint on your paper plate and paint your craft sticks however you like. I left my jumbo stick the natural color but I painted my minis in a burnt orange color.
- When done, set them aside to allow them to dry completely.
- Next up – cutting out your paper embellishments from the cardstock.
- Start off with the leaves and then the branches.
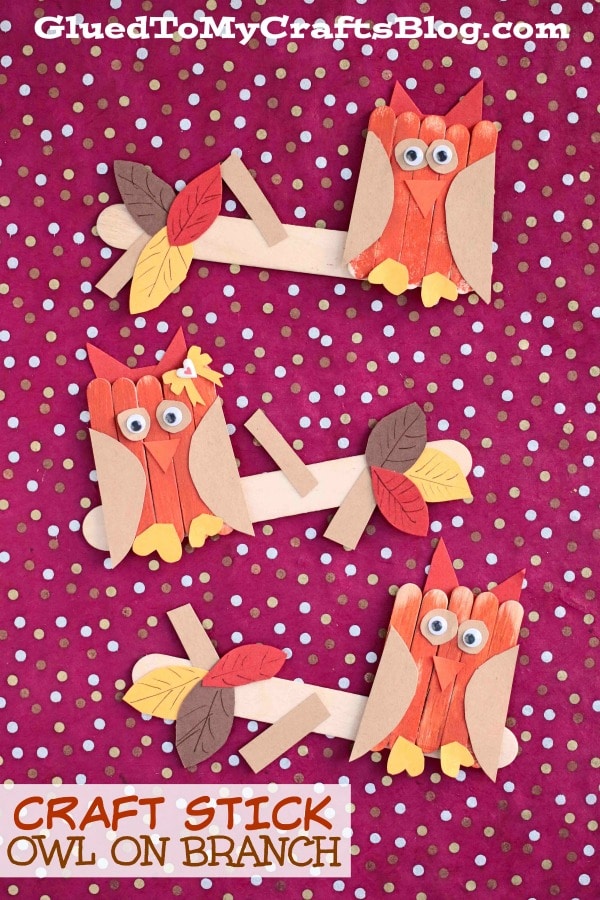
- Finish off with the wings of the owl and of course, a triangle nose, ears, feet etc. Use our pictures for an example.
- Finally the last step – assembling it all. Grab all your popsicle sticks, cardstock paper pieces, the wiggle eyes and school glue.
- First glue the five MINI painted popsicle sticks, in a row like a square, onto the jumbo popsicle stick. This will be the body of the owl and if you can envision it at this point, the jumbo stick is the tree branch.
- Follow that step up by gluing on all his paper body features so he can start to come to life.
- Don’t forget his eyes!
- Now the last gluing step – the leaves and little stick tree branches. Glue those in the empty spaces on the jumbo popsicle stick.
- Add any other embellishments you see fit.
- Set it aside to let it dry completely before you display it proudly.
- Don’t forget to snap those pictures and share them with us! #gluedtomycrafts
RELATED —> Paint Splat Indian Corn
Get ready to combine creativity, fun, and a touch of nature with this seasonal craft project. The popsicle stick owl on a branch is the perfect activity for kids this fall. Whether you’re an educator looking for a classroom project, a parent planning a fun weekend activity, or a crafter in search of inspiration, this project is easy to follow, budget-friendly, and loads of fun. Plus, it’s a wonderful way to bring the cozy vibes of fall indoors.
Love this craft stick owl craft idea? Be sure to check out our Cupcake Liner Owl On Branch craft post and pair it together with today’s idea!
We also have a great Facebook group for you to join for DAILY craft inspiration! Come join us!
