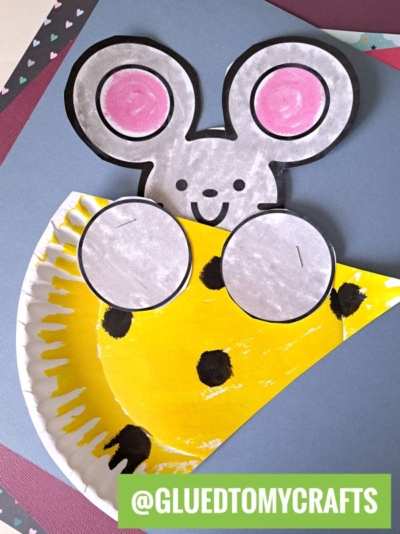
Bring out your creativity and surprise your little ones with this fun paper plate cheese & mouse craft! Get ready for hours of imaginative play that’ll have everyone smiling.

Cheese and Mouse Paper Plate Craft
Welcome friends! I feel like it’s been forever since I’ve shared a “children’s book” themed kid craft on the Glued To My Crafts blog, so I “feel” I need to remedy that ASAP!
Today’s blog post is titled Paper Plate Cheese and it goes along perfectly with the book – Cheese Belongs To You by Alexis Deacon.
Rat Law says that if you’re a rat, cheese belongs to you. But there are exceptions. For example, if a big rat wants it, cheese belongs to him. Unless a bigger rat wants it, or a quicker one, or a stronger one. And if a big, quick, strong, scary, hairy, dirty rat wants it, well . . . where does it end? A tumble of cumulative adjectives and a frenzy of hungry critters build up to a final note of politeness in a book sure to satisfy kids’ appetites for zany humor.
Not only is this a funny book to read with your child but today’s paper craft idea is ALSO super fun to really pull it all together. So what are you waiting for? This Paper Plate Cheese craft is not smelly but oh so easy, fun for all ages and inexpensive too! Follow my step-by-step tutorial below and let the fun begin! There’s even a FREE MOUSE PRINTABLE for you to download and use if you choose, in your mouse craft today!
Happy crafting, my friends! Don’t forget to share pictures of your cheese slice made from a paper plate with us on our Facebook page! #gluedtomycrafts
RELATED —> Potato Stamped Mouse

This fun cheese and mouse craft is perfect for kids of all ages! It’s a great way to teach them about shapes and colors, and it’s a lot of fun too.
Craft Supplies:
- Mouse Printable – our landing page
- White Cardstock Paper
- Crayons, Coloring Pencils or Markers
- Large Paper Plate
- Yellow Tissue Paper
- Black Cardstock Paper
- School Glue
Directions:
- First things first – print out the free mouse themed printable on white cardstock paper. You need one printable per cheese craft.
- Next grab your crayons and color in the mouse however you like. I went with a gray mouse body and a little bit of pink in the center portion of his ears. You can of course, change that up if you like!
- Now grab your scissors. Trim out the mouse pieces in the printable. Discard the excess paper. Set aside your mouse pieces.
- Next grab your paper plate and scissors.
- Cut the paper plate into a triangle for the “cheese.”
- Next take your yellow tissue paper and cut it into small squares.
- Now take your paper plate and put a good amount of glue all over it.
- Place the tissue paper on top of the glue, until the paper plate is completely covered.
- Next up – cut out some “holes” for the cheese from the black cardstock.
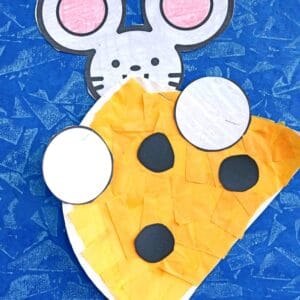
- To finish off the cheese kid craft – glue the cardstock circles all over the paper plate to give the look of holes in the cheese.
- Go ahead and then staple the mouse pieces in place on the decorated paper plate. The head on the back and the paws towards the front, holding the cheese.
- And that’s it! Display it proudly for all to see because you just completed it!
- Don’t forget to share pictures with us afterwards as well! #gluedtomycrafts
RELATED —> Paper Bag Mouse

If you by chance are looking for a few MORE easy kid craft ideas that go along with children’s books, from Glued To My Crafts, be sure to check out these fun posts:
- Paper Plate Spaghetti
- Paper Plate Muffin
- Paper Plate Red Riding Hood
- Paper Plate Taco
- Paper Plate Cookie
- Paper Plate Paddington
- Paper Plate Love Monster
- Paper Plate Mouse
- Popsicle Stick Mouse
Have something to say? Want to show off your creations? Join the conversation on our Facebook page. We love hearing from YOU!

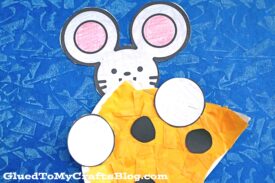
Paper Plate Cheese and Mouse Craft Idea
Here’s your checklist of supplies to bring this craft to life:
- School Glue
Prepare your creative haven by laying down a protective cover before the crafting magic begins!
Directions:
- First print out our provided printable, in color, on a single sheet of white cardstock paper. You only need one print per craft.
- Next grab your crayons and color in the mouse however you like. I went with a gray mouse body and a little bit of pink in the center portion of his ears. You can of course, change that up if you like!
- Now grab your scissors. Trim out the mouse pieces in the printable. Discard the excess paper. Set aside your mouse pieces.
- Next grab your paper plate and scissors.
- Cut the paper plate into a triangle for the "cheese."
- Next take your yellow tissue paper and cut it into small squares.
- Now take your paper plate and put a good amount of glue all over it.
- Place the tissue paper on top of the glue, until the paper plate is completely covered.
- Next up - cut out some "holes" for the cheese from the black cardstock.
- To finish off the cheese kid craft – glue the cardstock circles all over the paper plate to give the look of holes in the cheese.
- Go ahead and then staple the mouse pieces in place on the decorated paper plate. The head on the back and the paws towards the front, holding the cheese.
- And that's it! Display it proudly for all to see because you just completed it!


NEED MORE HELP DOWNLOADING OUR FREE PRINTABLES? PLEASE REFER TO OUR FAQ PAGE