
Going with the theme of yummy pies this time of year, today I’m going to share a simple Paper Plate Cherry Pie kid craft idea with you all today! Perfect for a fall or Thanksgiving theme!
No elaborate craft supplies or complicated directions with this one! All it takes is some basic red tissue paper, a large paper plate and tons of school glue to “bake” up!

Cherry Pie Paper Plate Craft Idea For Thanksgiving
I promise it won’t stress you out this holiday season. It’s just lots of fun to be had – for the young and old! We just hope to inspire some creativity in your home, in honor the upcoming Thanksgiving holiday!
Best part? This pretend cherry pie craft is not as messy as the real thing! Not to mention our version of a cherry pie is calorie free and of course, can be made on a whim if you like {over and over again!} No stove or fancy kitchen mixer required!
So now friends, enough chit chat from me. You can find all the details for this fun paper plate and tissue paper cherry pie craft idea below! Then take some time to whip up your own crafty pie creation and share pictures with us on our Facebook page to admire!
Happy crafting, my friends! I can’t wait to see how “good” your cherry pie from a simple paper plate turns out! #gluedtomycrafts
RELATED: Paper Plate Apple Pie and Popsicle Stick Pie

Crafters of all ages will love this easy paper plate cherry pie craft! It’s perfect for kids who want to get creative, and it’s a great way to teach them about baking.
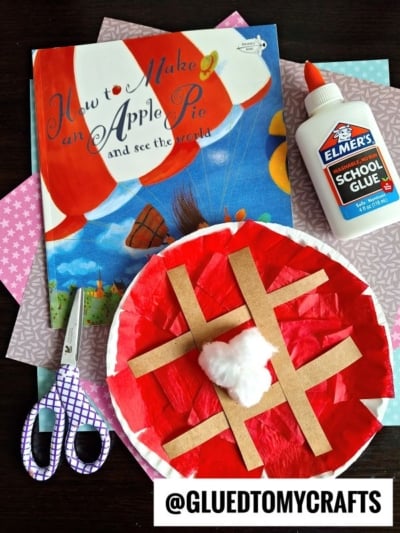
Craft Supplies:
- Large Paper Plate – 1 per craft
- Red Tissue Paper
- Tan Cardstock Paper
- Craft Scissors
- White Cotton balls
- School Glue
Directions:
- First cut your red tissue paper into small squares.
- Put a good layer of glue all over the paper plate.
- Have your child cover the paper plate, completely with the red tissue paper.
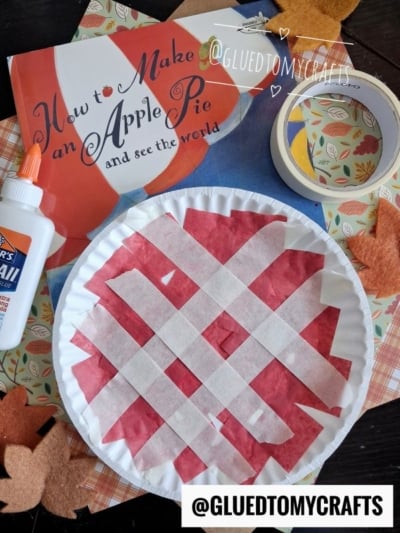
- Once they are done, cut strips of paper out of the tan cardstock.
- Lay/glue the strips on top of the paper plate, to give the look of pie.
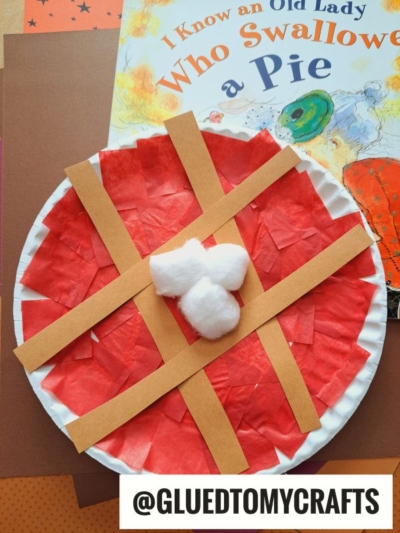
- To finish off your Paper Plate Cherry Pie, add some cotton balls to the center to give the look of whipped cream. {cause every pie needs whipped cream!
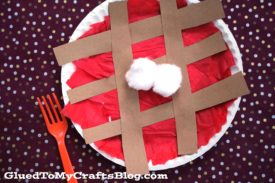
- Then allow it to dry completely before you display it proudly for ALL to see!
- Don’t forget to share pictures of your creations with us on your various social media sites! #gluedtomycrafts
Book Pairings:
Here are some recommended books that beautifully complement our craft idea. You can conveniently purchase them through our affiliate links on Amazon.
- The 12 Days of Thanksgiving by Jenna Lettice
- Nothing’s Wrong!: A Hare, a Bear, and Some Pie to Share by
- How to Make an Apple Pie and See the World by Marjorie Priceman
- A Charlie Brown Thanksgiving by Charles M. Schulz
- I Know an Old Lady Who Swallowed a Pie by Alison Jackson
- The Night Before Thanksgiving by Natasha Wing
- I Am Thankful: A Thanksgiving Book for Kids by Sheri Wall
- Porcupine’s Pie by Laura Renauld
- Pookie’s Thanksgiving by Sandra Boynton
- Thanksgiving in the Woods by Phyllis Alsdurf
RELATED —> Paper Plate Pumpkin Pie
If you are looking for even more Thanksgiving inspired kid crafts, be sure to check out these past blog posts on Glued To My Crafts right now:
- Handprint Turkey
- Felt Pumpkin Pie Set
- Handprint Leaf Napkins
- Paper Plate Pumpkin Pie
- Paint Splat Apples
- Paper & Washi Tape Pie
- Popsicle Stick Apple Pie Slice
- Paper Build Your Own Pie

Paper Plate Cherry Pie Craft
Here’s your checklist of supplies to bring this craft to life:
Prepare your creative haven by laying down a protective cover before the crafting magic begins!
Directions:
- First cut your red tissue paper into small squares.
- Put a good layer of glue all over the paper plate.
- Have your child cover the paper plate, completely with the red tissue paper.
- Once they are done, cut strips of paper out of the tan cardstock.
- Lay/glue the strips on top of the paper plate, to give the look of pie.
- To finish off your Paper Plate Cherry Pie, add some cotton balls to the center to give the look of whipped cream.
- Then allow it to dry completely before you display it proudly for ALL to see!

Grab our favorite books via our Amazon affiliate link! In our Amazon storefront you will find books, toys and craft supplies we absolutely love using for our Glued To My Crafts tutorials!